11 best tips and tricks for HTC U12+
If you've just bought the HTC U12+, our pick of clever user hacks will help make you look like a pro
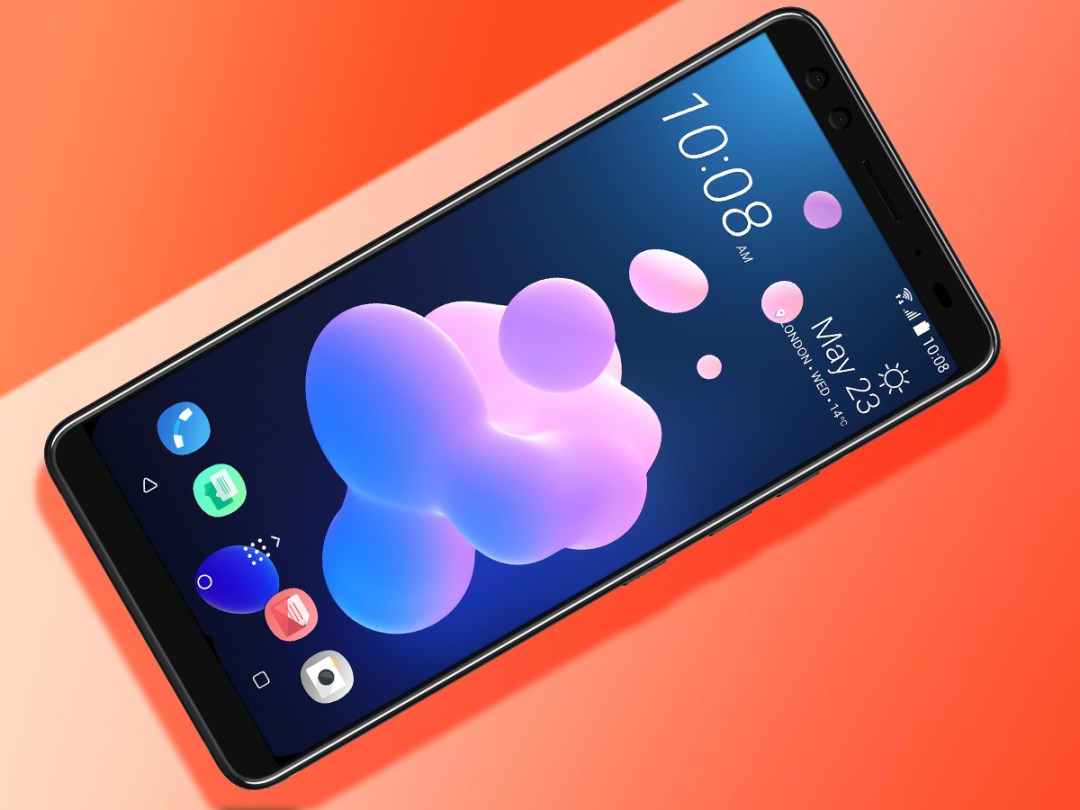
The HTC U12+ is so packed with features there’s no chance you know about them all if you’ve just bought the phone. We’re still stumbling on new little extras, and we’ve had a good headstart.
To get you started, we’ve pulled together 11 great things you can do with an HTC U12+ – most of which is not available in its competitors.
For a sneak peek, how about recording “surround sound” whenever you shoot a video? Or giving the U12+ a classic HTC look you may not have seen in years?
Read these tips and you’ll be an HTC U12+ master in no time.
READ MORE: HTC U12+ review
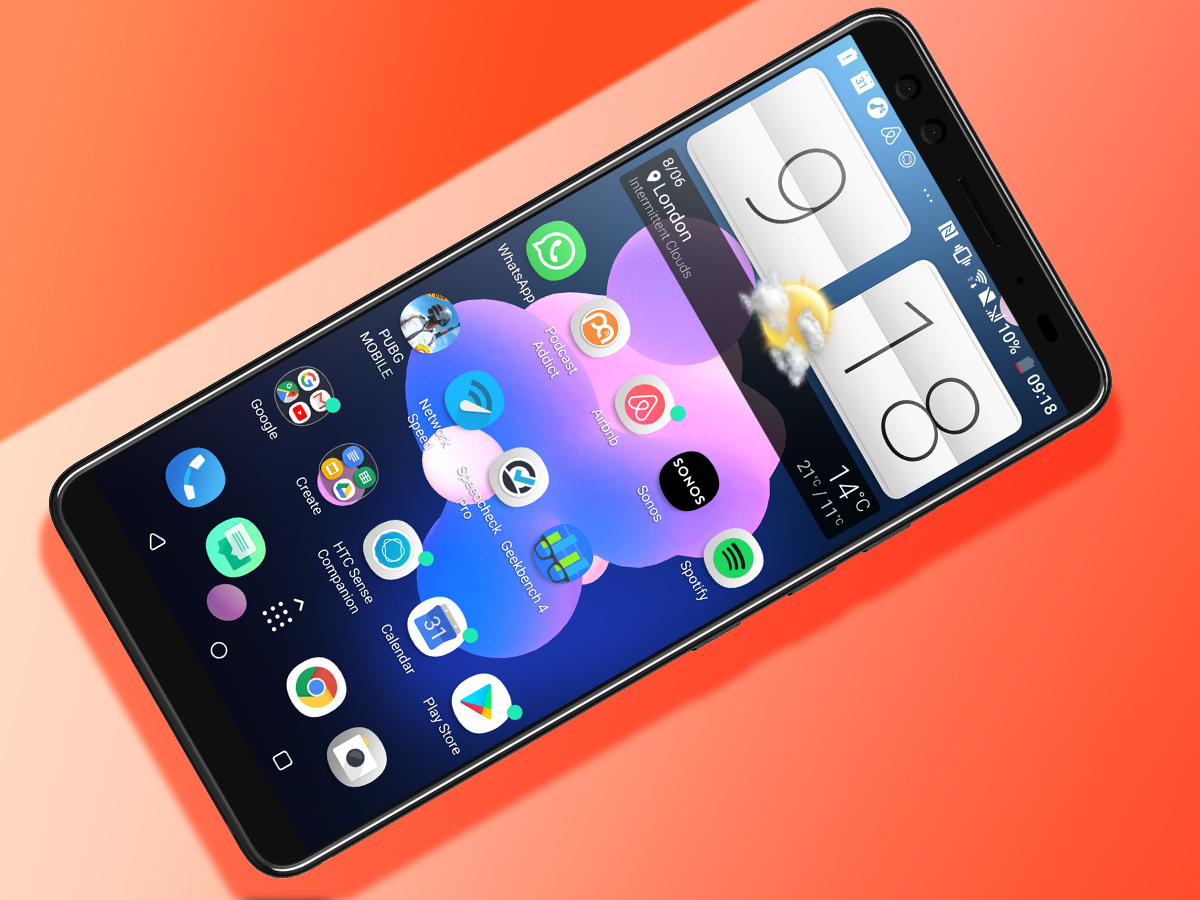
1) Tell BlinkFeed what you like… or get rid of it completely
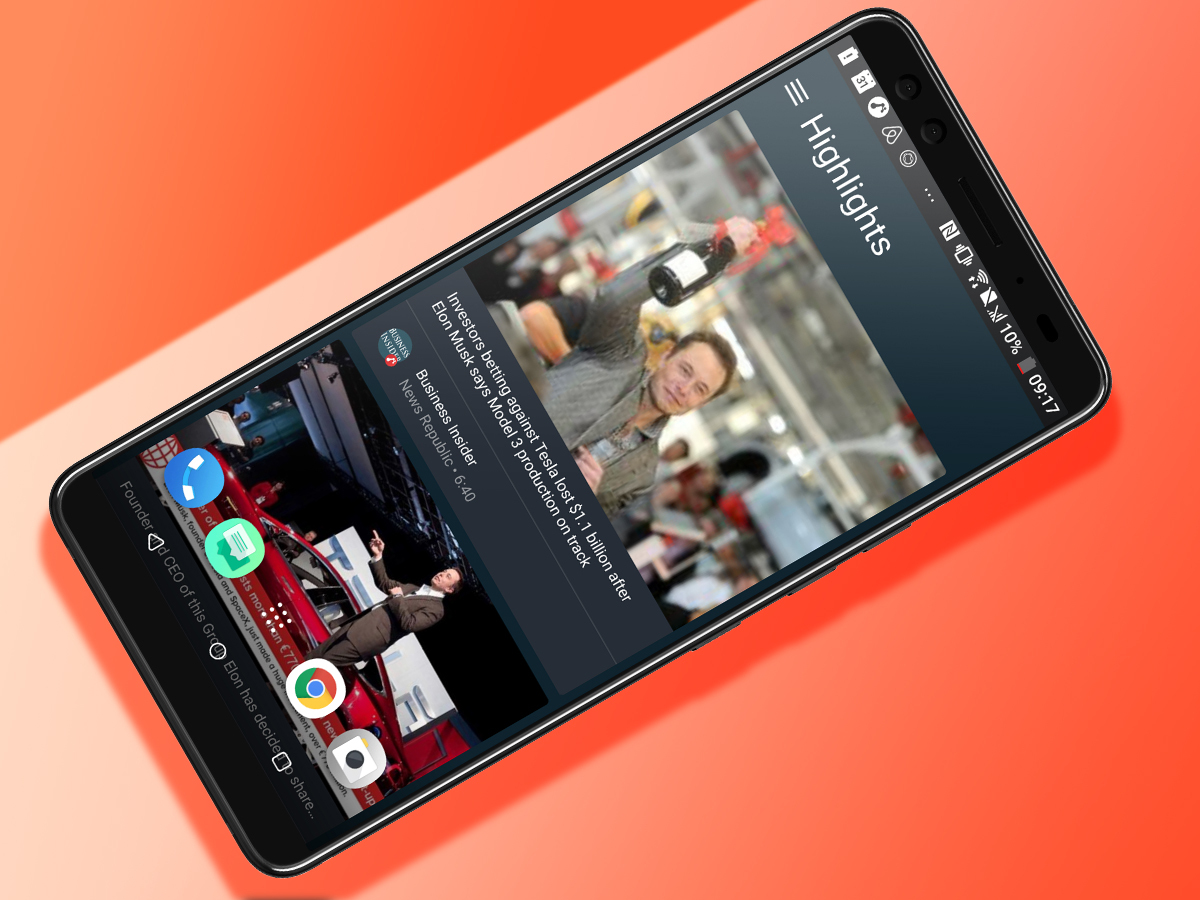
HTC BlinkFeed has been around so long, we often forget it is even there. New to HTC? It’s is the special news feed home screen that sits to the left of your main one.
Ignore it and it’ll sit dormant, doing nothing. However, fiddle with it and you’ll actually find it pretty useful.
Press the three-line icon at its top left, then the little “plus” button and you can choose what goes in there. News Republic is the default choice. It floods BlinkFeed with news stories. Tell it the kind of news you want, though, or you’ll end up with a feed that resembles Daily Mail Online.
You can add Facebook, your calendar, Twitter and YouTube, all linked to your own accounts. Don’t be afraid to pare it down to just the bits you really want, as BlinkFeed also invades your standby screen and regularly pops notification-style alerts at the top of the interface.
Still hate BlinkFeed? You can kill it completely too. Just use a pinch gesture on a home screen, then long-press the BlinkFeed preview image up top and drag it over to the “remove” bin. BlinkFeed purged.
2) Switch up the nav bar
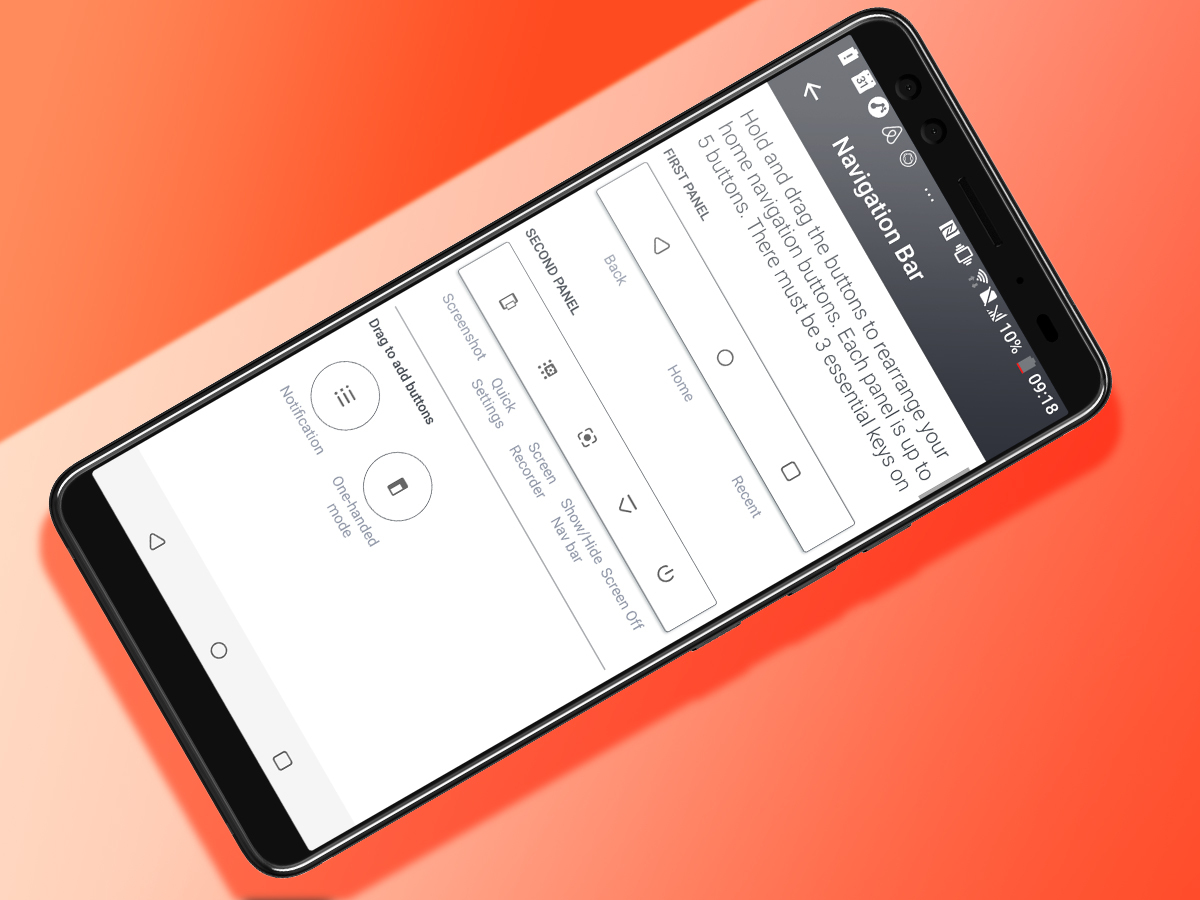
The HTC Sense software lets the HTC U12+ do things you can’t with a vanilla phone like the Google Pixel 2 XL. One extra the phone pros should seek out is the custom nav bar.
This phone actually has two of them, not one. Just swipe, right to left, and you’ll see a whole new row of buttons. There are ones to power off the phone, start recording what’s on-screen, take a screenshot and hide the nav bar altogether.
You can choose what goes into each of these bars too. How? Long-press on an empty part of a home screen and then tap ‘Change Navigation Bar’. This page lets you drag and drop functions onto both of the nav bar displays. It’s an instant Android phone pro mode.
3) Customise Edge Sense
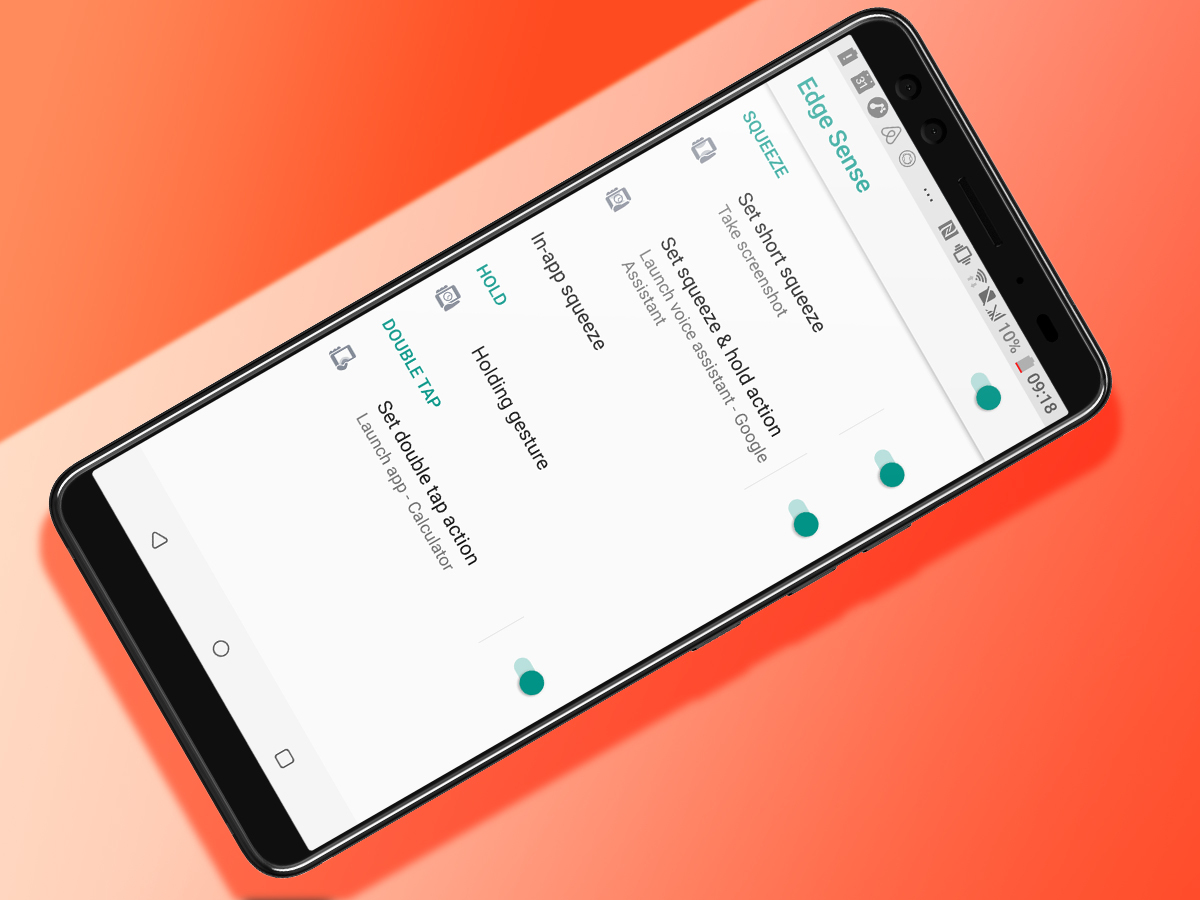
Edge Sense is one of the HTC U12+’s defining features. It lets you squeeze the phone to fire off a command. There’s more to it than just that, though.
There are actually four uses for its unusual extra-sensory sides. A long squeeze will do something completely different, as will a quick double tap with your thumb against the phone’s edge.
As standard a single squish opens the camera, a long one brings up Google Assistant and a double tap fires-up one-handed mode. However, you can make each launch an app, turn the flashlight on, play/pause your music and more.
You’ll find these customisations in Settings > Edge Sense. It’s like training your dog to do tricks, but without all the confused looks and slobber.
In this menu you’ll also see its fourth use, which stops the phone autorotating when it senses you’re holding the HTC U12+. No more screen flipping when you read Facebook in bed.
4) Go old school with an HTC clock
Here’s one for the long-term HTC fans. Back in the day the clock widget was the part that made you recognise an HTC from 30 paces.
To look at the HTC U12+ you’d think those days are gone and forgotten, binned like the ‘Best Before 2006’ can of tuna you found in the back of the cupboard. But they’re still here.
Long-press on an empty part of the homescreen, then tap the Add Apps and Widgets button in the pop-up menu that appears. Flick down and you’ll find the HTC Flip Clock widget that used to sit front and centre on every classic HTC phone. It’s a 2010 timewarp. But even today the flip clock looks pretty good to us.
5) Set up face unlock
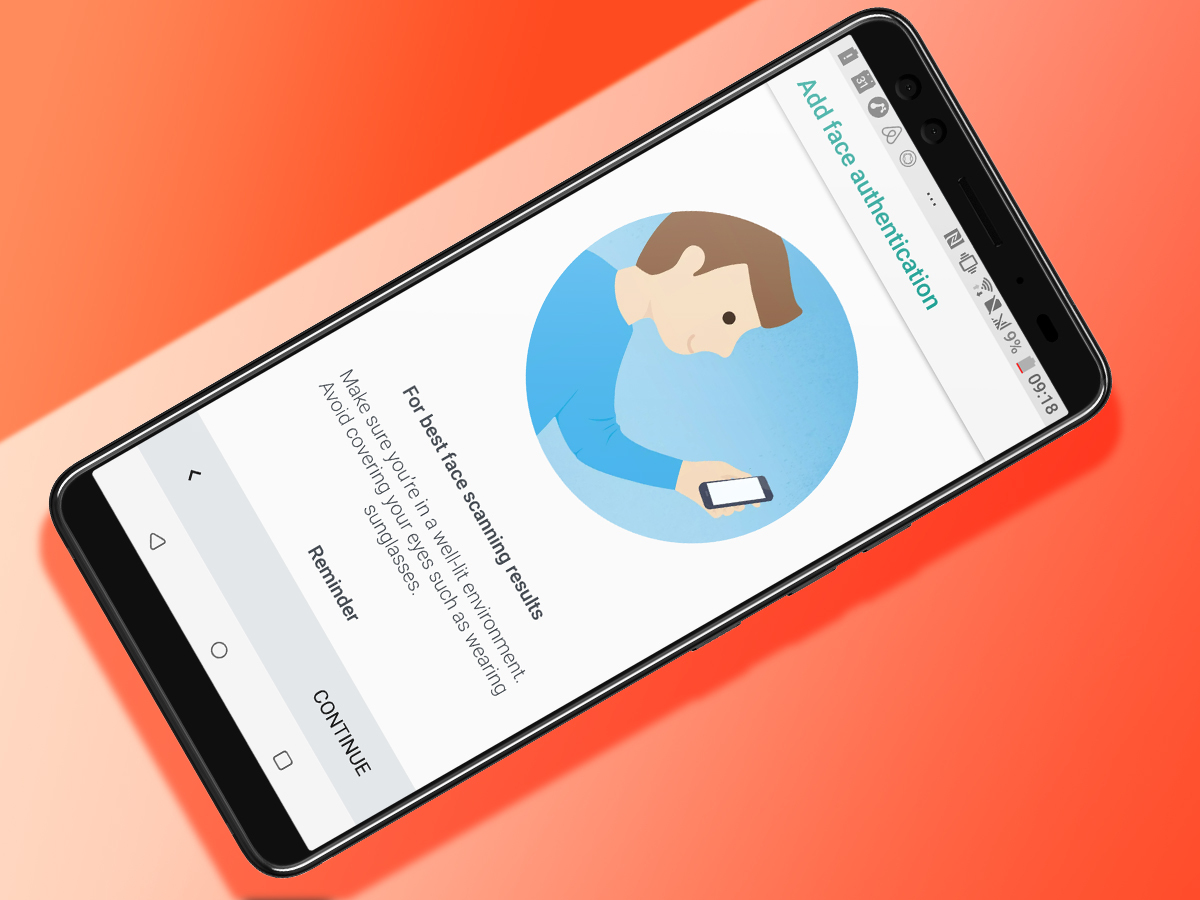
There’s a good chance you’ll setup the HTC U12+’s fingerprint scanner when you first use the phone. A software wizard takes you through it, so it’s hard to miss.
The Face Unlock feature is worth using too, though, and is buried deeper in the menus. Just hold up the phone, press the power button and the front camera does the rest.
You teach the HTC U12+ what you look like in Settings > Face Unlock and, as ever, you’ll have to setup a backup PIN or password to use it. After this it only takes a couple of seconds.
Our pro tip is to make sure the Low Light Recognition in the Face Unlock menu is turned on. This uses the screen to light-up your face a bit more in poor lighting, making the whole feature work much better indoors.
6) Tweak the earphone EQ for your hearing
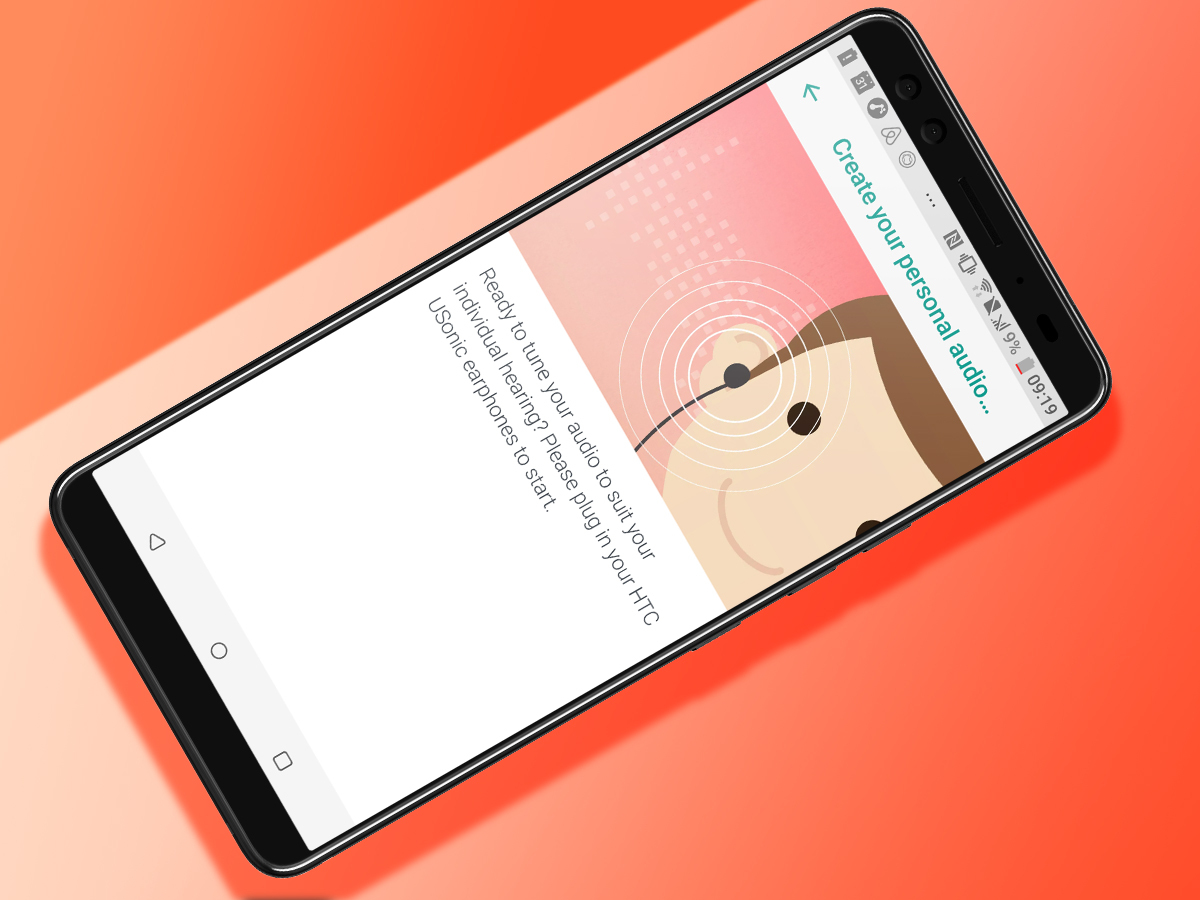
The HTC U12+ does not have a headphone jack, but it does have a special feature for you audio fans out there. HTC’s bundled USB-C earphones can scan your ears, making a custom EQ profile to suit your hearing.
It makes the set sound clearer and more powerful. Who doesn’t want that?
Unlike some of these bespoke EQ modes, there’s no audiologist-style hearing test to put yourself through either. It just takes a few seconds, scanning how your ear holes respond to a sound wave played through the drivers.
You’ll find this feature in Settings > HTC USonic with Active Noise Cancellation.
7) Test the camera’s limits
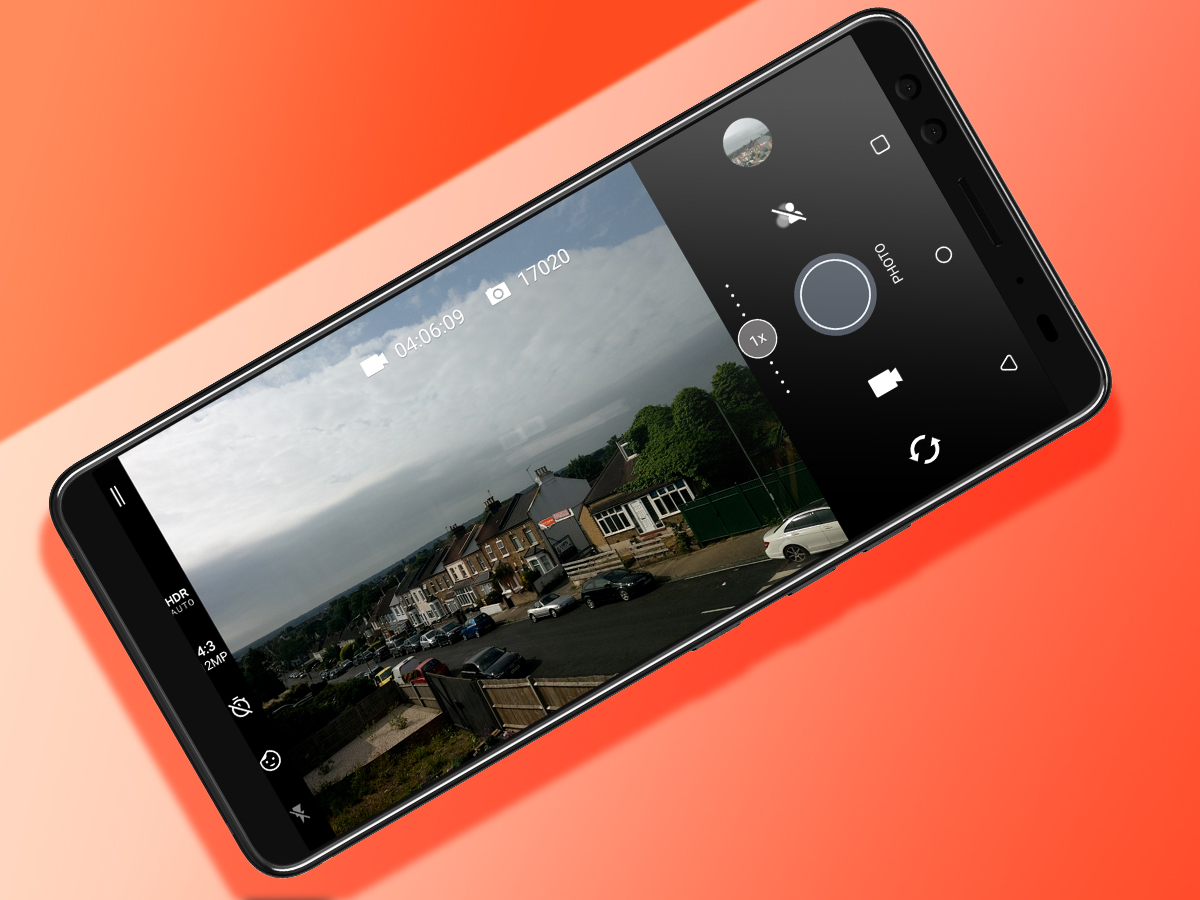
The HTC U12+ has a fantastic camera. To see what it can really do, you need to test its limits rather than just taking pictures of puppies.
Step one: use the optical zoom. This is one of its great extra features, letting you zoom in without the usual pixel-smudging you get with a digital zoom. You can’t miss the x1/x2 button in the camera app. It sits right by the shutter button.
Next, make the HTC U12+’s Auto HDR mode work hard. With this phone you can shoot right into the sun and you won’t just see a blob of white and not much else. These kind of HDR chops are great for sunset pics.
Want to go even further? Use the Pro mode. This captures a RAW file as well as a JPEG. Open up a RAW file in Photoshop on your laptop or a RAW phone editor app and you can bring out even more shadow and highlight detail in your photos.
8) Make the display suit your eyeballs
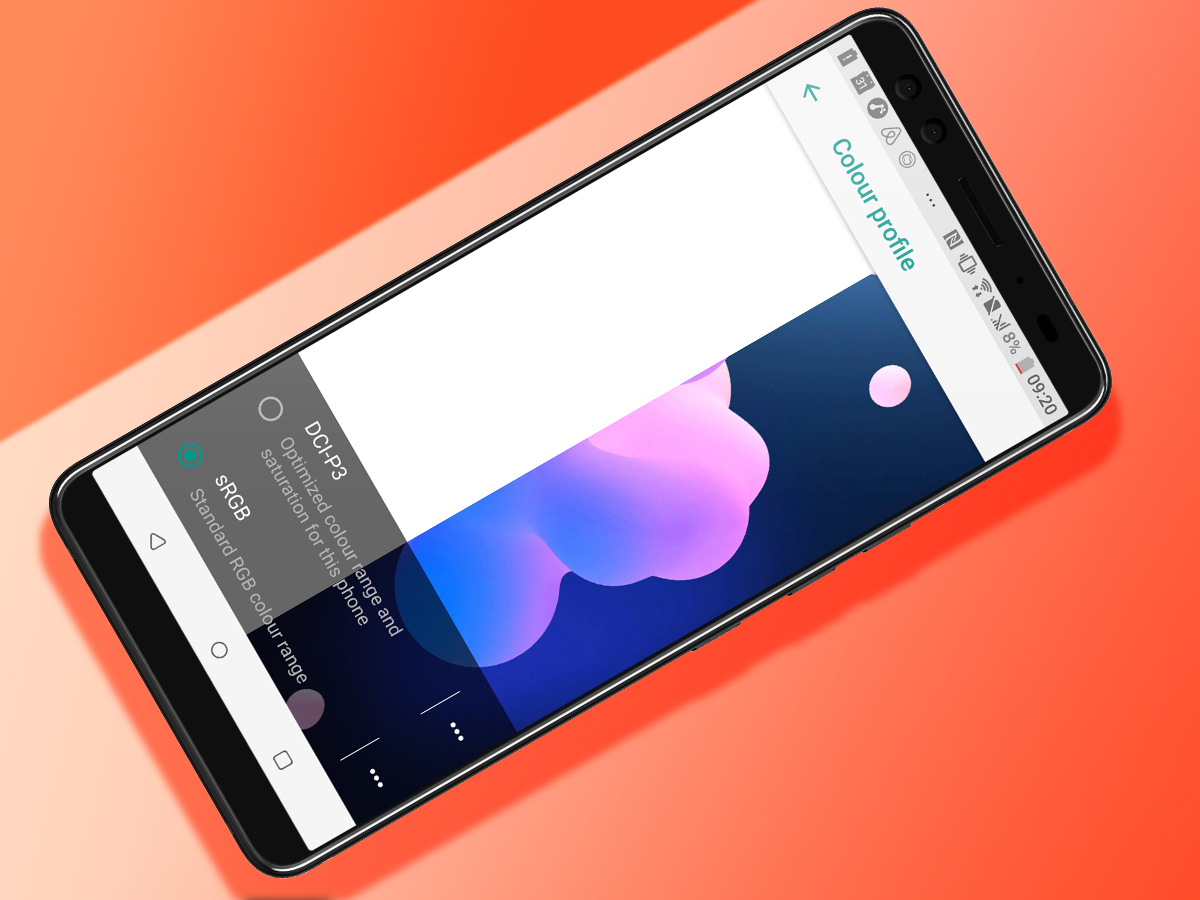
You spend more time looking at your phone screen than the walls of your house. It should feel like home, right?
One way the HTC U12+ does this is to let you tweak how the display operates. You can switch between DCI-P3 and sRGB colour modes, and fiddle with the colour temperature to alter how warm or cool it looks.
What on earth are sRGB and DCI-P3? sRGB is the colour standard monitors and printers used to be judged by. It’s there for the more natural, chilled-out look. DCI-P3 is a cinema standard, and really gives the HTC U12+’s screen colour a workout, with extra vivid tones.
You’ll find these in the Advanced section of Settings > Display. See which your eyes like the look of more.
9) Try out HTC Alexa
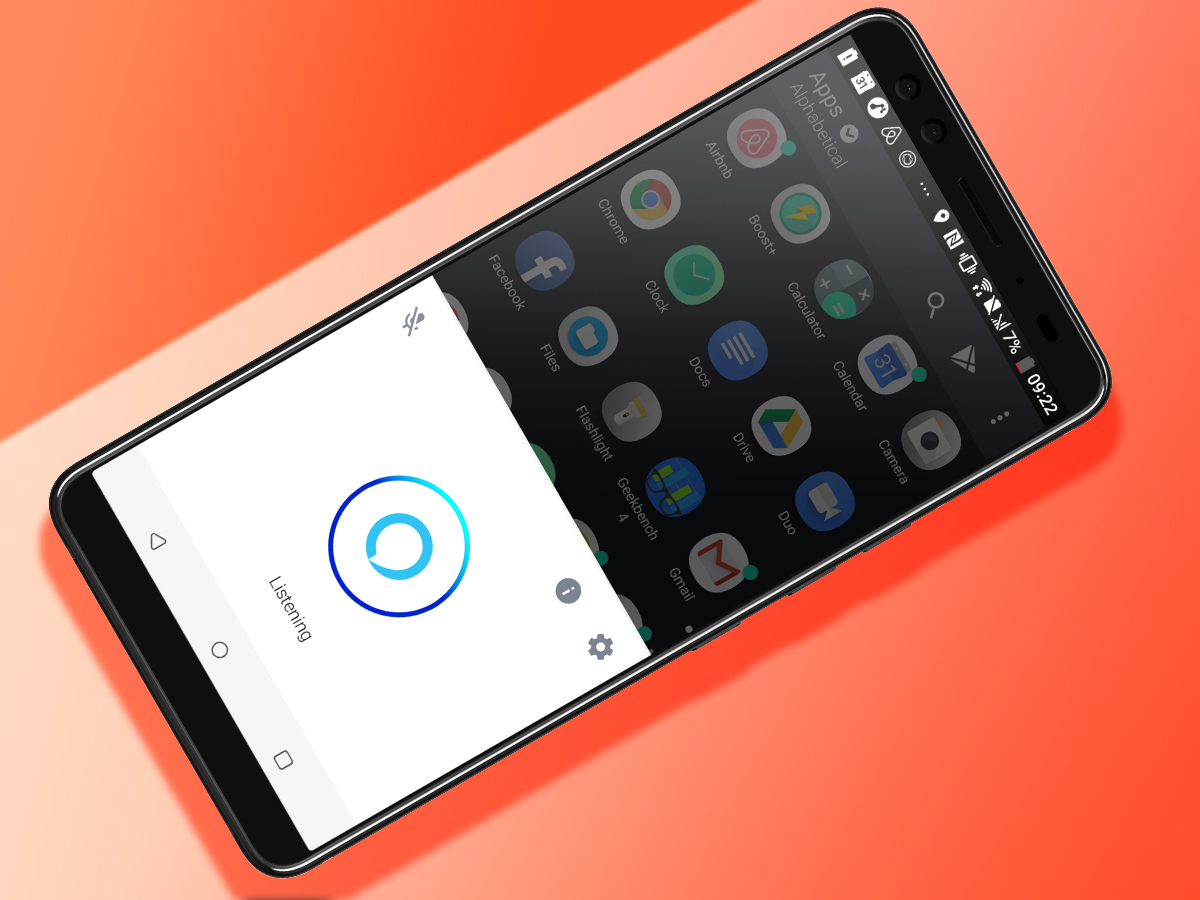
Any new Android phones lets you use Google Assistant, the Siri-a-like voice assistant that’ll do all banal things your fingers can’t be bothered with, like set reminders. However, HTC has also put in some extra work getting the U12+ to play nice with Amazon Alexa too, its arch rival.
The phone comes with a dedicated HTC Alexa app that lets you talk to it just like you might an Amazon Echo. Sure, using a smart speaker is more fun but you don’t have to pay any extra to get involved here.
To make HTC Alexa even more useful, you can set it to fire-up when you squeeze the phone’s sides. This option is found in Settings > Edge Sense.
10) Lower the resolution for better battery life
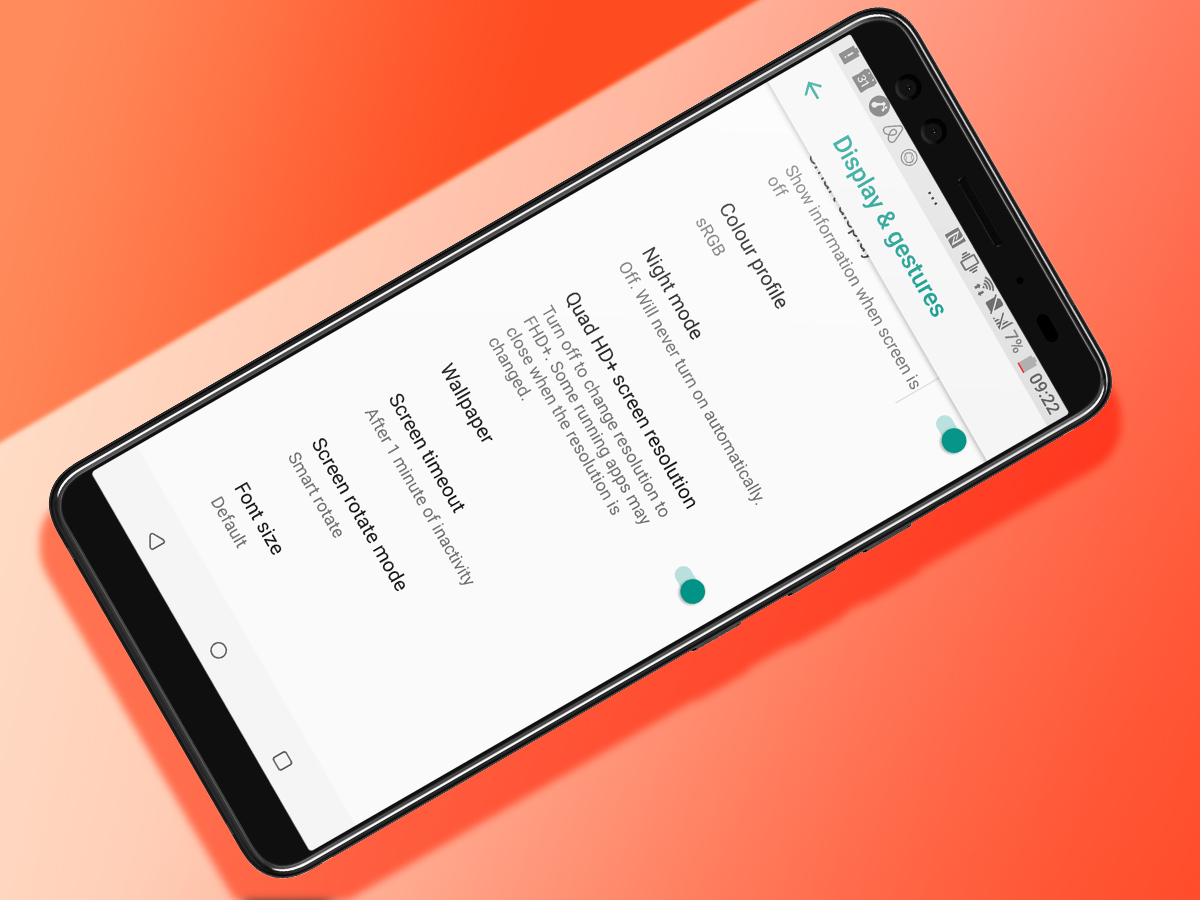
One of the HTC U12+’s issues, at launch anyway, is that its battery life is not all that great. But there is a partial solution.
Dig into the Settings menu and you’ll find an option to lower the screen resolution. This doesn’t end up lighting only half the screen’s pixels, as that’d look terrible. However, it does limit how much legwork the processor has to do by reducing the pixels it has to render. It reduces the strain a bit.
When you shift it down in Settings > Display & Gestures, the HTC U12+ flips to Full HD+ instead of QHD+. There’s actually not a huge difference in how sharp the screen looks, so if you find it makes the U12+ last longer, go ahead.
11) Get creative with video sound
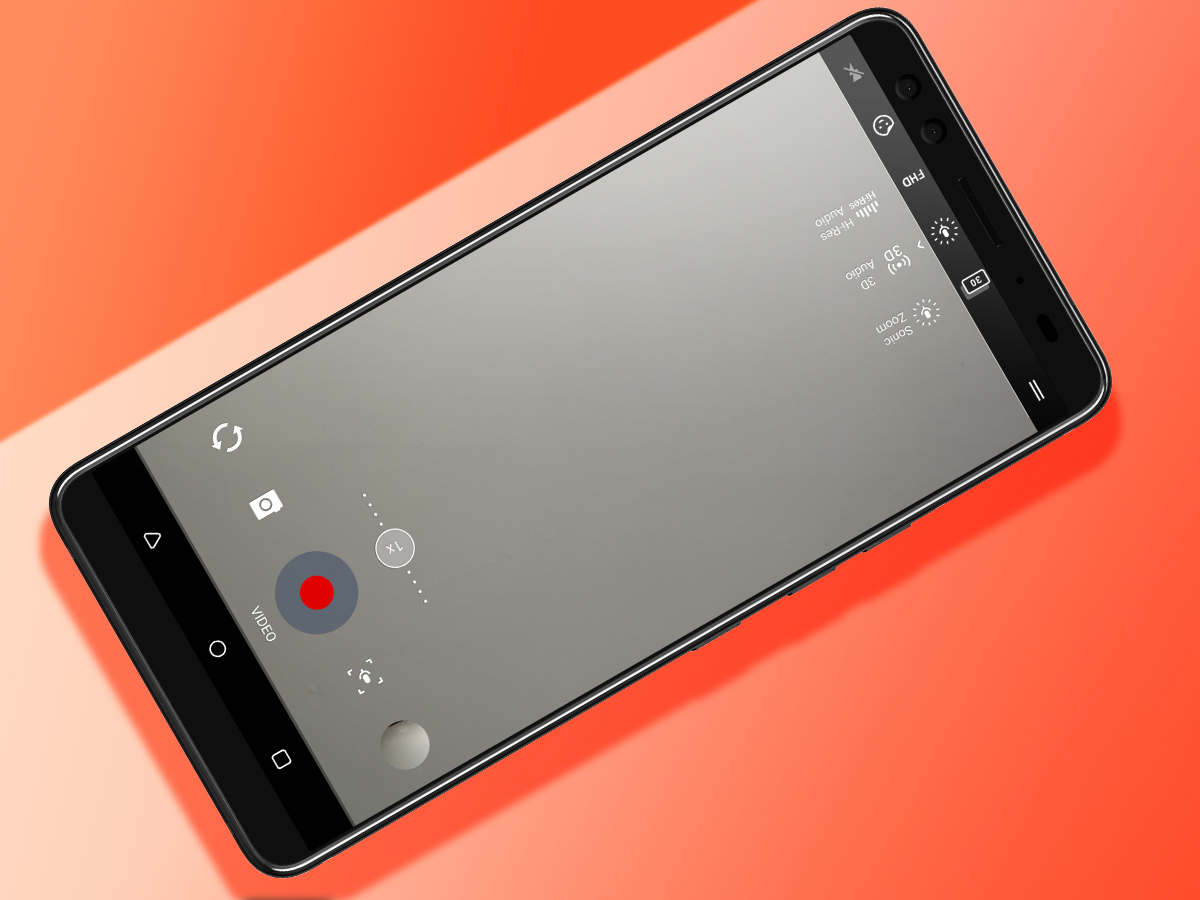
The HTC U12+ doesn’t just have an advanced camera, it has advanced microphones too, and it’s a good idea to get to grips with what they can do before heading out to record a gig or your friend’s wedding.
There are four microphones peppered around the phone, and they let you choose between three audio modes when you shoot a video. Hi-Res audio is neat, but also the least interesting of the lot.
3D Audio records surround sound-like audio, so you can really tell where objects are in the soundstage. Obviously, you’ll need headphones or some good speakers (not the HTC U12+’s built-in ones) to tell, but the effect is neat.
Sonic zoom is even more unusual. It focuses the mic array’s pick-up on your subject, so whatever noise it creates sounds louder than everything else.
You’ll see these options in the left bar of the camera app.
Have a play around, just make sure you don’t block any of the mics. With the phone held landscape, there’s one on the left side, one on the right, another on the front and one pointing towards you, on the front.
 Andrew Williams

