How to master… Google Photos
The tips and tricks you need to get the most out of Google's photo-storage-and-sharing app
Google Photos is by far our favourite app for backing up the thousands of cat photos we’ve taken over the years.
Not only does it store all your photos for free (at high resolution), there are also a bunch of features within the app that give it the edge over other cloud storage services such as iCloud and Dropbox.
Google is also constantly updating it with new features, for instance its ability to remove duplicated pictures, or the ‘Rediscover this day’ reminder for a hit of photographic nostalgia, among many others. Its in-built tagging, meanwhile, is powered by some seriously clever (or seriously scary, depending on your point of view) AI. It really has to be seen to be believed.
Ready to start your Google Photos addiction? Here’s a list of tips and tricks to help you make the most of its photographic magic.
Beginner: 1) Get free unlimited storage
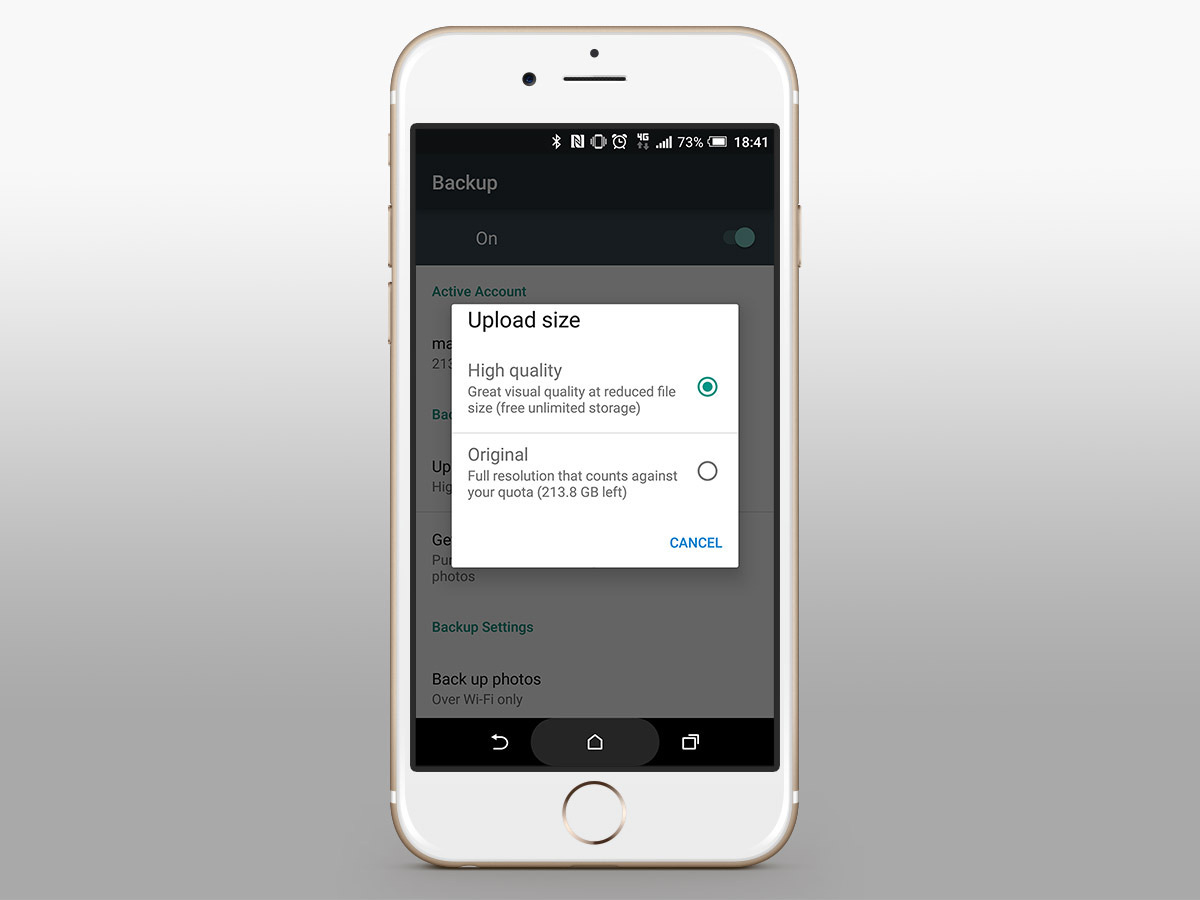
Let’s start with the simple stuff. Google Photos offers free, unlimited photo storage with only one minor caveat: you get a maximum resolution of 16MP.
Unless you’re planning to blow up your photos to billboard size, though, that’s ample. A 16MP photo can be printed at around 17 x 11 inches at excellent-quality 300dpi resolution, and not many people need to print bigger than that; indeed, not many people bother to print at all.
So to qualify for this free storage, simply go to the settings menu (> Top-right main menu > Settings) and change the resolution from ‘Original quality’ to ‘High quality’.
If you do want to store all your photos at their original resolution, leave it on ‘Original quality’ – but bear in mind that you might need to boost Google Photos’ free 15GB storage (prices start at US$1.99/month for 100GB).
The same deal applies for video: you can upload up to 1080p quality for free, anything above that will either be downscaled or will count towards your data allocation, depending on your preferences.
2) Turn off cellular backup
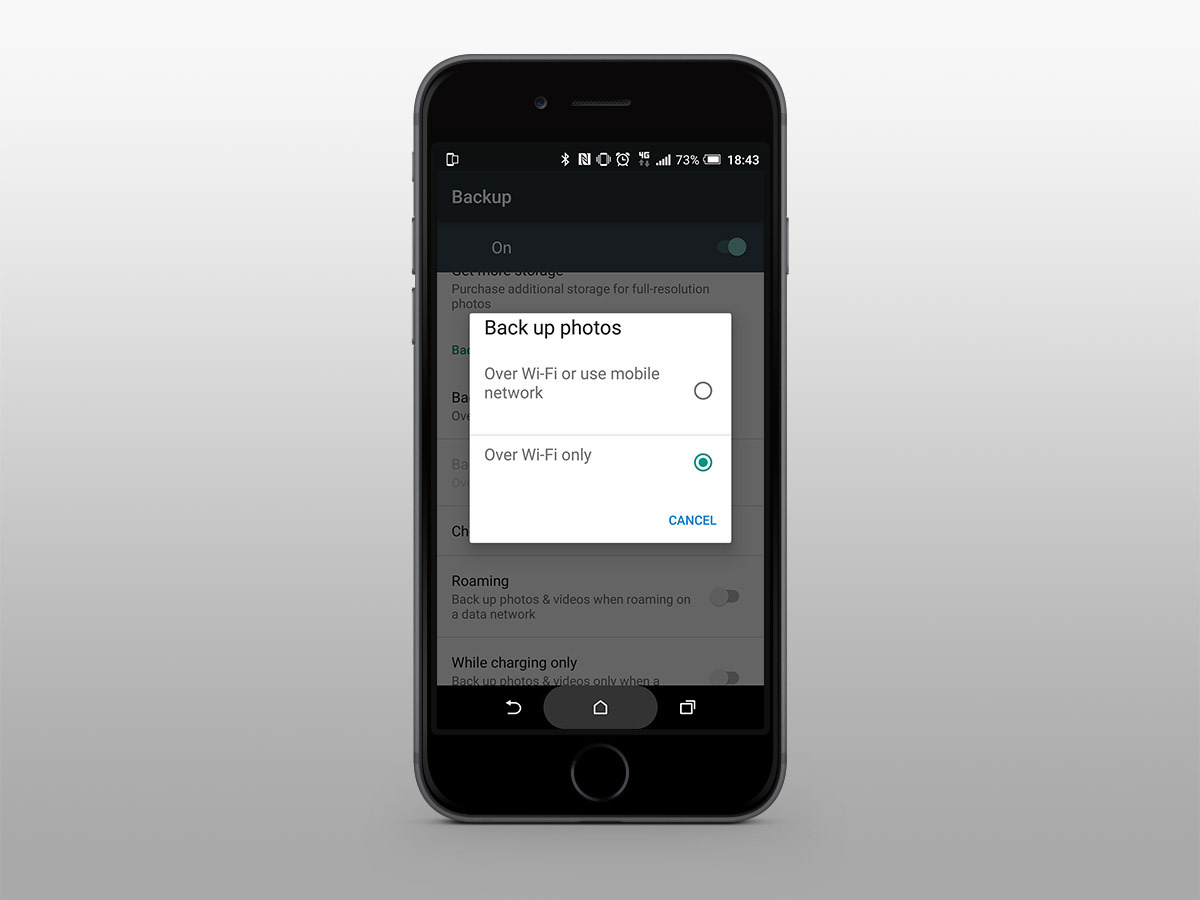
Most of us will use Google Photos for two things: automatically backing up images taken on a smartphone or tablet, and backing up existing photos on a computer or camera.
The first thing you’ll probably want to do on the smartphone side of things is to head to the Settings menu and turn off backups over mobile data (> Main menu > Settings > Backup & sync > Back up photos > Over Wi-Fi only).
Android users can also protect their battery life by telling the app to only back up while their smartphone’s charging. All very handy, particularly for those who don’t have unlimited data.
3) Free up space on your phone
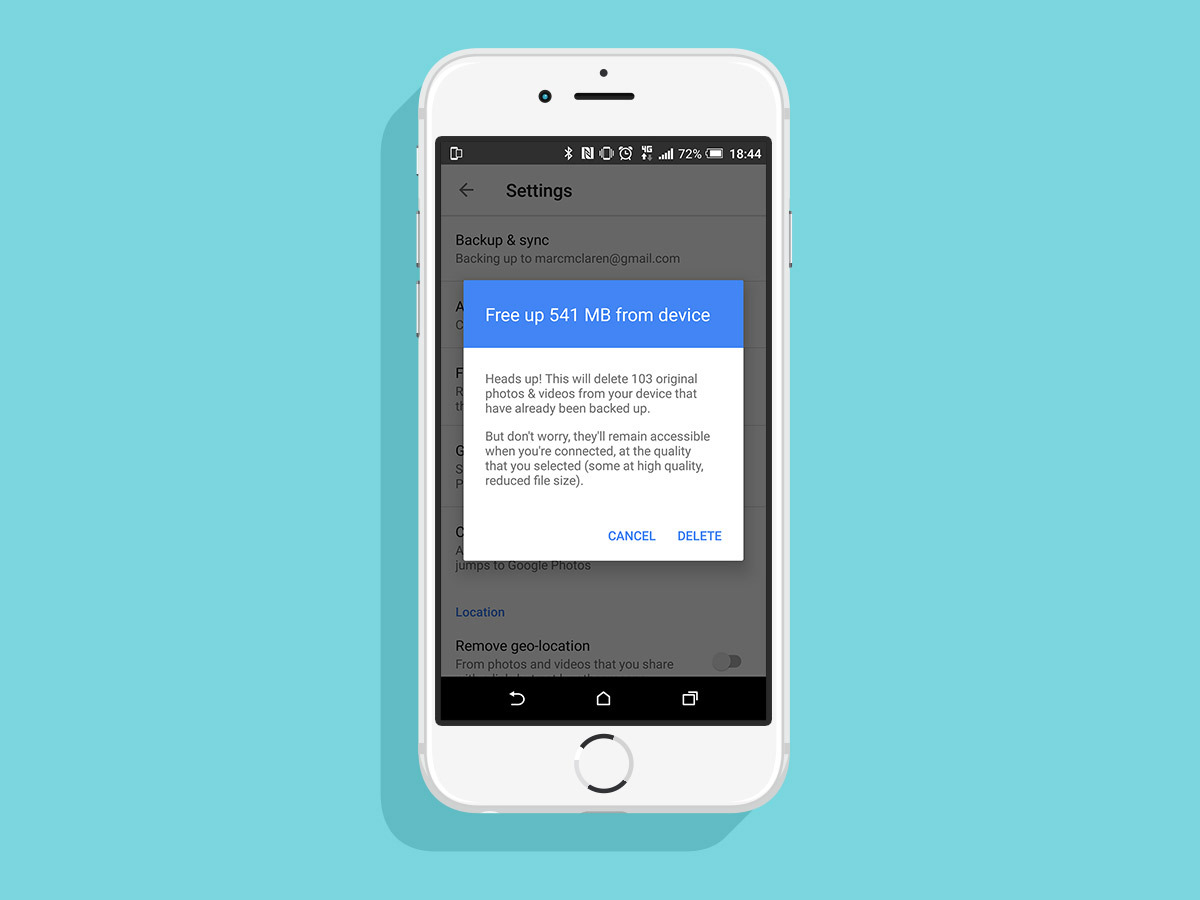
Using a 16GB device with no SD card slot? Poor thing. Or iPhone user. Either way, no worries: Google Photos will free up space on your device by removing pictures and videos that have already been backed up to the cloud.
Just tap ‘Free up device storage’ in the settings menu (>Main menu > Settings > Free up Device Storage), and Google will delete already-backed-up photos and videos from your device.
Don’t worry – the photos will remain accessible so long as you’re connected, though obviously at a reduced quality if you opted for high-quality free unlimited storage in tip No.1 above.
4) Upload your old photos
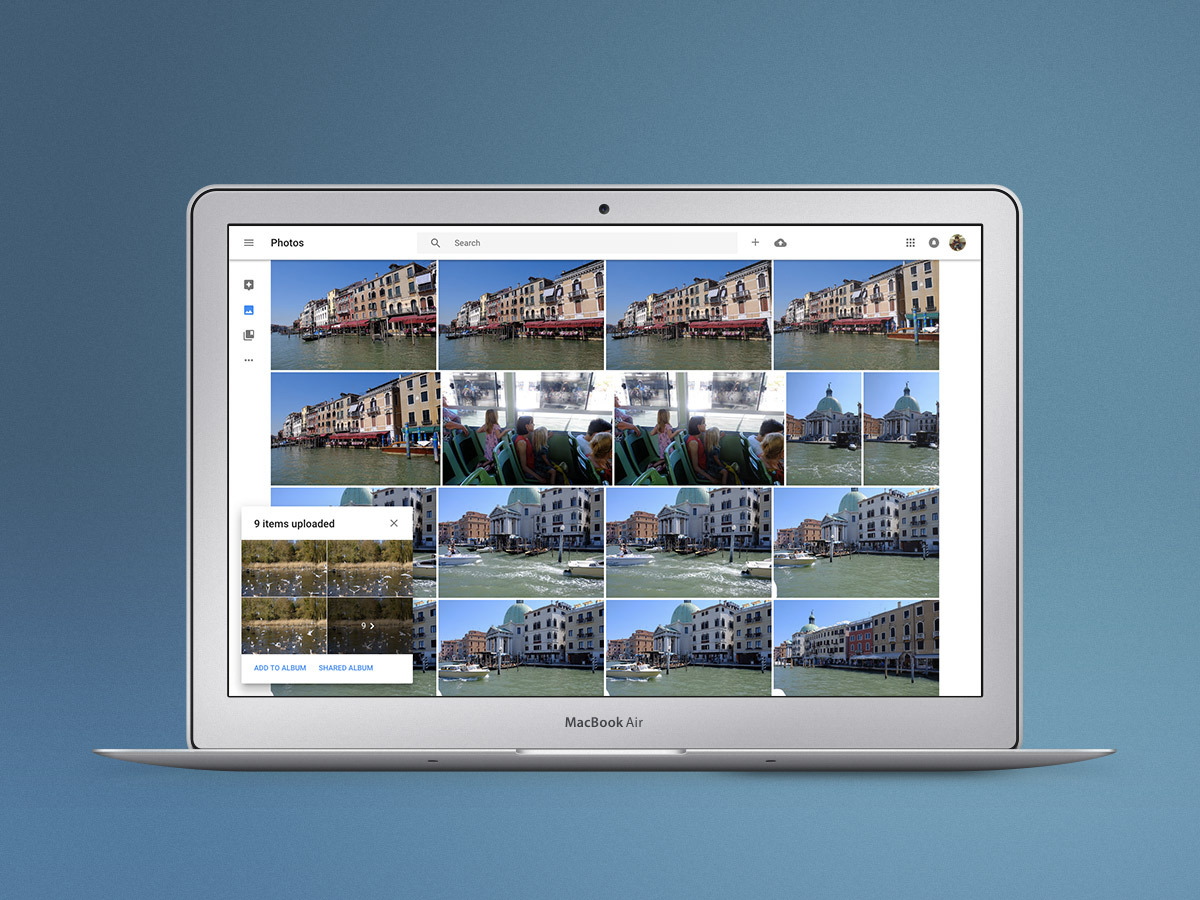
Google Photos isn’t limited to just backing up your smartphone photos – you can also use it to back up all your existing photos, wherever they’re saved.
Adding them to your Google Photos library is a simple matter of dragging and dropping them from your desktop or external storage. The speed at which they’re uploaded will depend on your connection and whether you’re uploading the full-res images or letting Google downscale them, and a handy window in the bottom left of your screen will show you how far into the job you are. You can also stop the uploading process at any time.
Handily, photos will appear in your library based on the date they were taken rather than uploaded – so if you add a bunch of images from 10 years ago, they’ll be happily nestled at the bottom of your feed rather than sitting at the top as a constant reminder of how much better you looked a decade ago.
NEXT PAGE: INTERMEDIATE
– Restore deleted photos
– Edit photos
– Select multiple photos
– Share photos
Intermediate: 5) Restore deleted photos/videos

The bin holds photos for 60 days, so if you change your mind about a snap you can restore it with just a few taps. Just hit the menu button, select ‘Bin’, and pick the photos you wish to restore.
This is a very handy feature, especially if you have kids, pets or prankster flatmates at home who might accidently delete your photos.
One further note of warning: if your library is synced with your phone or tablet, deleting photos or videos will also remove them from your device. You can delete images uploaded from your computer without it having any affect on the originals, though.
RELATED › Six of the best photo-editing apps
6) Edit your photos
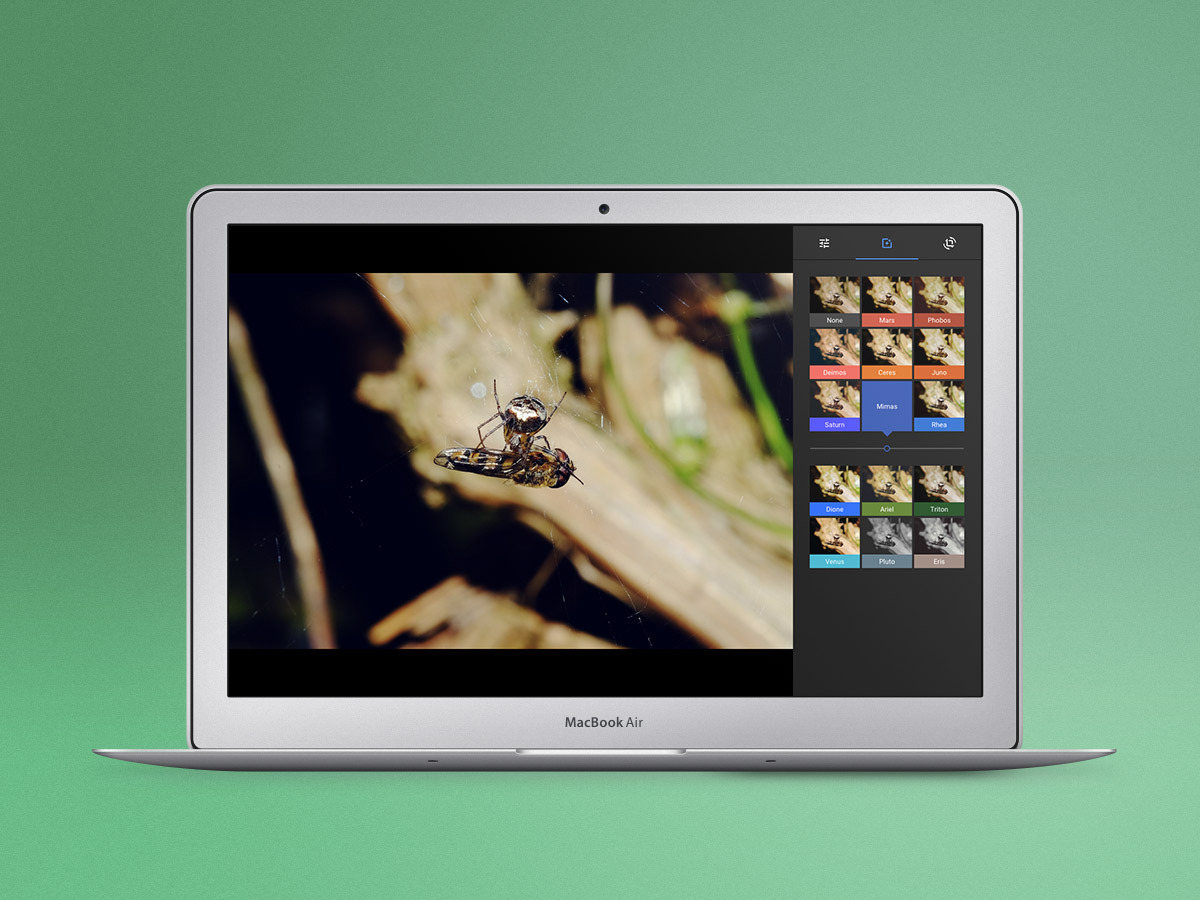
While not exactly rivalling Photoshop for features, Google Photos does have some built-in editing tools. To use them, simply hit the little pencil icon on a photo you’d like to edit.
The adjustments are best described as ‘basic’, but they’re easily good enough for most needs. Light changes the brightness, Colour ups the saturation, Pop controls the vibrance and Vignette the, er, vignetting. You can also apply Instagram-style filters to all those shots of your dinner, and crop or rotate pictures.
The best part is that, since it’s already in the cloud, you don’t have to sync or upload the picture again.
7) Quickly share photos
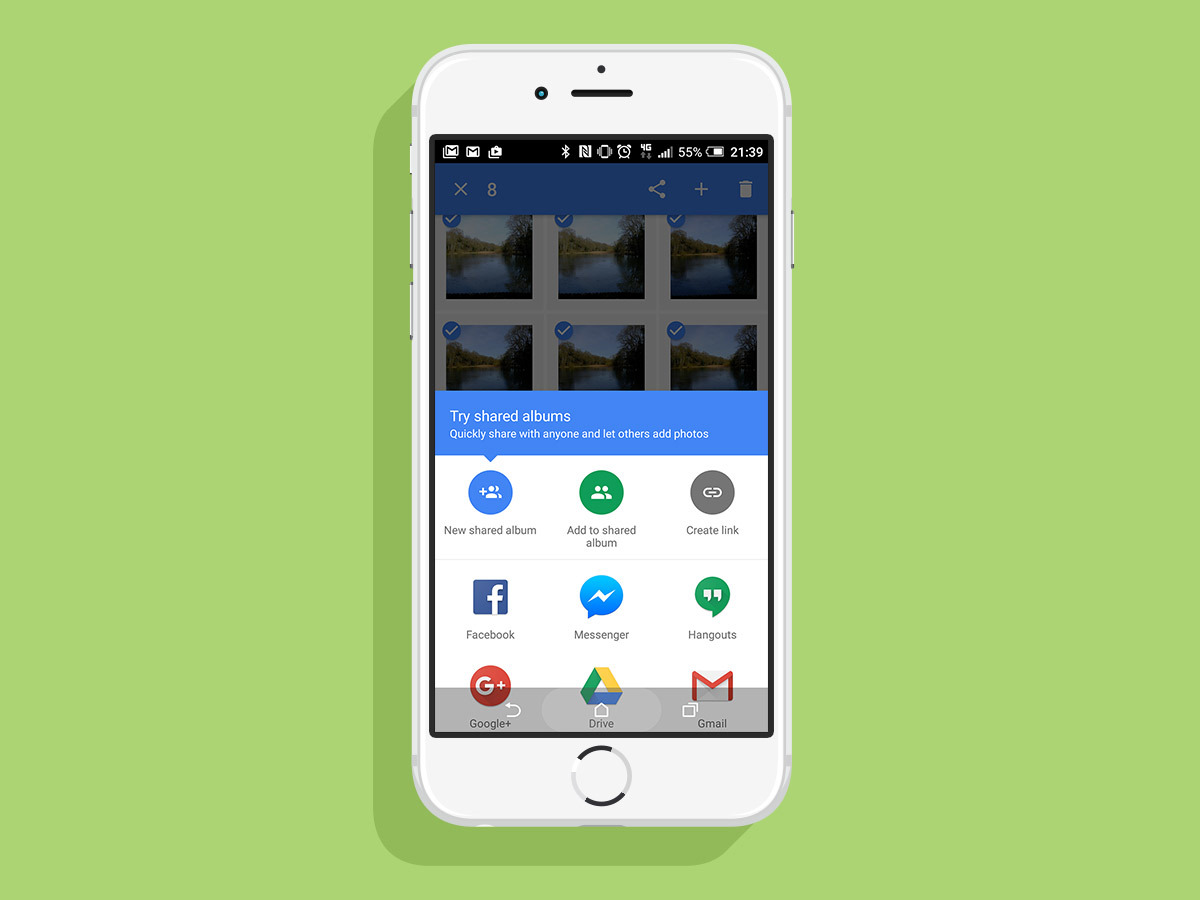
As with everything in Google Photos, selecting images is an exercise in slick UI. Tap the tick icon and you select one. Drag across with finger or shift-click with mouse on desktop and you select several.
Sharing them is then a simple matter of then hitting the share icon at the top. You can create and share an album via a link, create a collaborative album, and share to social media with a click.
NEXT PAGE: MASTER
– Create animations, collages, movies and more
– Find your pictures in a flash
RELATED › Which smartphone takes the best pictures
Master: 8) Create animations, collages, movies and stories
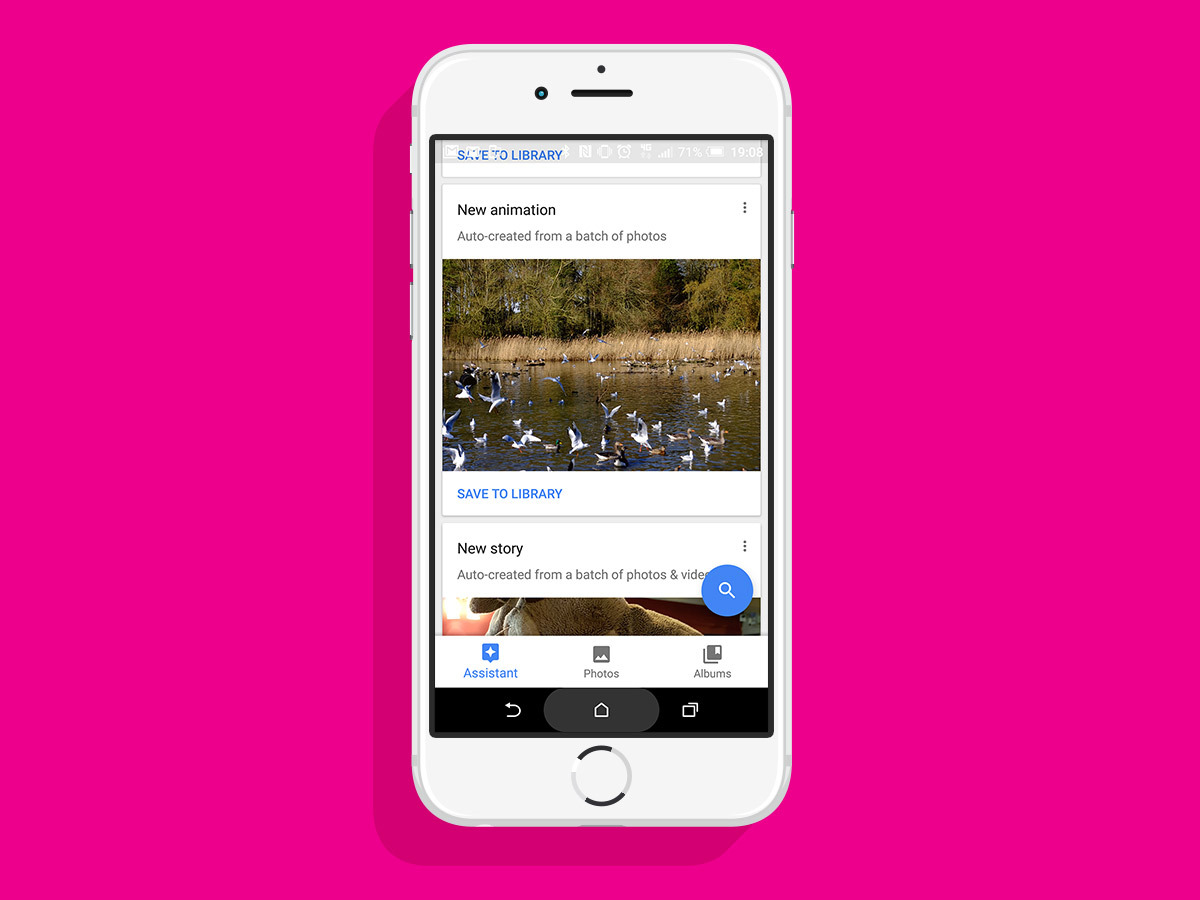
Now for the really fun stuff. As you upload videos, Google will automatically group relevant photos and videos, and create animations, collages, movies and stories with them.
It works brilliantly, mashing a series of photos into a timelapse-style video, for instance, or selecting a set of four similar photos for a neat collage. The story feature is particularly nice: it takes all pictures shot in one particular place on one particular day and groups them together under a title such as ‘Sunday afternoon in Dorking and Walton on The Hill’ (which admittedly sounds like a particularly dreadful BBC1 drama).
Once created, you’ll find them all lurking in the Assistant tab (top left on desktop, bottom left on mobile). You now have the option to either dismiss them, thus consigning them to digital oblivion, or save them to your Albums.
While Google makes the right choices most of the time, there’s no reason why you can’t prove human brains still beat AI algorithms by creating your own.
Simply select the photos or videos you like, hit the “+” sign on the mobile app, then pick Album, Shared album, Movie, Story, Animation or Collage. Once done, sit back and let Google do its magic. You can’t do them all on the desktop version just yet; only Album, Shared album, Animation and Collage are options.
Our favourite is Movie; just pick a group of pictures or videos and Google will automatically create a short film for you, complete with music.
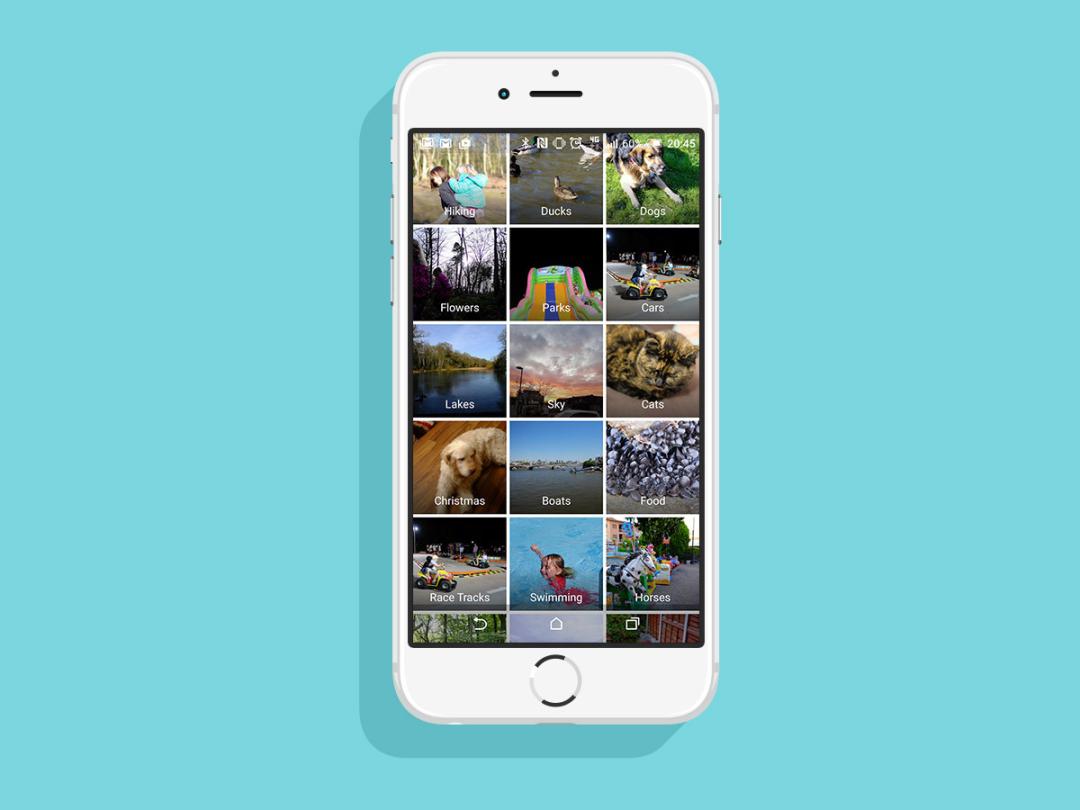
9) Track down any picture in seconds
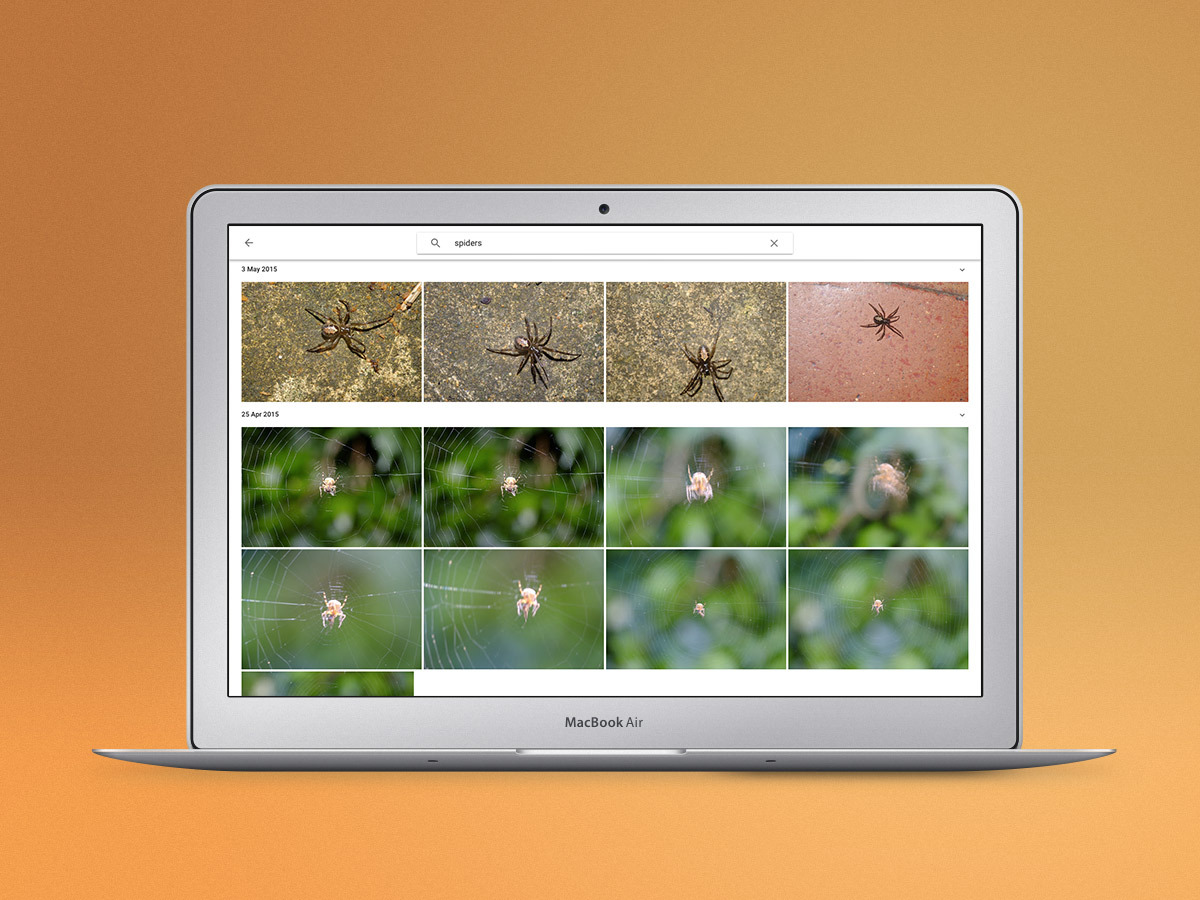
Now Google’s not bad at the whole search malarky in general, but the search options in Photos are nothing short of astonishing.
The app uses machine learning to categorise your images, comparing them to billions of other tagged images so it can decide that yes, that is a photo of a clown standing on a Ford Focus in Bristol in 2008. Or whatever.
The first time you try it, you’ll be blown away. The second time, you’ll be unsettled. By the third time you’ll be feverishly rewatching Terminator 3 for tips on how to survive the AI uprising.
So how do you use it? Simply tap on the magnifying glass icon (or search bar on desktop) and type what you’re looking for. You want pictures of cats? Here you go. Beaches? It can do that too. Smiles? It’ll have a stab at it. You can even be more specific and search for things such as “beach photos in 2007”.
Now it doesn’t always get it right – and sometimes with hilarious results. No, Google, my daughter is not a dog. And neither is my cat. But it’s mostly accurate and certainly narrows things down.
Alternatively, Google automatically sorts things into Places and Things, so you can just tap into the respective section and scroll away. If you’re reading this in the US, you also get the People option: tag a person once and Google will find other photos of them, right the way through from birth to adulthood.
RELATED › Beta Yourself: street photography
 Marc McLaren
Contributor
Marc McLaren
Contributor