Geek Projects Special: Coding
Build your own gadgets and learn how they operate, all through the fascinating world of coding

Learning to code doesn’t have to mean locking yourself away for months with a Python textbook.
These days almost anyone can learn to code and build computer programmes (including their own games). All you need is some imagination, some patience and some gadgets. We can only really help you with the last one.
Here, as a gift to all our loyal readers (and those that got here by accident), are a couple of hands-on projects to get you started…
Build it: DIY gamer kit
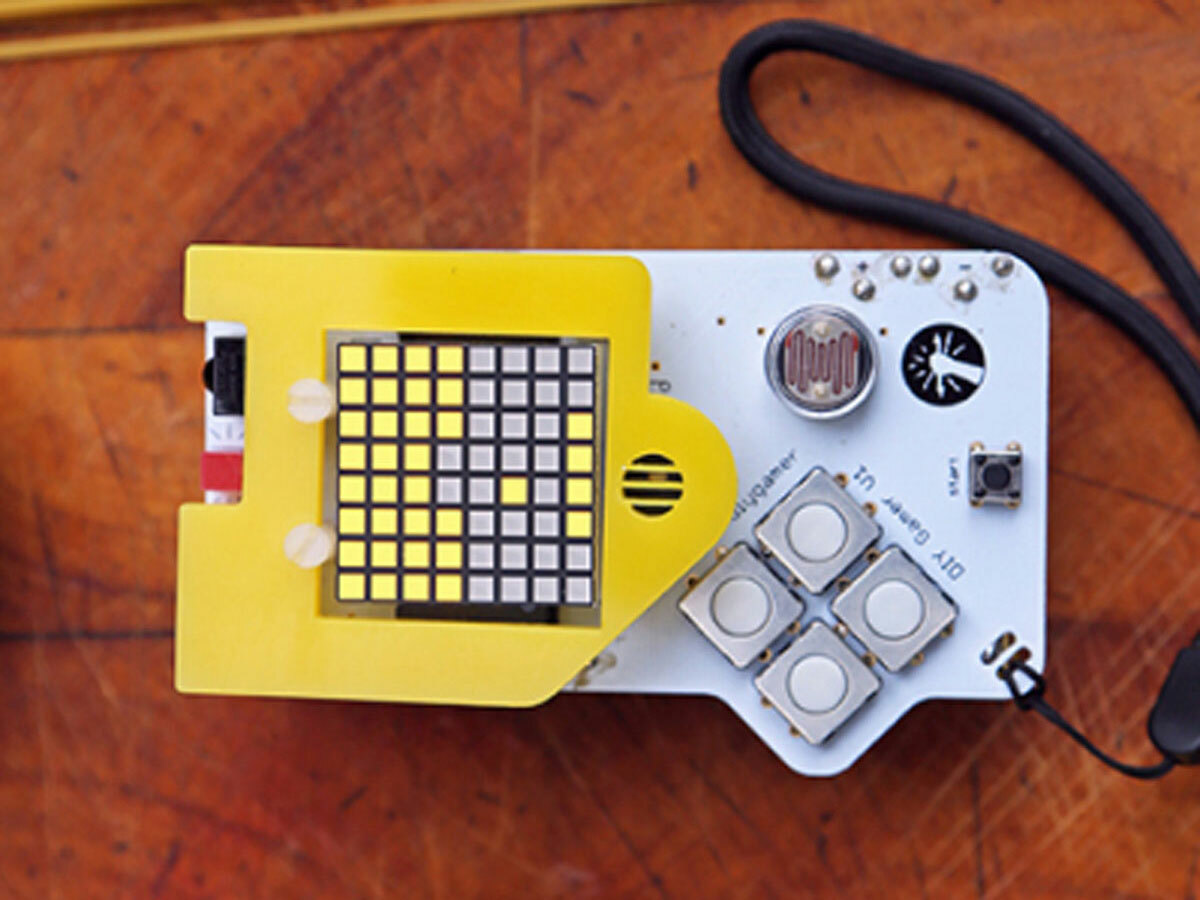
■ So you dug out your old Nokia 3210 to play a nostalgic game of Snake but there’s less life in it than a Tory MP’s 60th birthday party. Don’t worry. TWSU’s DIY Gamer Kit has all the ingredients you need to make your own handheld console, with Snake pre-coded for you.
■ Sounds too easy, right? Depending on your skill level you can buy it pre-soldered, or for £10 less do all that yourself. There are 40 pieces that need to be assembled on the circuit board, including an 8×8 display and four-way D-pad. It should take about 90 minutes.
■ After about five minutes, when you’ve remembered how tedious Snake is, download the Arduino Game Library from the TWSU website and you’ll be able to install others, such as Breakout and Flappy Bird. It’ll also allow you to tinker with the games’ source code.
■ Once you have the Arduino software you can also start writing your own games for it. There’s a whole section on the TWSU website with tips, guides and cheat sheets to help. Don’t expect Far Cry 4 – it’s only an 8×8 screen – but it’s a good way of picking up the basics.
Project #1 (easy): learn a programming language
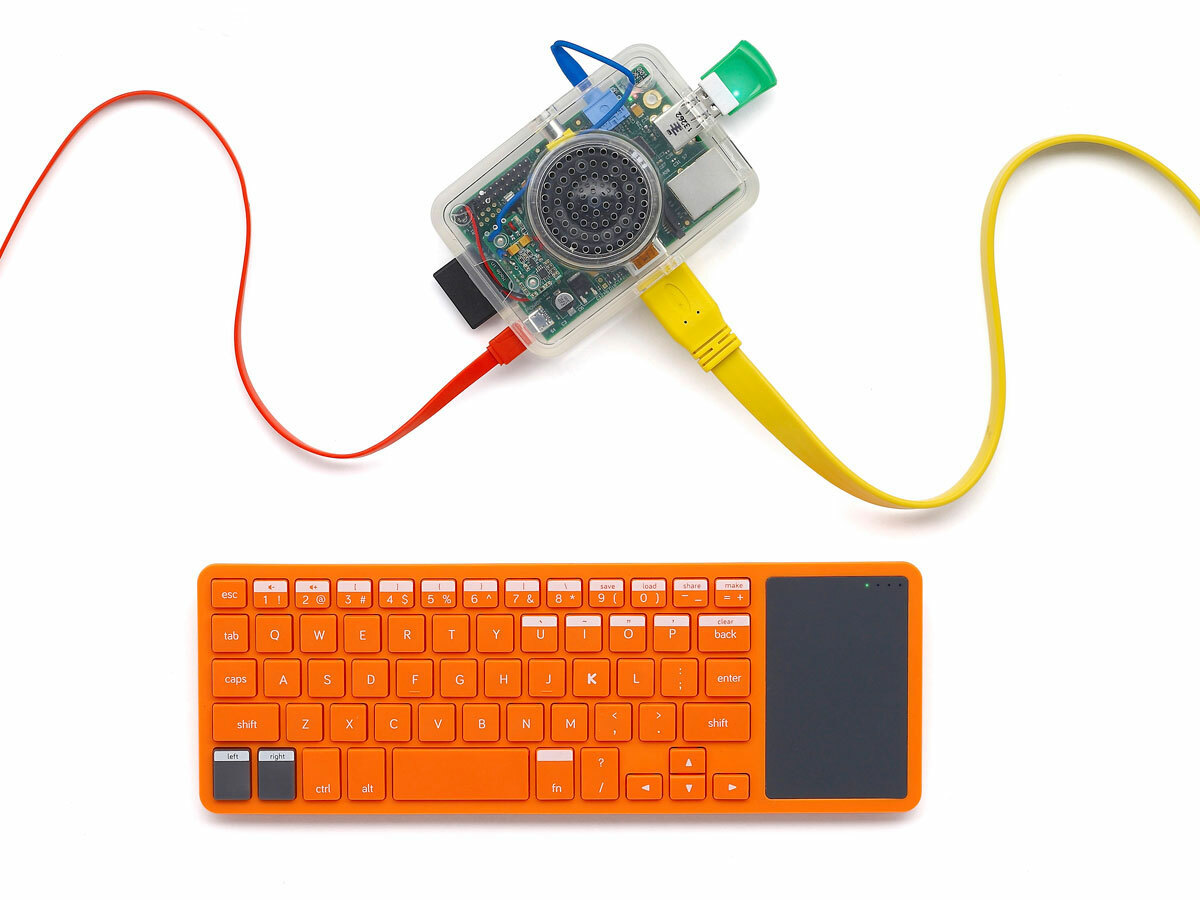
Learn a new language
Using a Raspberry Pi Model B, the Kano kit is designed to teach the basics of coding using its own Blocks programming language. It comes with a keyboard (including a touchpad), case, speaker, Wi-Fi dongle and its Kano OS pre-installed on an 8GB SD card. You just need to add a monitor or TV screen.
Time to swot up
It also comes with a manual – and you might just have to read this one. Everything slots together neatly and it’ll gradually introduce you to the different principles of coding. After typing a few commands you can dive right into Pong and start messing about with the size and speed of the ball.
Give it a Pi
Kano isn’t just a tool to teach coding. Don’t forget there’s a Raspberry Pi under there, so it can access the internet, stream video, run a home server, or do any of the projects posted online, including a fart detector, Wiimote-controlled robot butler, and a time-lapse camera housed in an old coffee tin.
Project #2 (hard): build the button of power
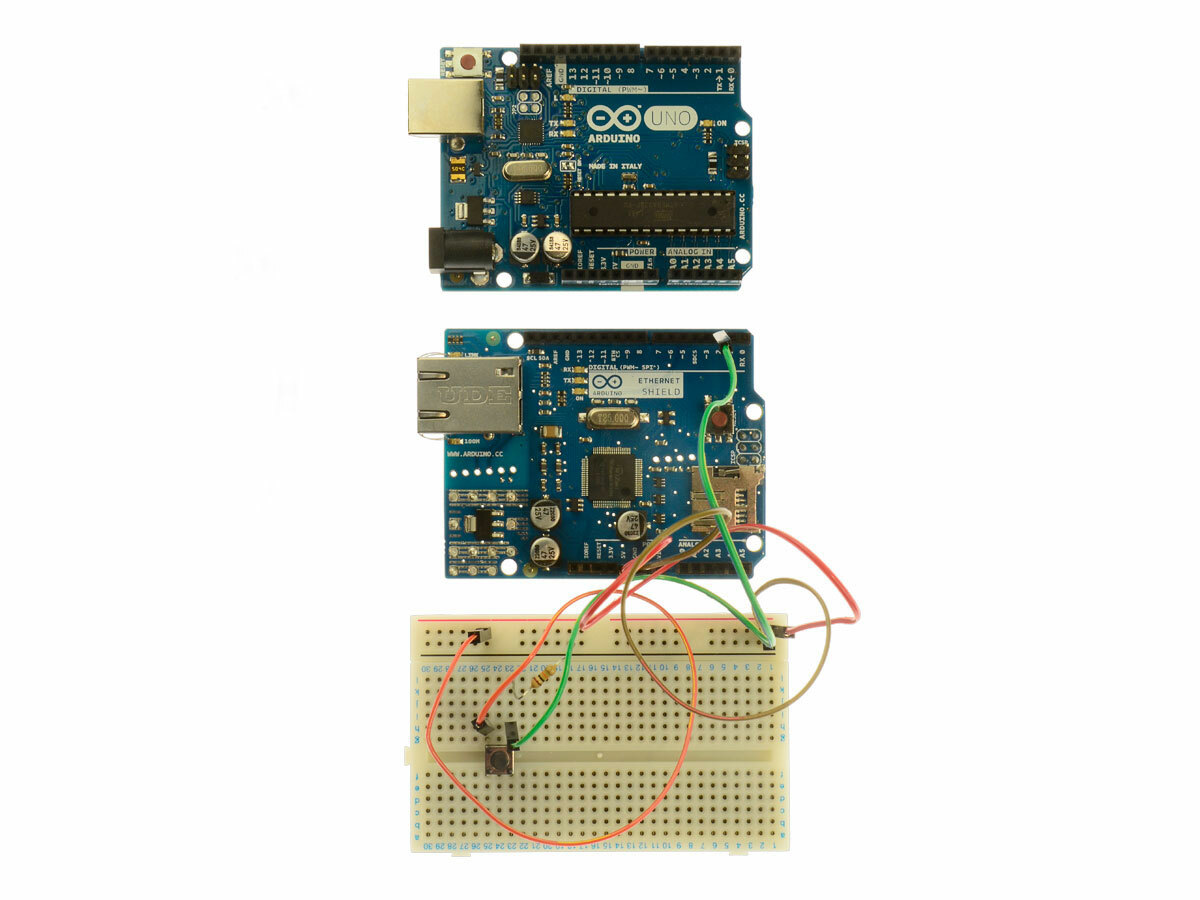
Arduino is like the gadget-making equivalent of Raspberry Pi: while the famous tiny-puter is ideal for creating code, Arduino is an amazingly powerful way to get into building your own gadgets.
On Decoded’s Future Tech In A Day course (decoded.com), Stuff was shown how to make a live Twitter sentiment-o-meter; an entry-level project, yes, but you have to take baby steps before you can build a fire-breathing animatronic pony. Here, an adapted design from Instructables.com by bigbuttonfun.com will create a button that can perform any task that can be automated by web service IFTTT. The button sends an email to your Gmail account, and when IFTTT sees, it can do whatever you want it to: tweet, text, switch all your lights off or heating on, and much more besides. Truly, a Button of Power.
Step 1 – Create the trigger email
Visit futuretech.decoded.com and create a unique Arduino identity by clicking the button. On the ‘Configure your Tech in a Day’ page, under ‘Add a new Trigger’, select ‘Send an Email’, give the trigger a name, then enter the Gmail inbox you want to send an email to, and a message if you so wish. Click ‘Add the trigger’.
Step 2 – Write the code
Download the Arduino software from arduino.cc and create a new sketch from the file menu. Copy the code at this page into the sketch, adapting with your own Ethernet Shield’s MAC address where appropriate (it’s on a sticker on the box) and ensuring your Arduino’s unique identity is referenced. Step-by-step instructions are available at futuretech.decoded.com/api/
Step 3 – Build your button
1 x Arduino Uno (£25)
1 x Arduino Ethernet Shield (£30)
1 x AD101 breadboard (£3.60)
1 x 10⁵T switch (£1.50)
10KOhm resistor (a few pence)
4 x jump wires (£2)
1 x USB wall plug
1 x Ethernet cable
Place the Ethernet Shield on top of the Arduino Uno, making sure the pins line up, and push them together. Assemble components as shown in the photo. Connect to your computer via USB and upload the sketch, then hook up to your router via Ethernet. Now, pressing the button on the breadboard will send the email. Now use the USB wall plug.
Step 4 – Create your IFTTT recipe
Now you can formulate recipes on IFTTT.com for when an email lands in your account. Building recipes is simple; so get thinking.
I fixed… London parking

Enric Requena, co-founder of AppyParking / appyparking.com
“When I came to London I was working on mobile apps for lots of different clients. I think I did about 20 different apps and one of them was for Dan Hubert.
Later on, Dan had the idea for AppyParking and he took the idea to the co-founder of a start-up I used to work for, but he couldn’t do it so he pointed Dan towards me. I’d just quit my job and was going to start freelancing but I met with Dan, who had started collecting data on parking zones from different councils, and we started to develop AppyParking.
The first thing to do when making an app is to start brainstorming and create some mock-ups of different screens. You need to visualise the whole thing so you can decide where the buttons are going to be and work out how you see things working. Once you’ve got all your ideas together, you need to prioritise what’s most important and work on those things first. There are lots of online resources, such as Cocoapods.org, which have loads of things you can take advantage of that have already been implemented and tested elsewhere.
Once you’ve made something you put it out there and get some feedback from users. It’s important to make a good system for them to report what other functionality they need and what they would like to add. I think that’s the best way to develop an app. Start with something very small and then keep adding things – don’t try to build the finished thing straight away because you might end up with something full of things that people don’t like or don’t use and then you’ve wasted your time.
We’re working on our third version now, which we hope to have ready by March. We’re expanding to 33 boroughs, adding more data, a better API and a content management system that will allow us to expand to other cities more easily. We’d like to cover the whole of the UK, or at least the eight major cities.”
Project #3 (fiendish): Learn to mod

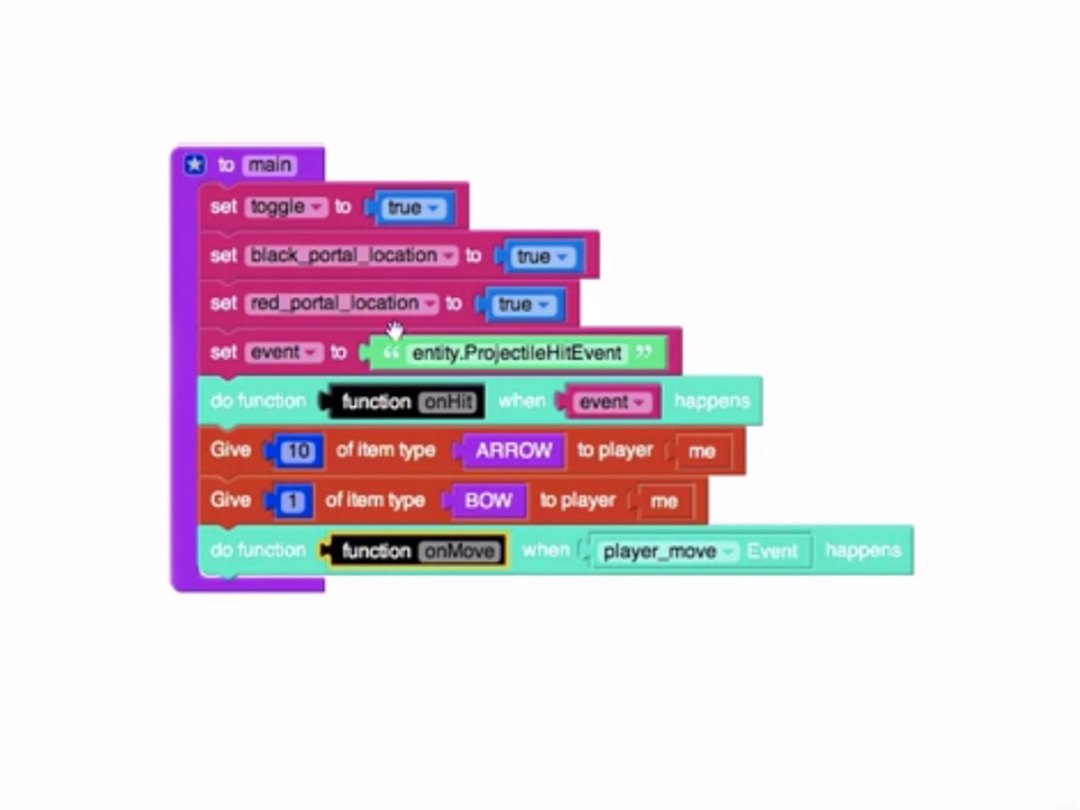
Block-’em-up coding
LearnToMod (US$40/year / learntomod.com) teaches coding through creating modifications for Minecraft. It’ll teach you the fundamental concepts through Blockly’s drag-and-drop interface, so you can learn about if-statements, Boolean logic and event-driven programming without dealing with Javascript.
Go to gaming college
You can use LearnToMod’s online studio to combine Blockly and Javascript. There are extra online tutorials created by staff from the University of San Diego that’ll teach you the latter. What you create can be tested on private LearnToMod servers, but you’ll need your own copy of the game to run them.
Dungeons and creepers
There are various badges to earn with gradually increasing difficulty. Controlling the weather and summoning Creepers are level-one skills; it goes all the way up to designing mini-games to play within the Minecraft world, plus writing the code for procedurally generating your own dungeons.
 Mark Wilson
Features editor
Mark Wilson
Features editor