The 3 best starter projects for your Raspberry Pi 3
Start your Pi 3 journey with these simple, step-by-step projects...
The initial excitement of ordering a new £25 tiny-puter can quickly turn into procrastination – do I actually have the time or ability to turn this Pi 3 into an automatic cat feeder?
If the answer is ‘probably not’, we recommend trying these three starter projects to build your tinkering confidence. All three – the £30 office PC, media centre and retro games arcade – make use of the Pi 3’s boosted power and wireless capabilities. You’ll also get a good grounding in terminal commands and the Noobs OS.
Better still, all you need is your Raspberry Pi 3, an SD card and our handy tips…
The £25 desktop PC
The Raspberry Pi 3’s power boost and wireless networking make it a great desktop for web browsing and work. The latest version of Raspbian even includes a fully-featured office suite. Here’s how to set it up as your home computer…
1) Download Noobs
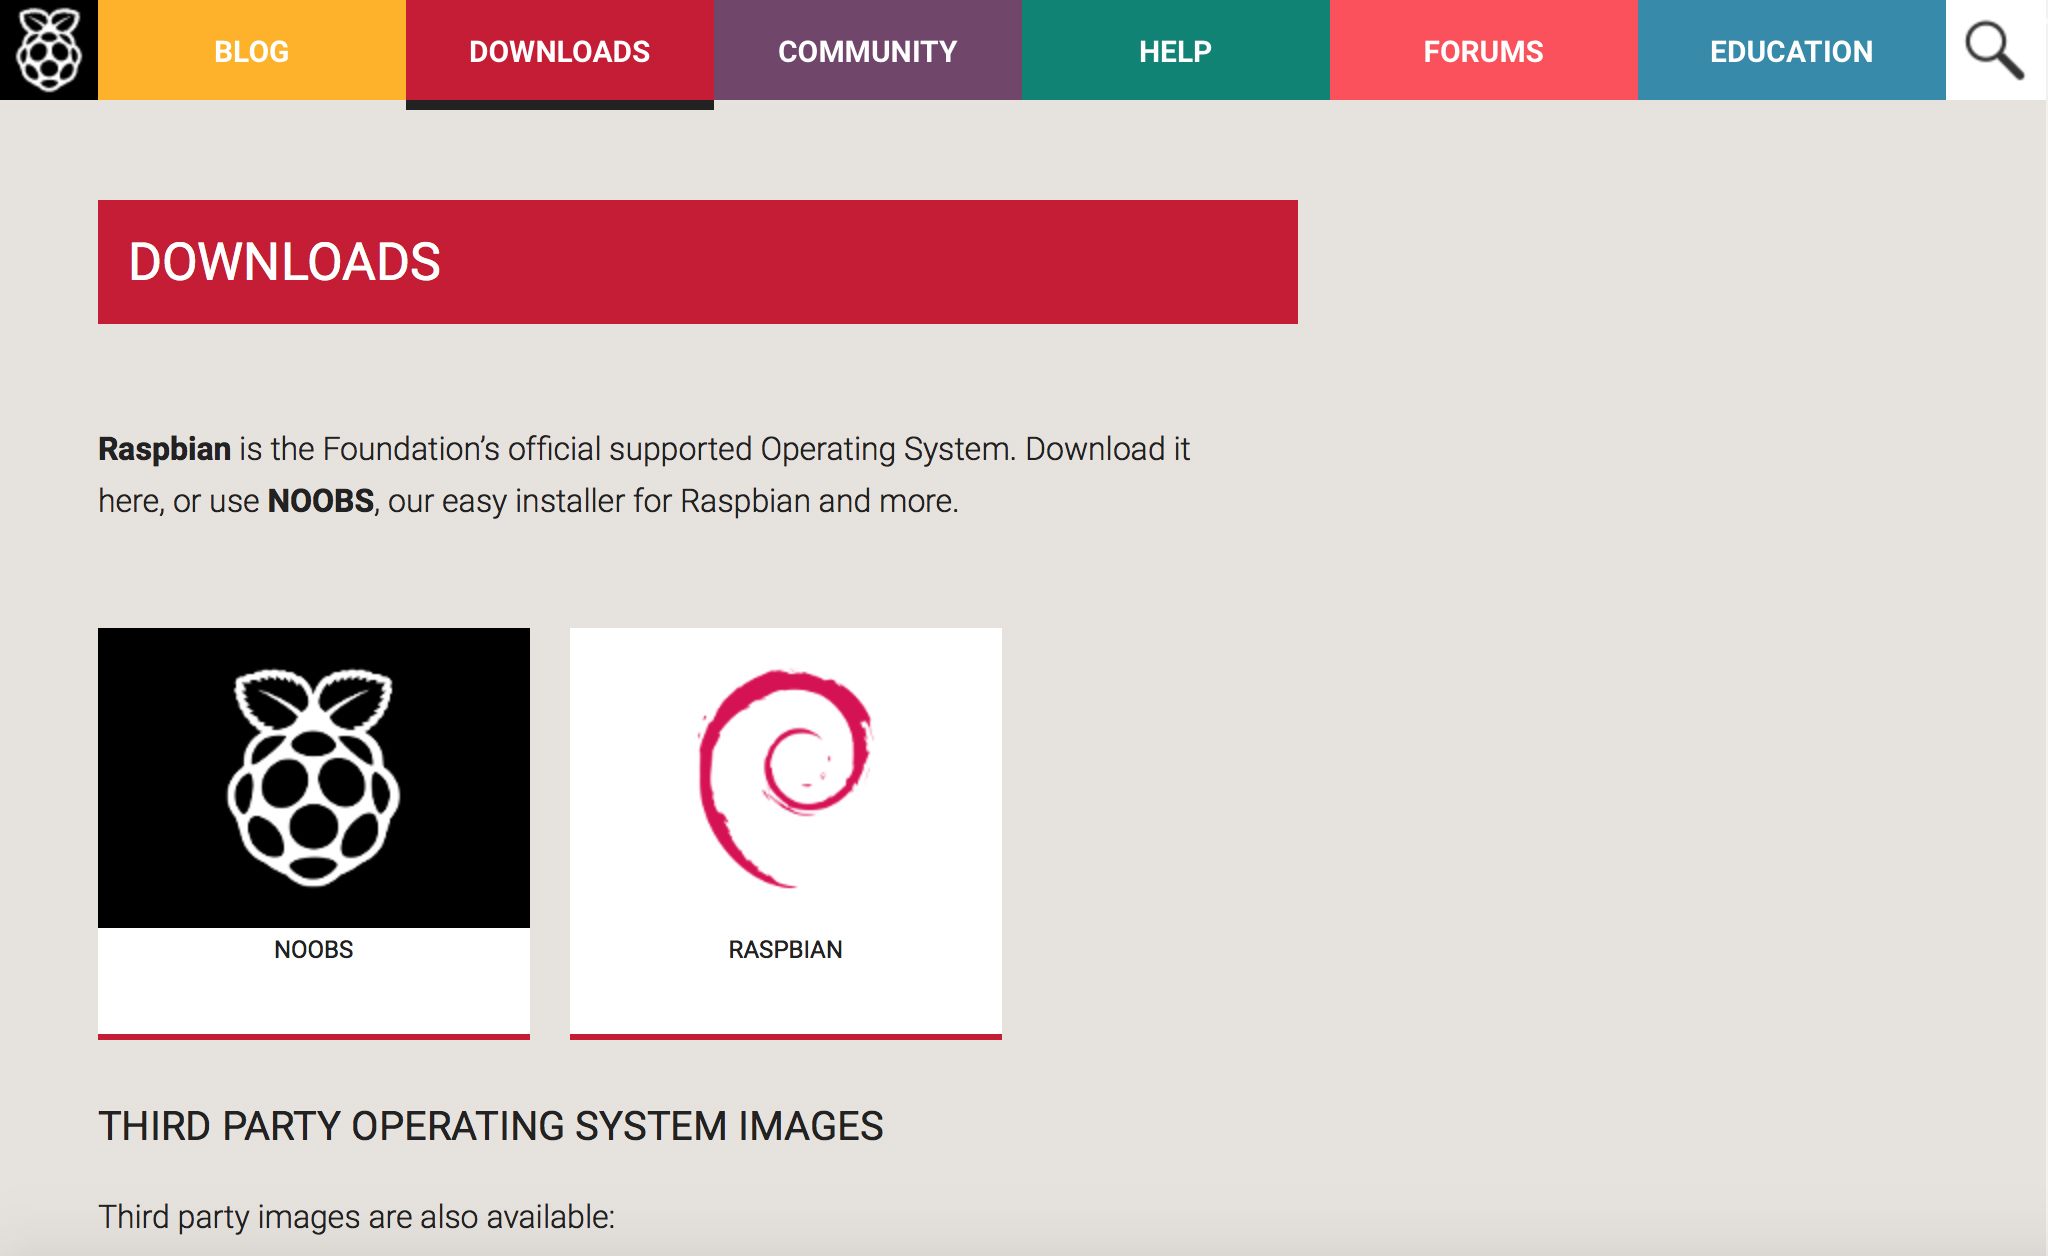
The Raspberry Pi 3 is the first generation of circuit board computers with the power and features to make a decent bargain basement PC. It doesn’t come with the software we need, though. For that we need to head over to raspberrypi.org. Head to the Downloads section and grab Noobs.
2) Prep your SD card
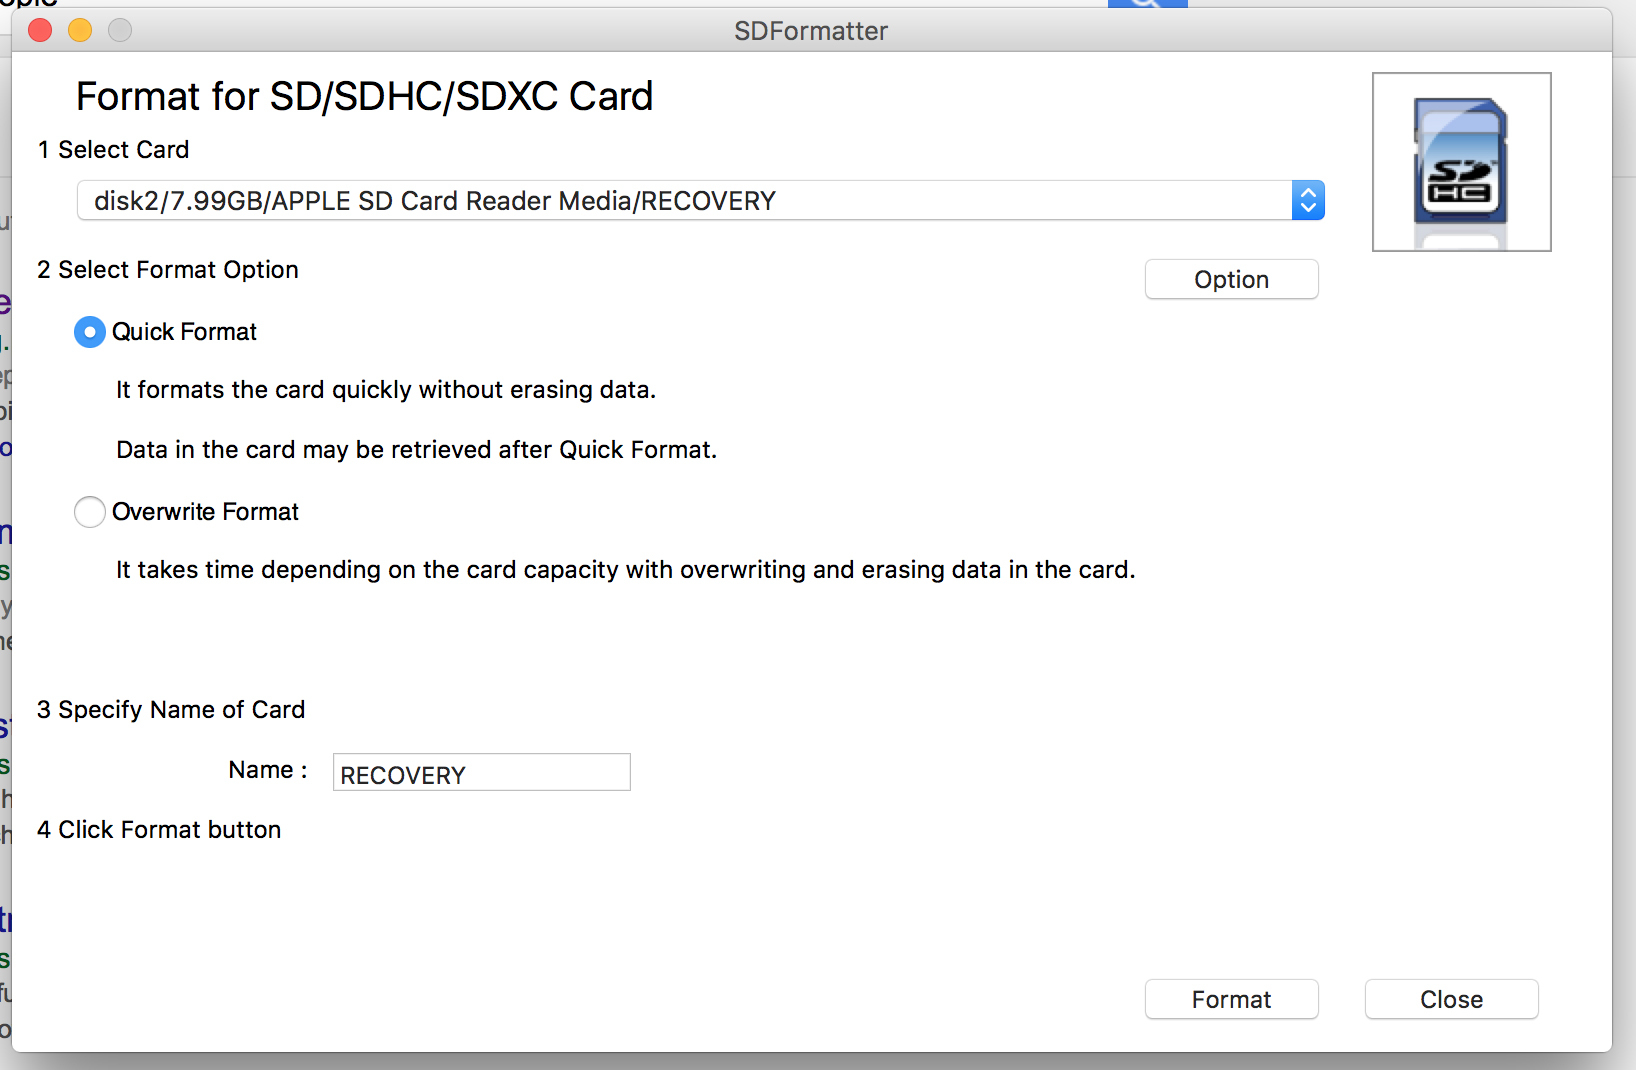
Now we need to format our memory card, which will need a full-size SD adapter to fit in your computer unless you have a microSD reader. The card needs to have at least 8GB storage, and we’ll format it using the SD Formatter from sdcard.org. It’s available for OS X and Windows. Run it, select Overwrite, then the format button.
3) Copy and unmount
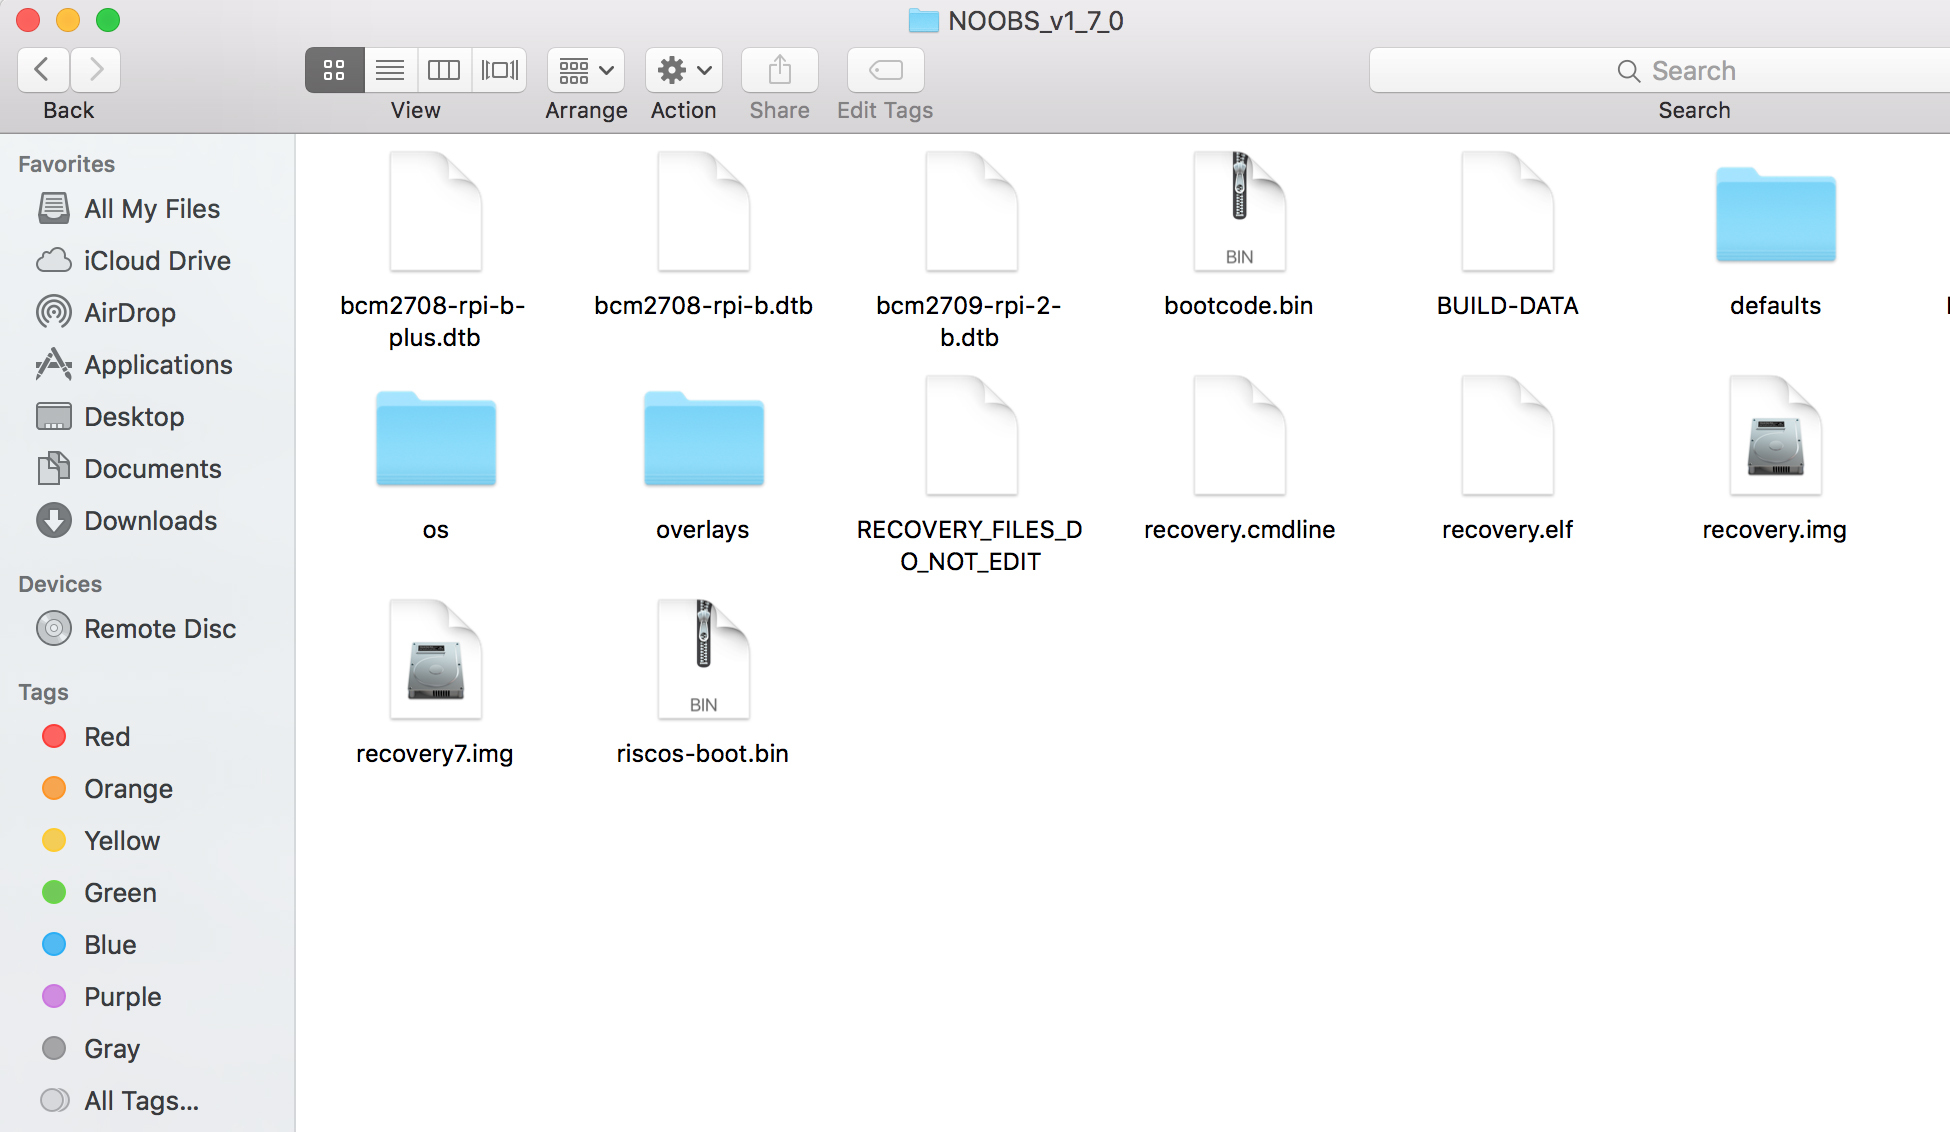
Noobs is so easy to use that all we need to do is extract the files in it and drag them over to our newly-formatted memory card. You don’t get much easier than that. Once you’re done, click on the drive in Explorer/Finder and Eject the drive. That last bit matters.
4) Install Raspbian
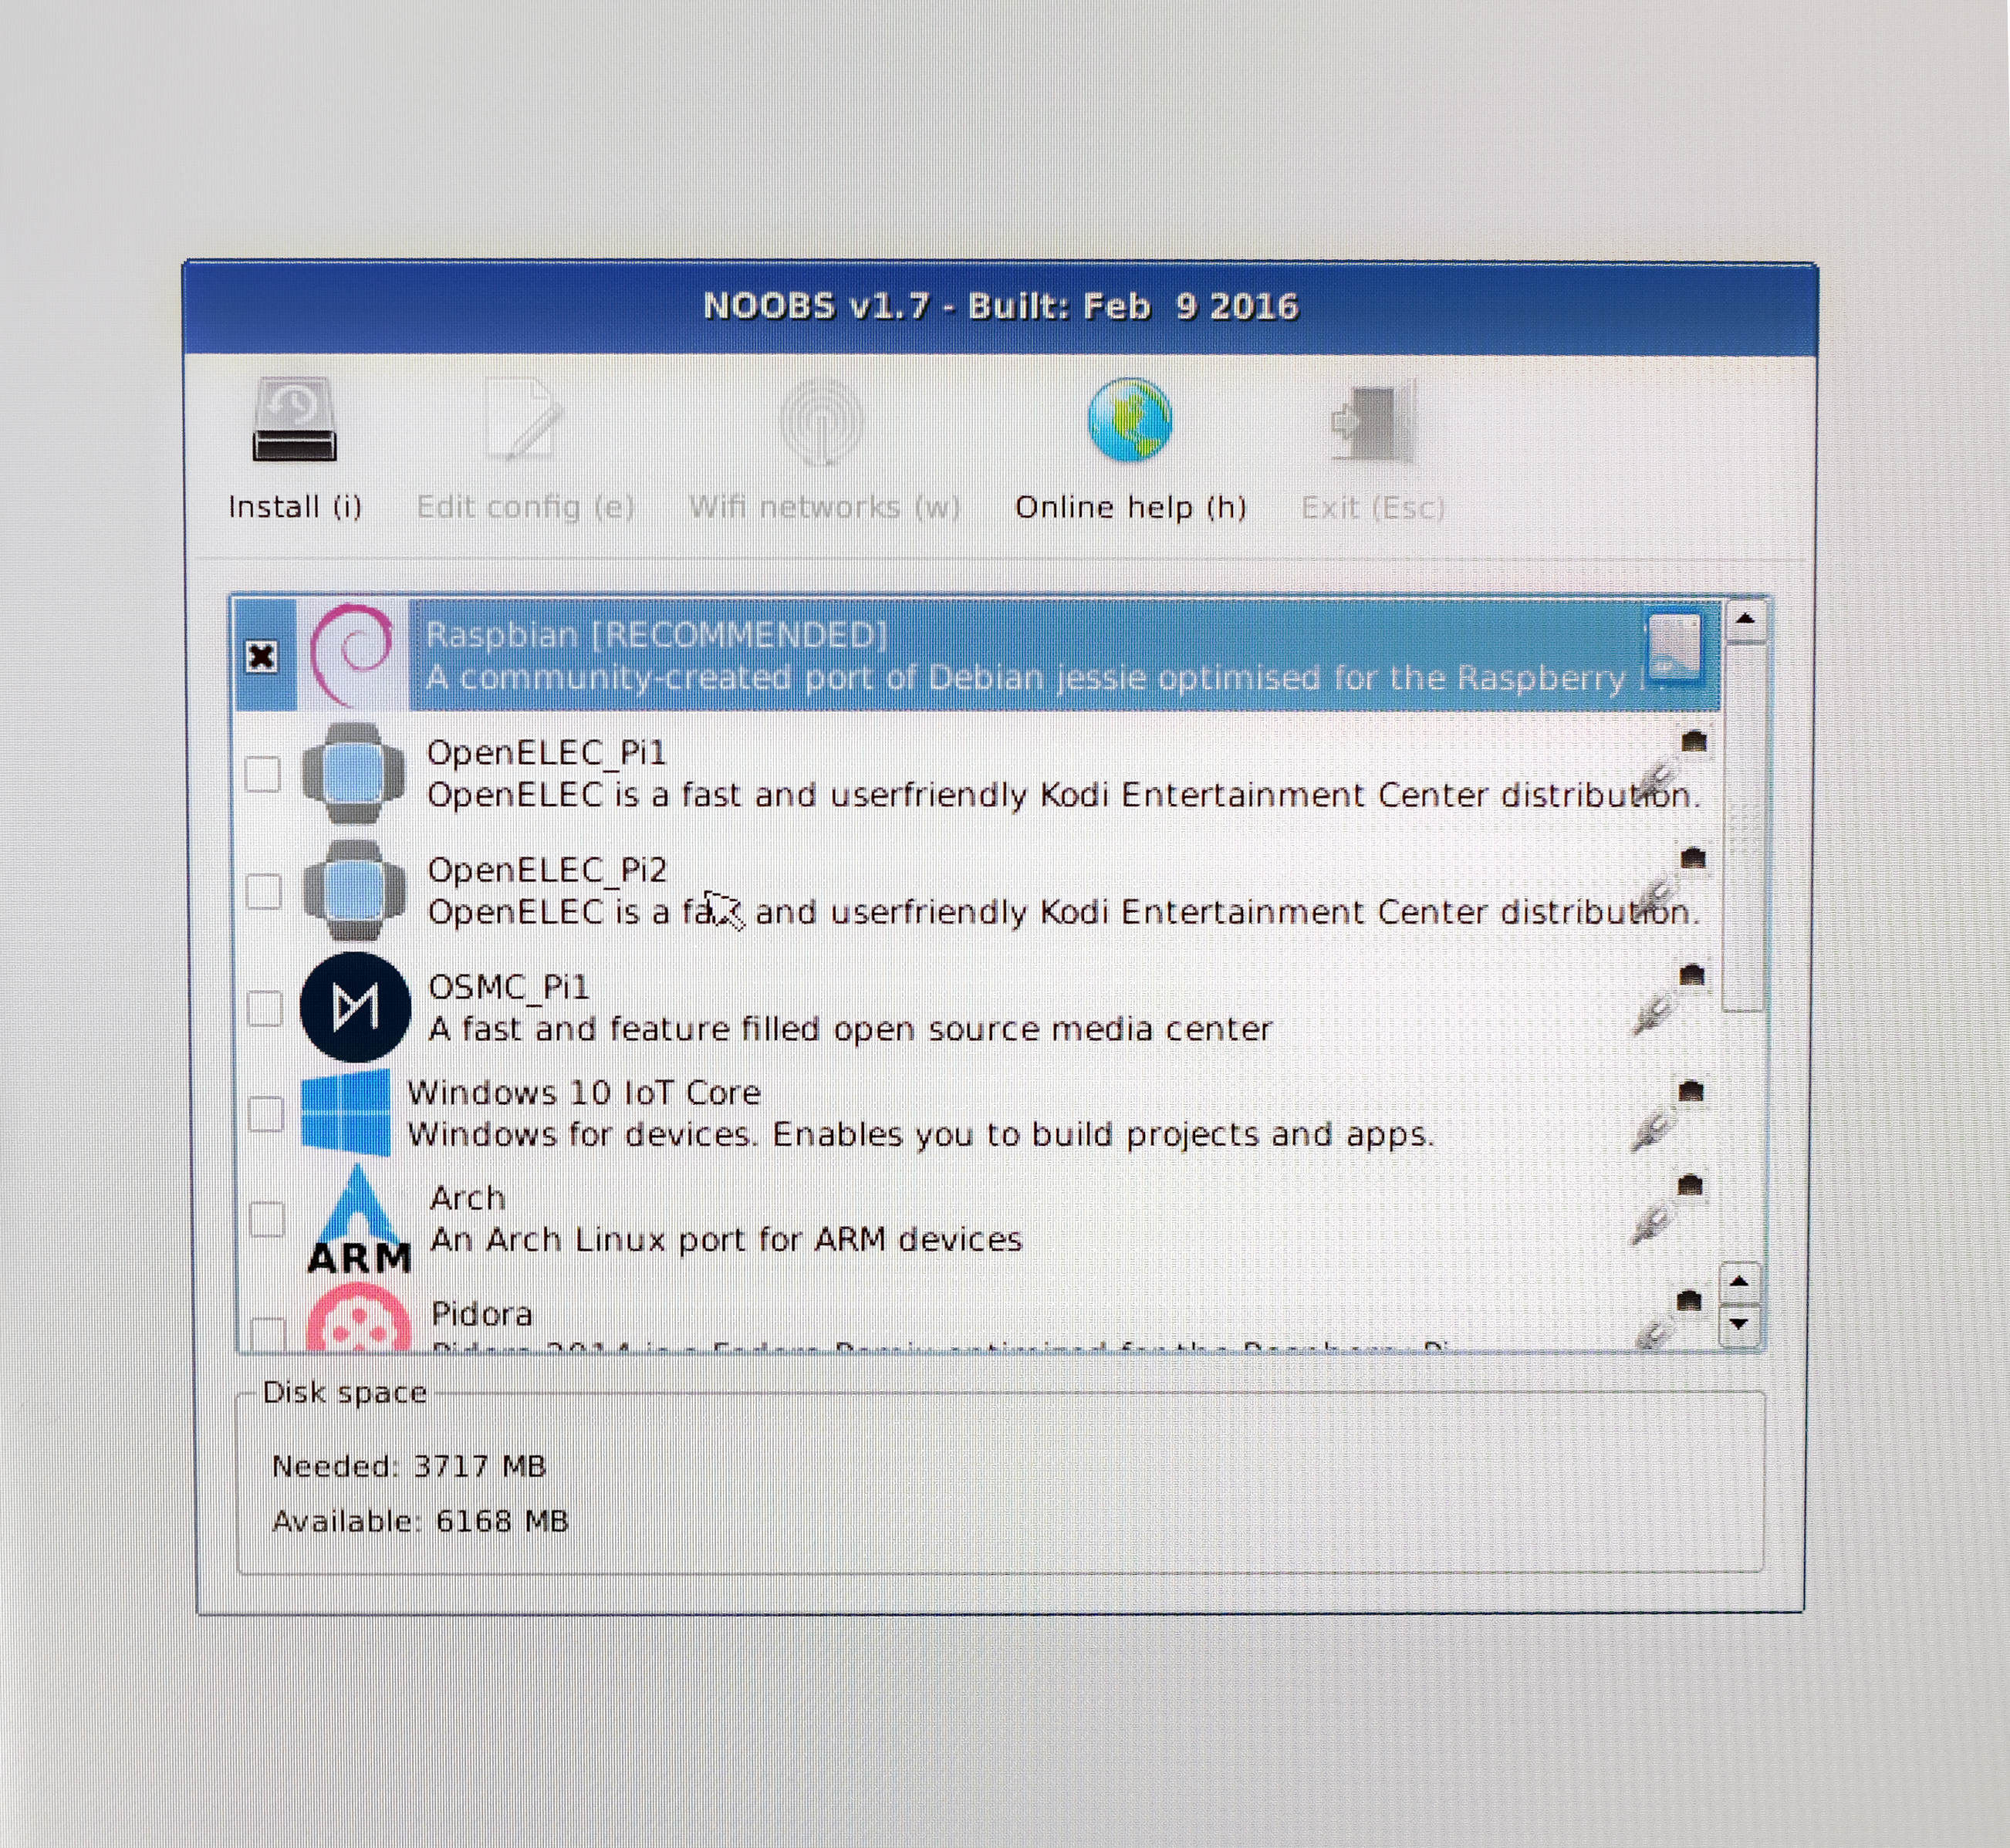
Plug the microSD card into your Pi 3 and jam in the microUSB power cable. The Pi will boot up to the Noobs install screen, offering a whole bunch of front-ends we can use. What we want this time is Raspbian, the top selection. This is the Pi’s version of Windows 10 or OS X.
5) Start exploring
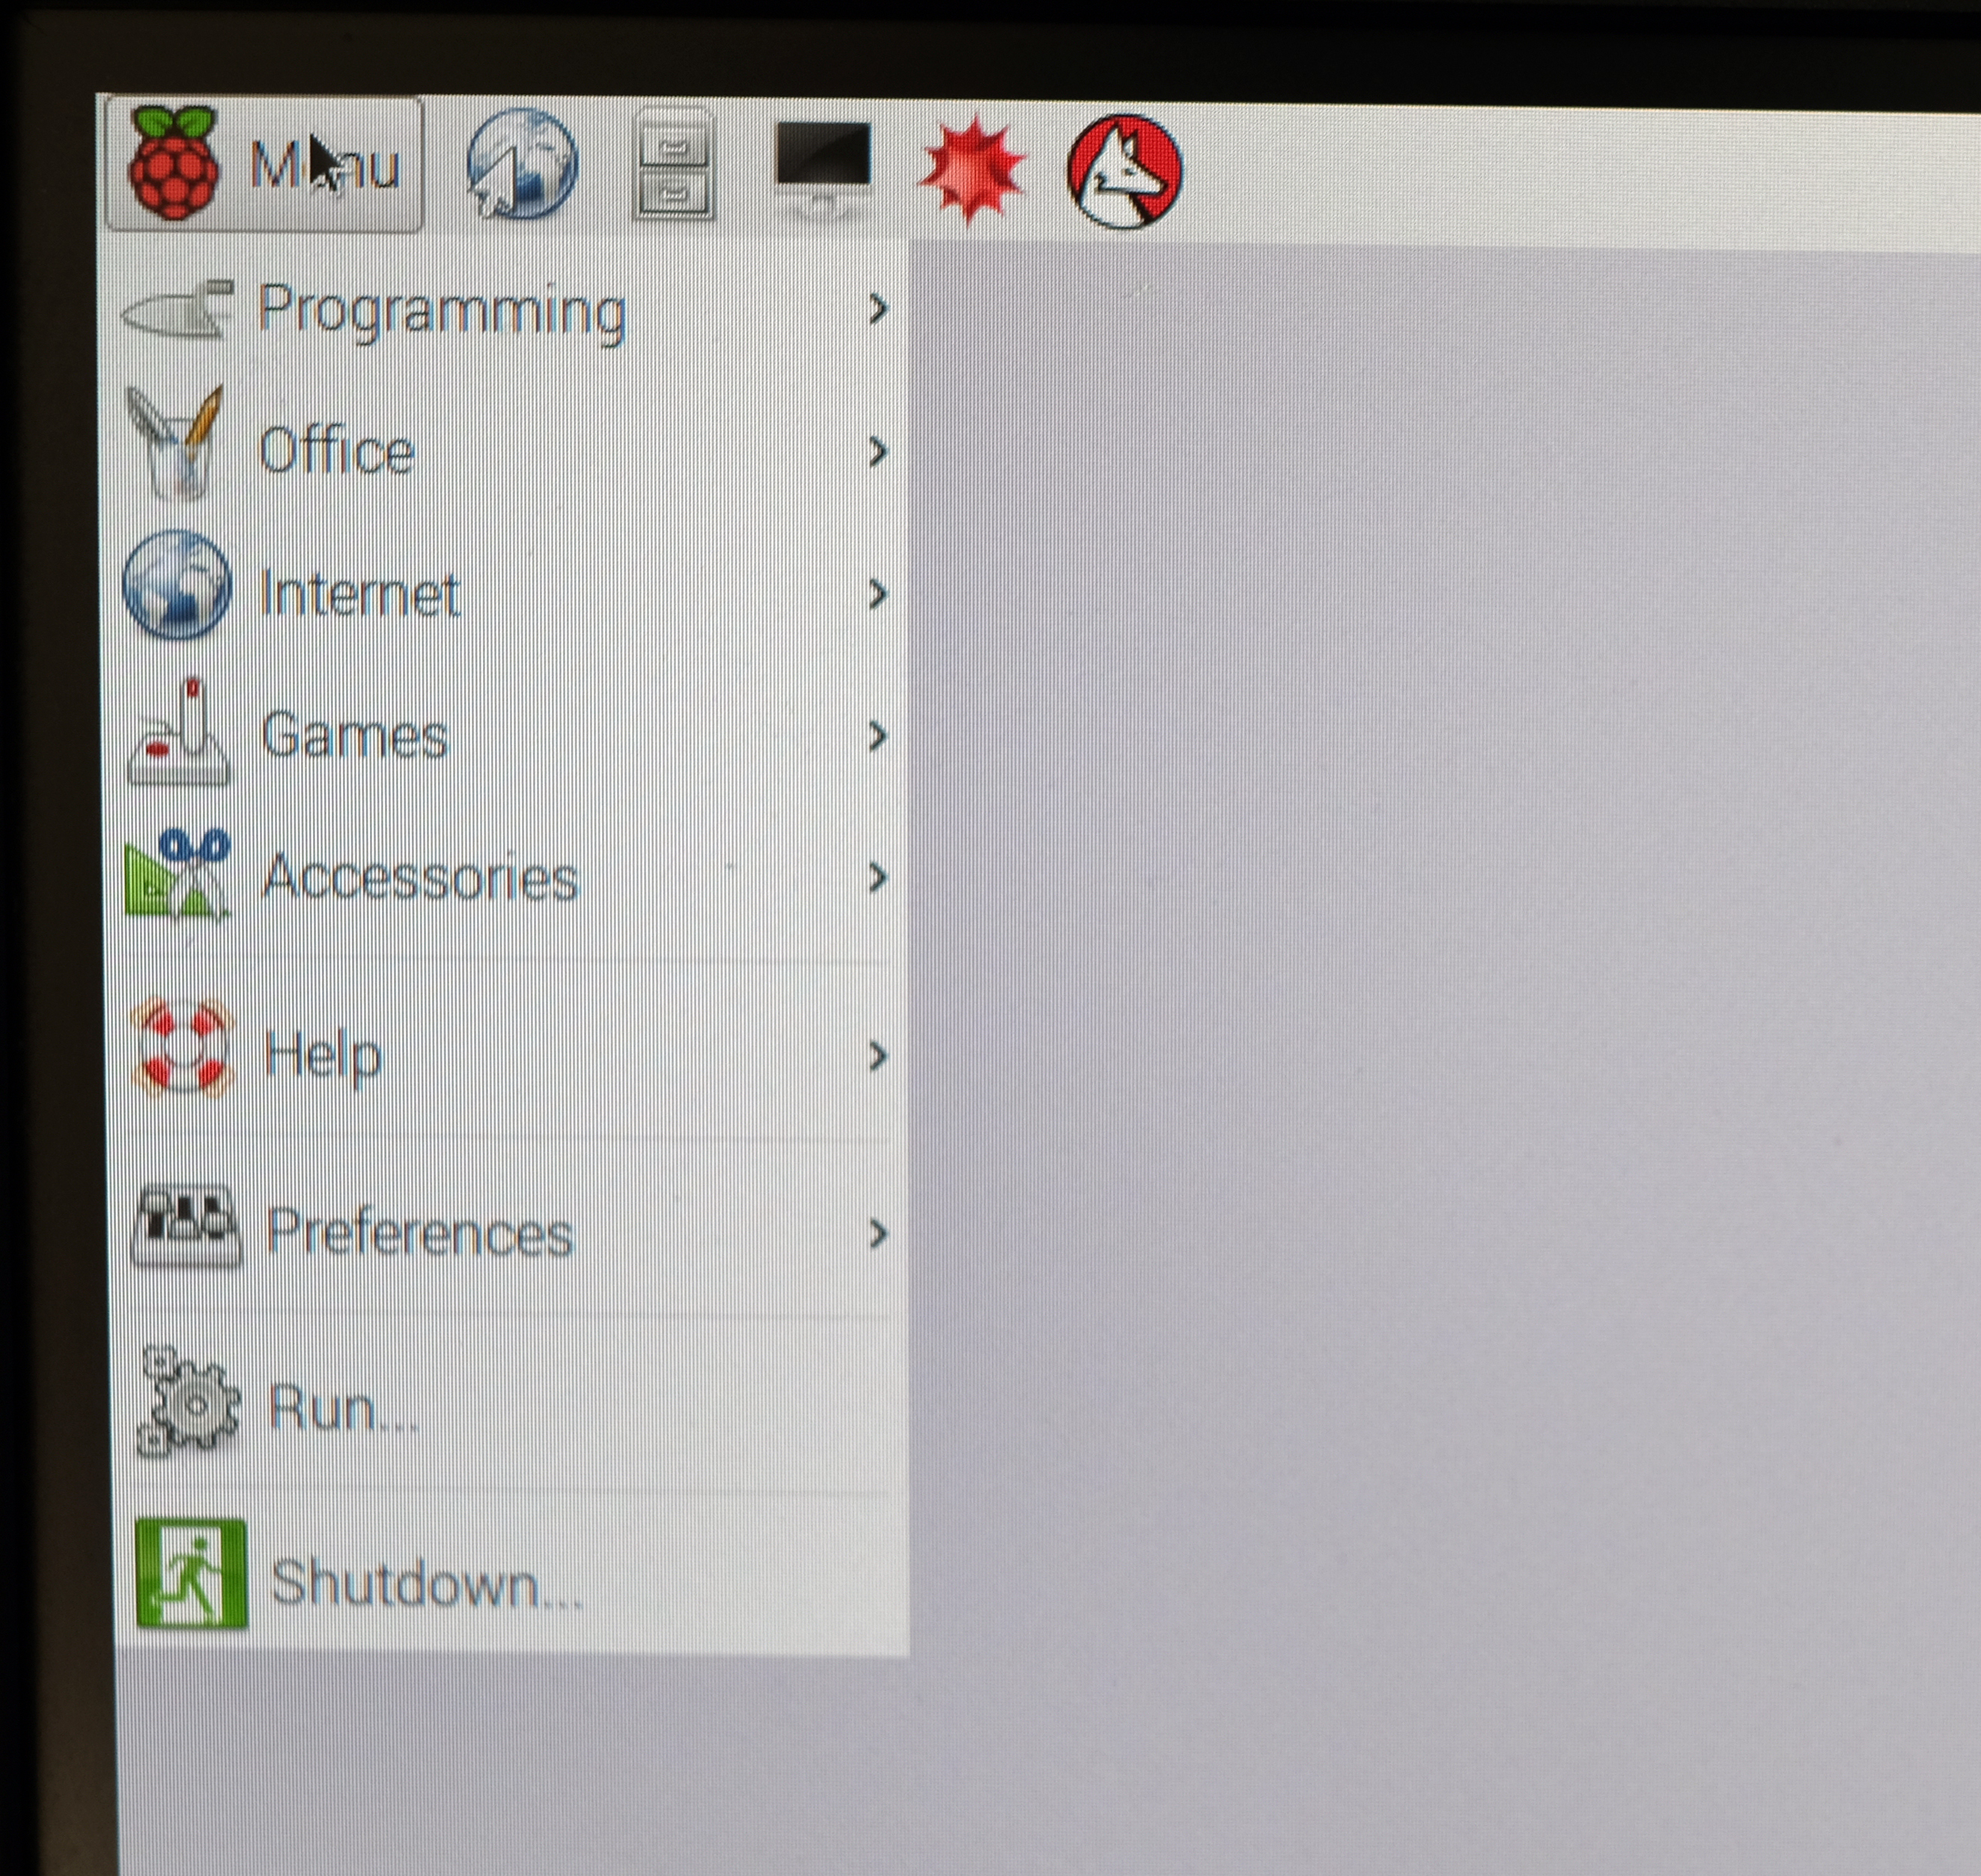
After Raspbian is installed, the Pi 3 will boot into the main system UI, which is like a retro version of OS X or Windows. It’s based on Linux, and comes pre-installed will all the goodies an office PC needs. Press the button in top left corner of the screen, and under the Office header is a whole suite. Boom.
The retro arcade machine
You can whip up a retro Pi 3 games console in less time than it takes to dash over to CeX for a Neo Geo. Here’s how to use the Terminal window to get Duke Nukem 3D running on your Pi 3…
1) Visit the terminal
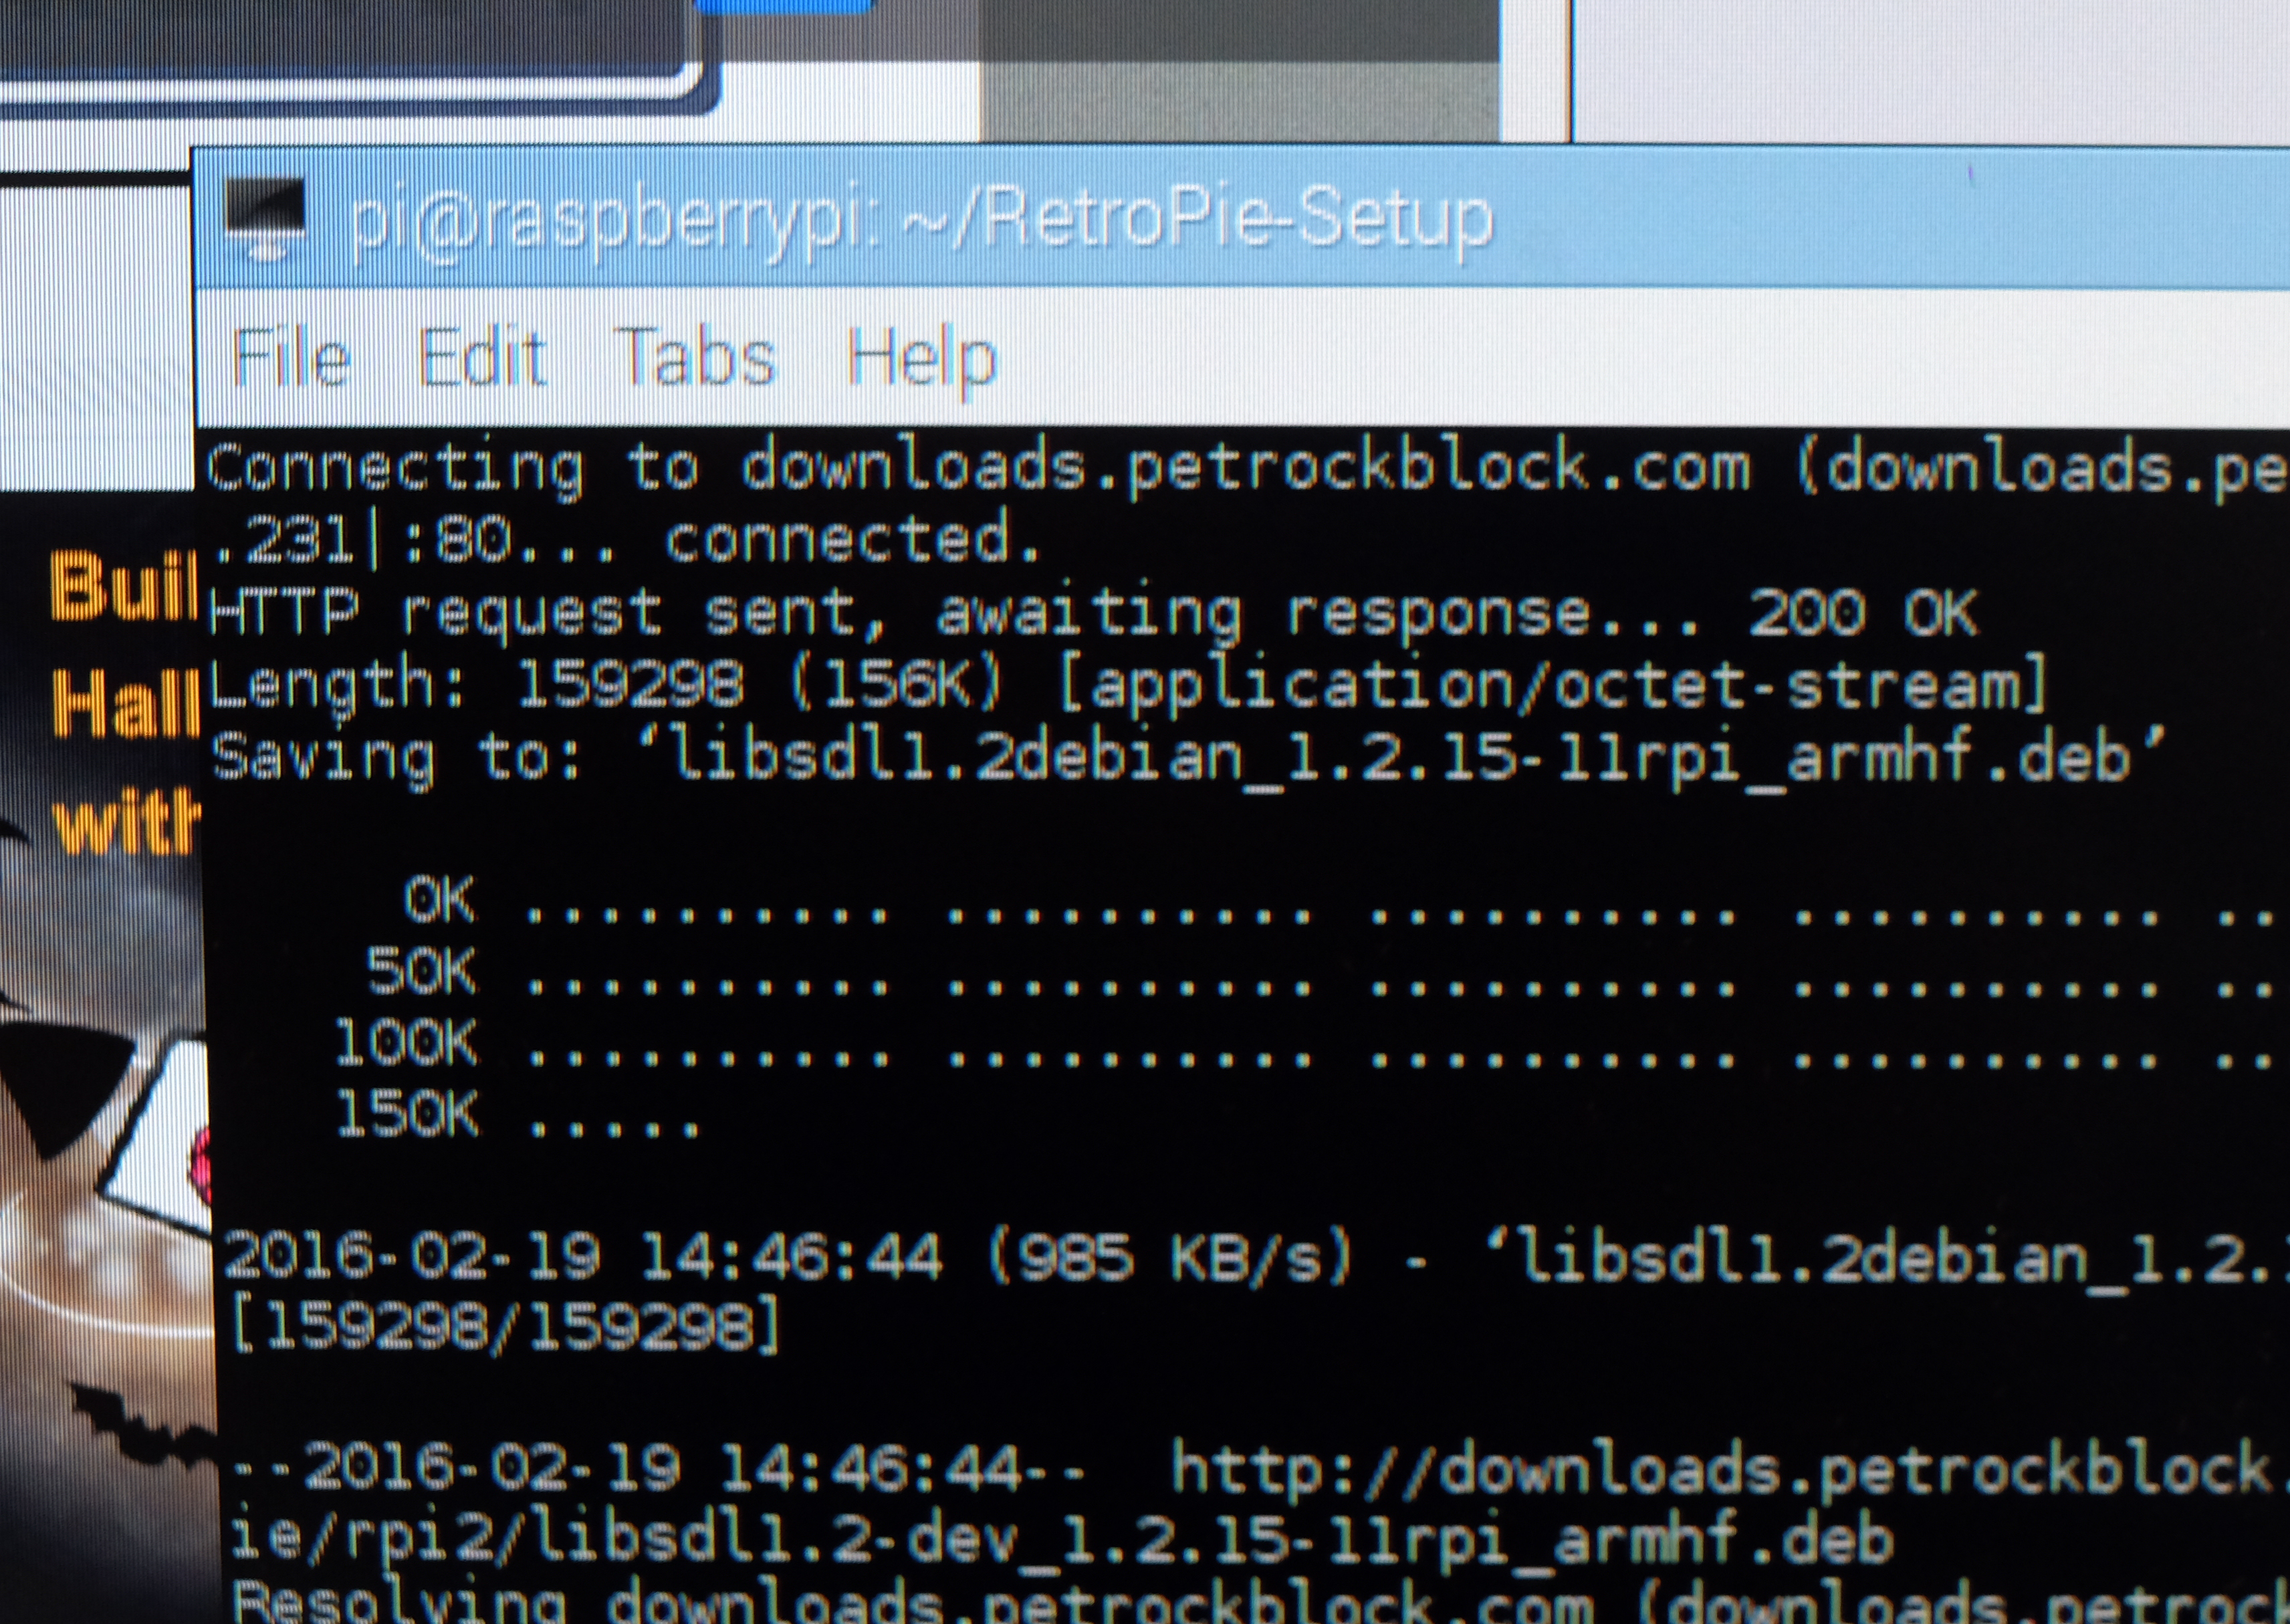
Ready to have some fun? Now we have Raspbian installed we can turn our Pi into a retro game console. First, open up a Terminal Window. It’s one of the buttons at the top of the screen. Now type “sudo apt-get update” and then “sudo apt-get install -y git dialog”. It’s Linux o’ clock.
Now type “cd” and then “git clone git://github.com/petrockblog/RetroPie-Setup.git” to download a little script that’s going to install the game emulators for us. Loads of them. To prep the installer, type “cd RetroPie-Setup”, then “chmod +x retropie_setup.sh”. Now we’re ready to roll.
2) Get busy installin’
In the same terminal window, type “sudo ./retropie_setup.sh” to run the installer. It’ll bring up a retro-tastic interface, where we want to select the binaries-based install option. The other one takes hours and hours. Even the standard one takes about an hour, so go and make a cup or tea.
After the install, we can’t just run EmulationStation from Raspbian. Open up another Terminal window, then type “sudo raspi-config”. In this config app, go into the boot options and make the Pi boot into command prompt rather than Raspbian. Reset the Pi, then type “EmulationStation” to run your retro game centre. We’re in.
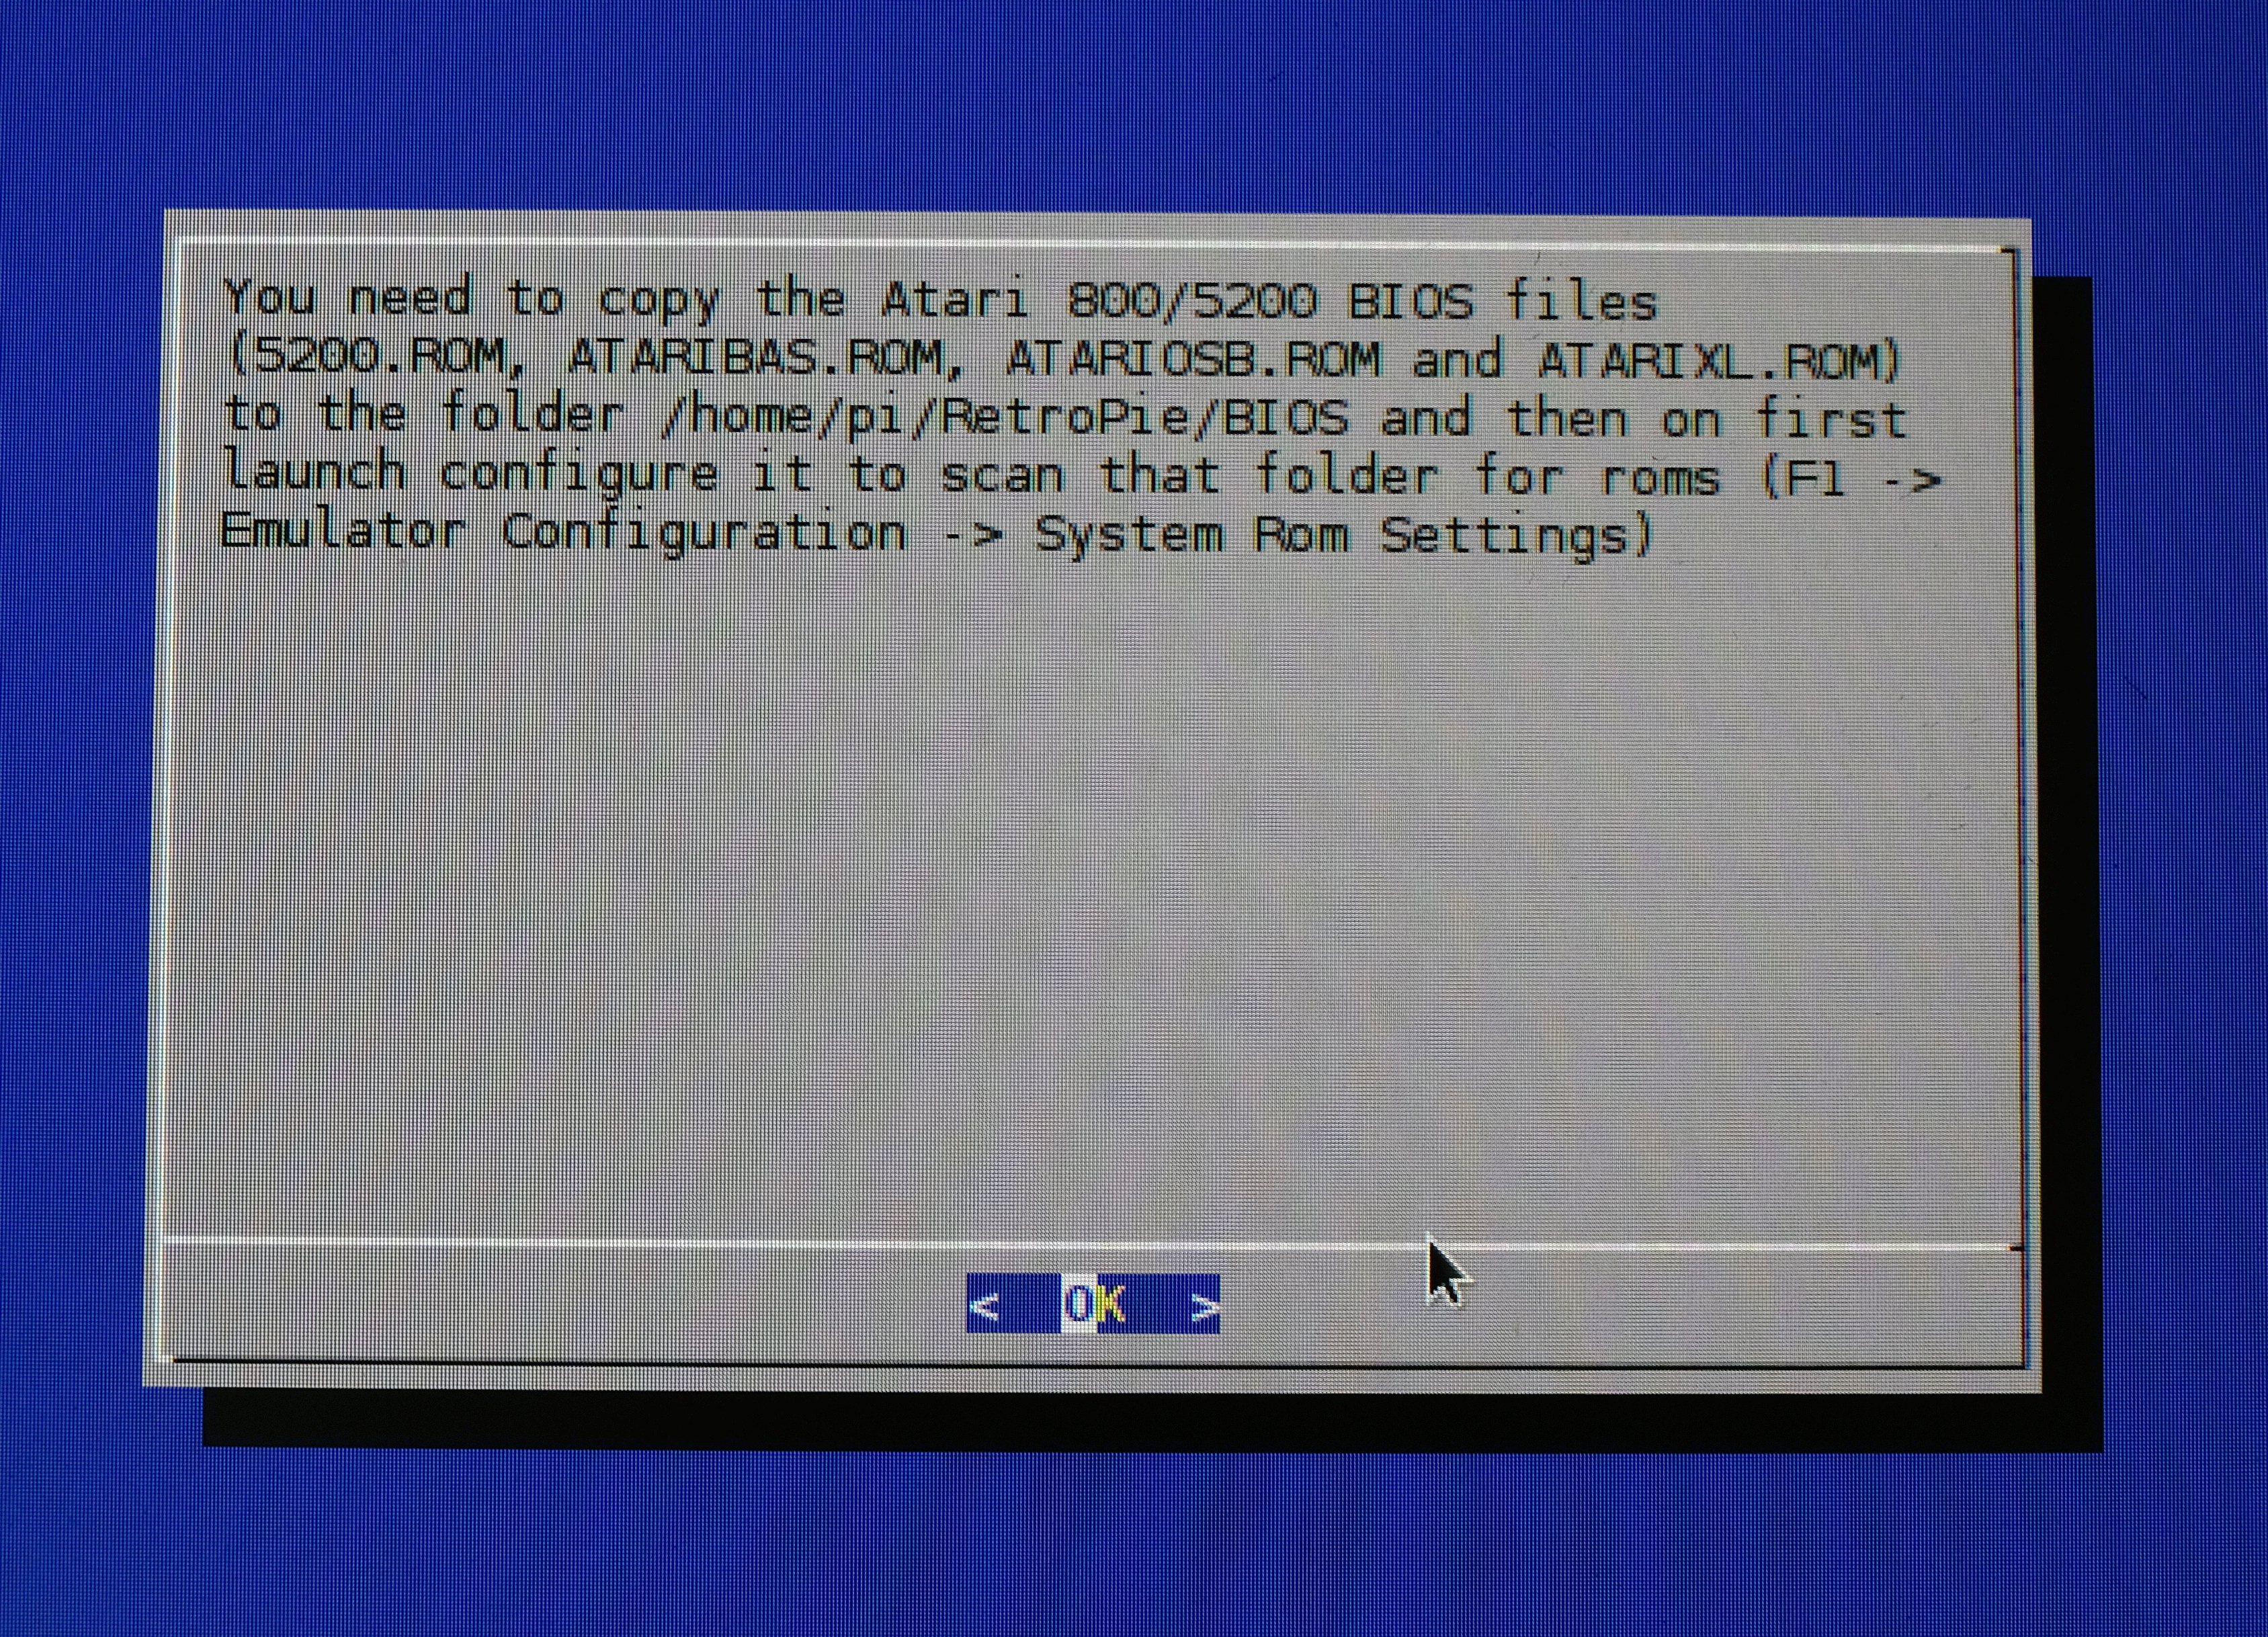
3) Commence nostalgia
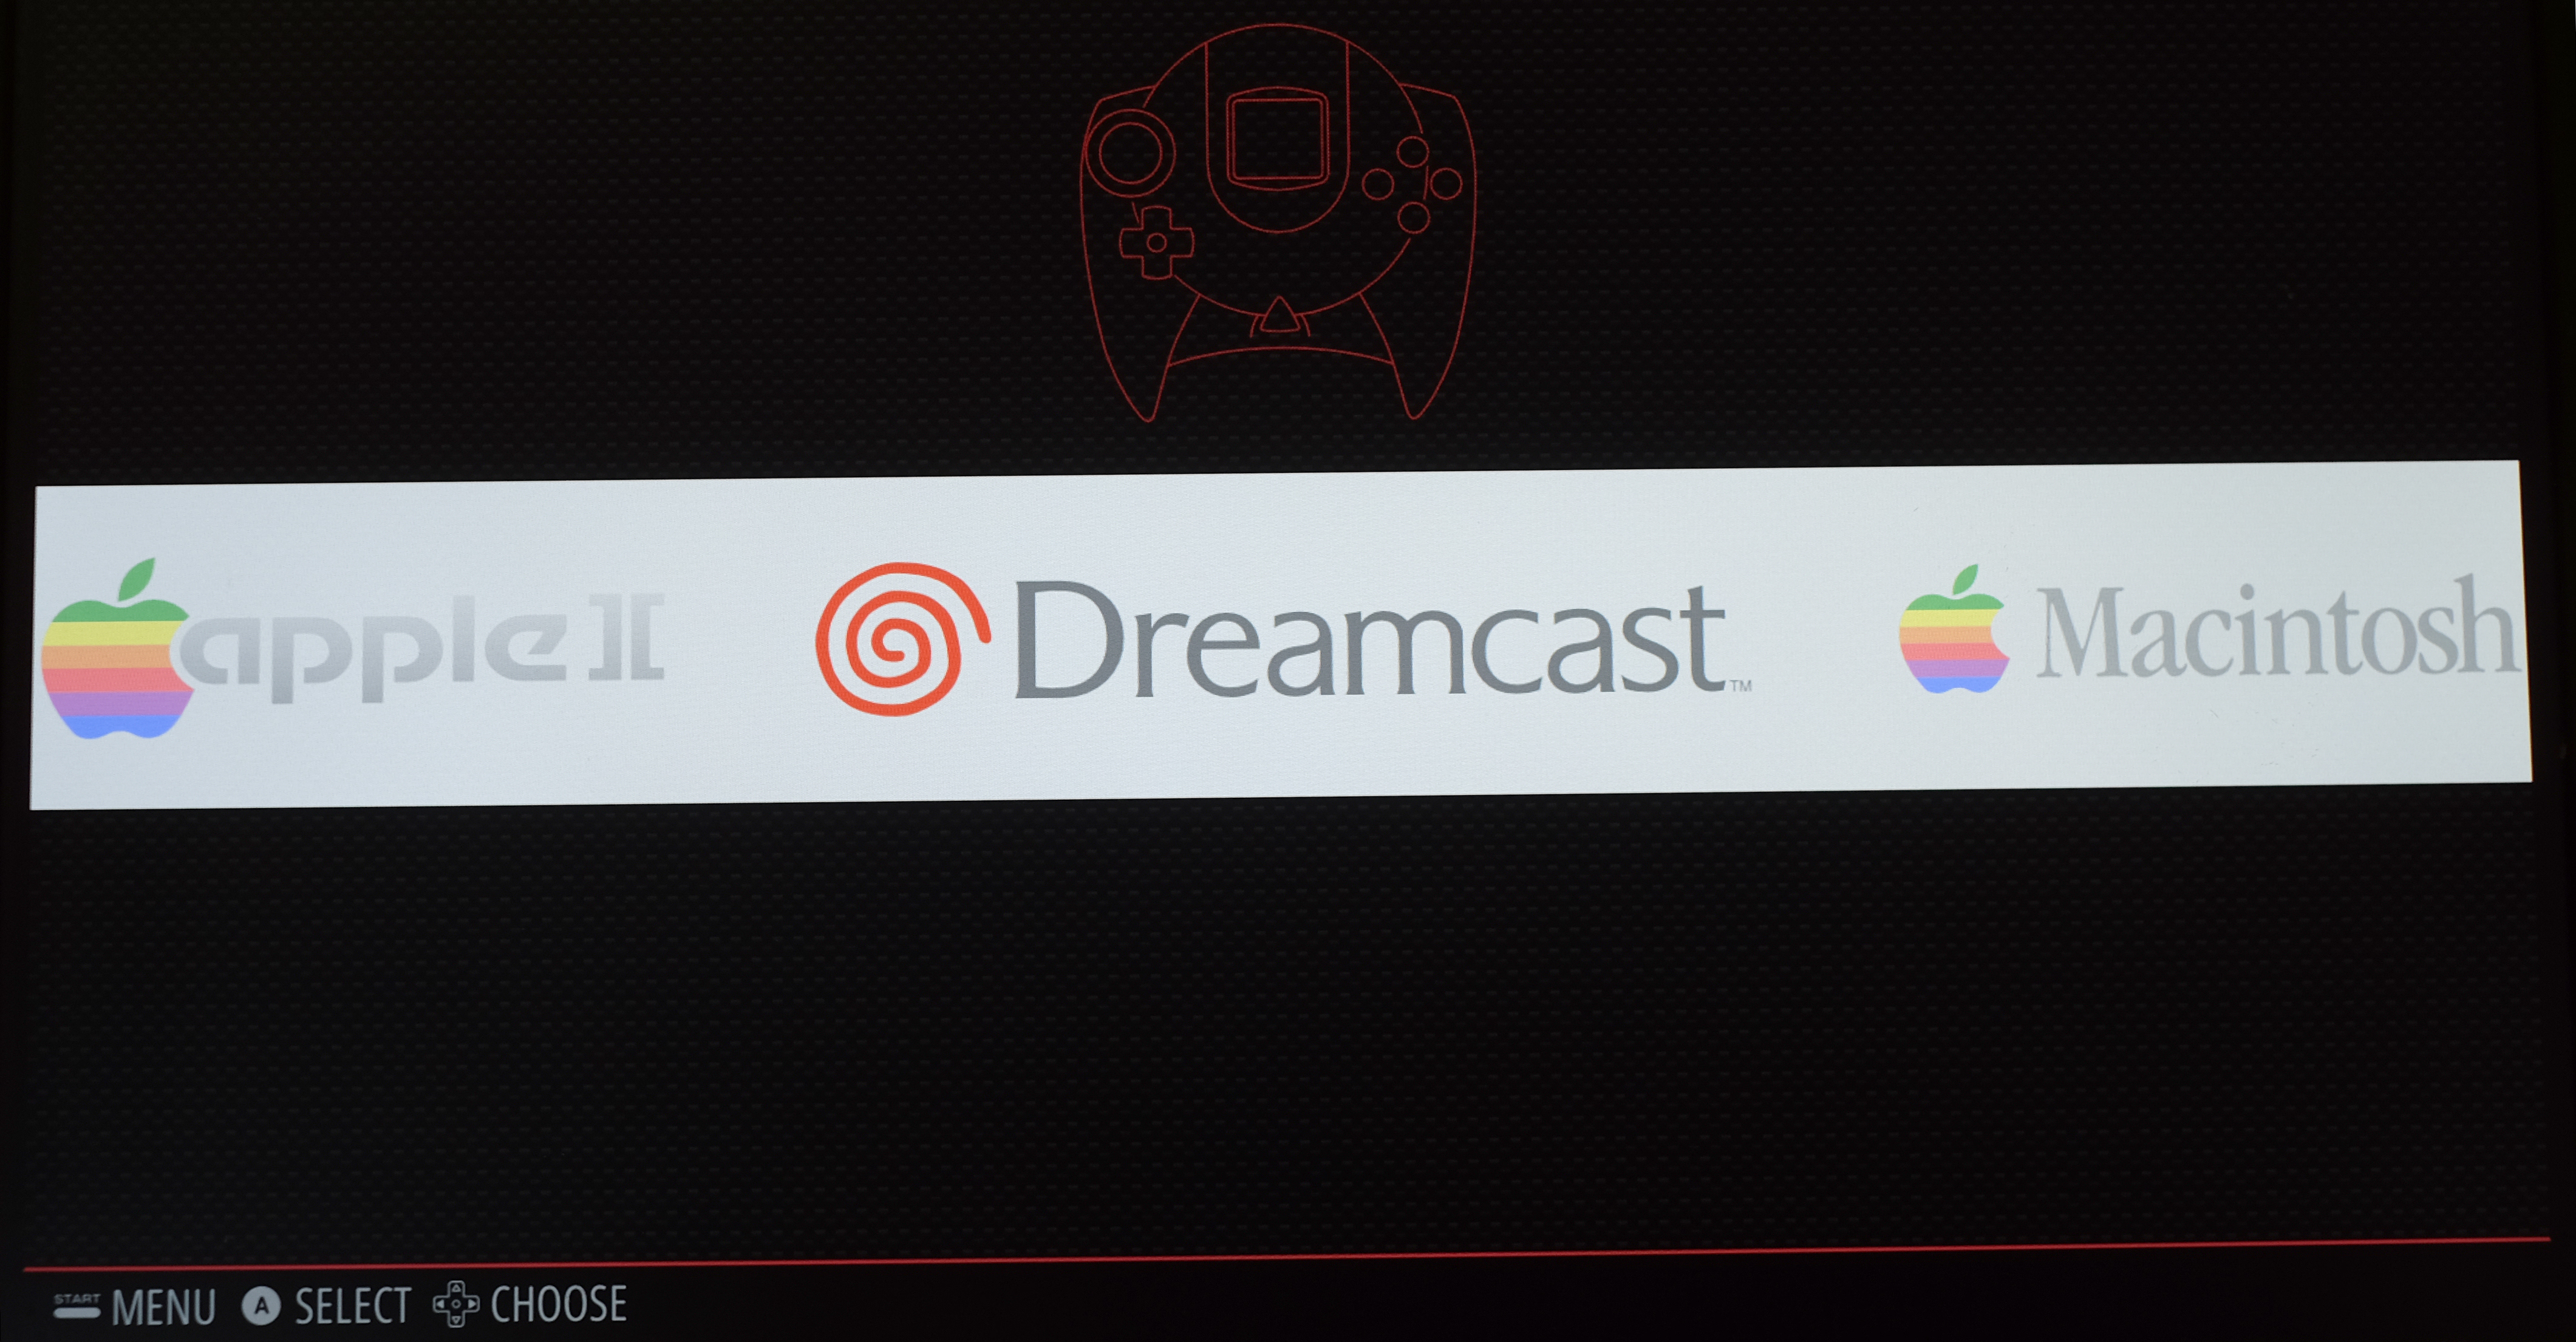
The RetroPie/EmulationStation mash-up we’re using features emulators for more than 20 systems, including classics like the Mega Drive and Nintendo 64. Some games come built-in too, like Duke Nukem 3D. But to get actual games you’ll want to check out a site like Emuparadise. Stick to freeware titles to avoid breaking the law.
Making a Pi 3 media centre

Our final starter project is a media centre that plugs directly into your TV and will play (almost) any movie you jam on your Pi 3’s memory card…
1) Return to noobs

Already tried making an office PC out of your Pi? We’re going to use the same Noobs installer package for this little project. As before, just download it from raspberry.org in the downloads section, and extract it into a folder on your computer. We’ll be back for these files in a minute.
Now, as before, use sdcard.org’s SD Formatter app to format the card we’re going to use for the media centre project. Next, copy over the files we extracted from the Noobs download and unmount the memory card to avoid the many errors that can happen on the next point.
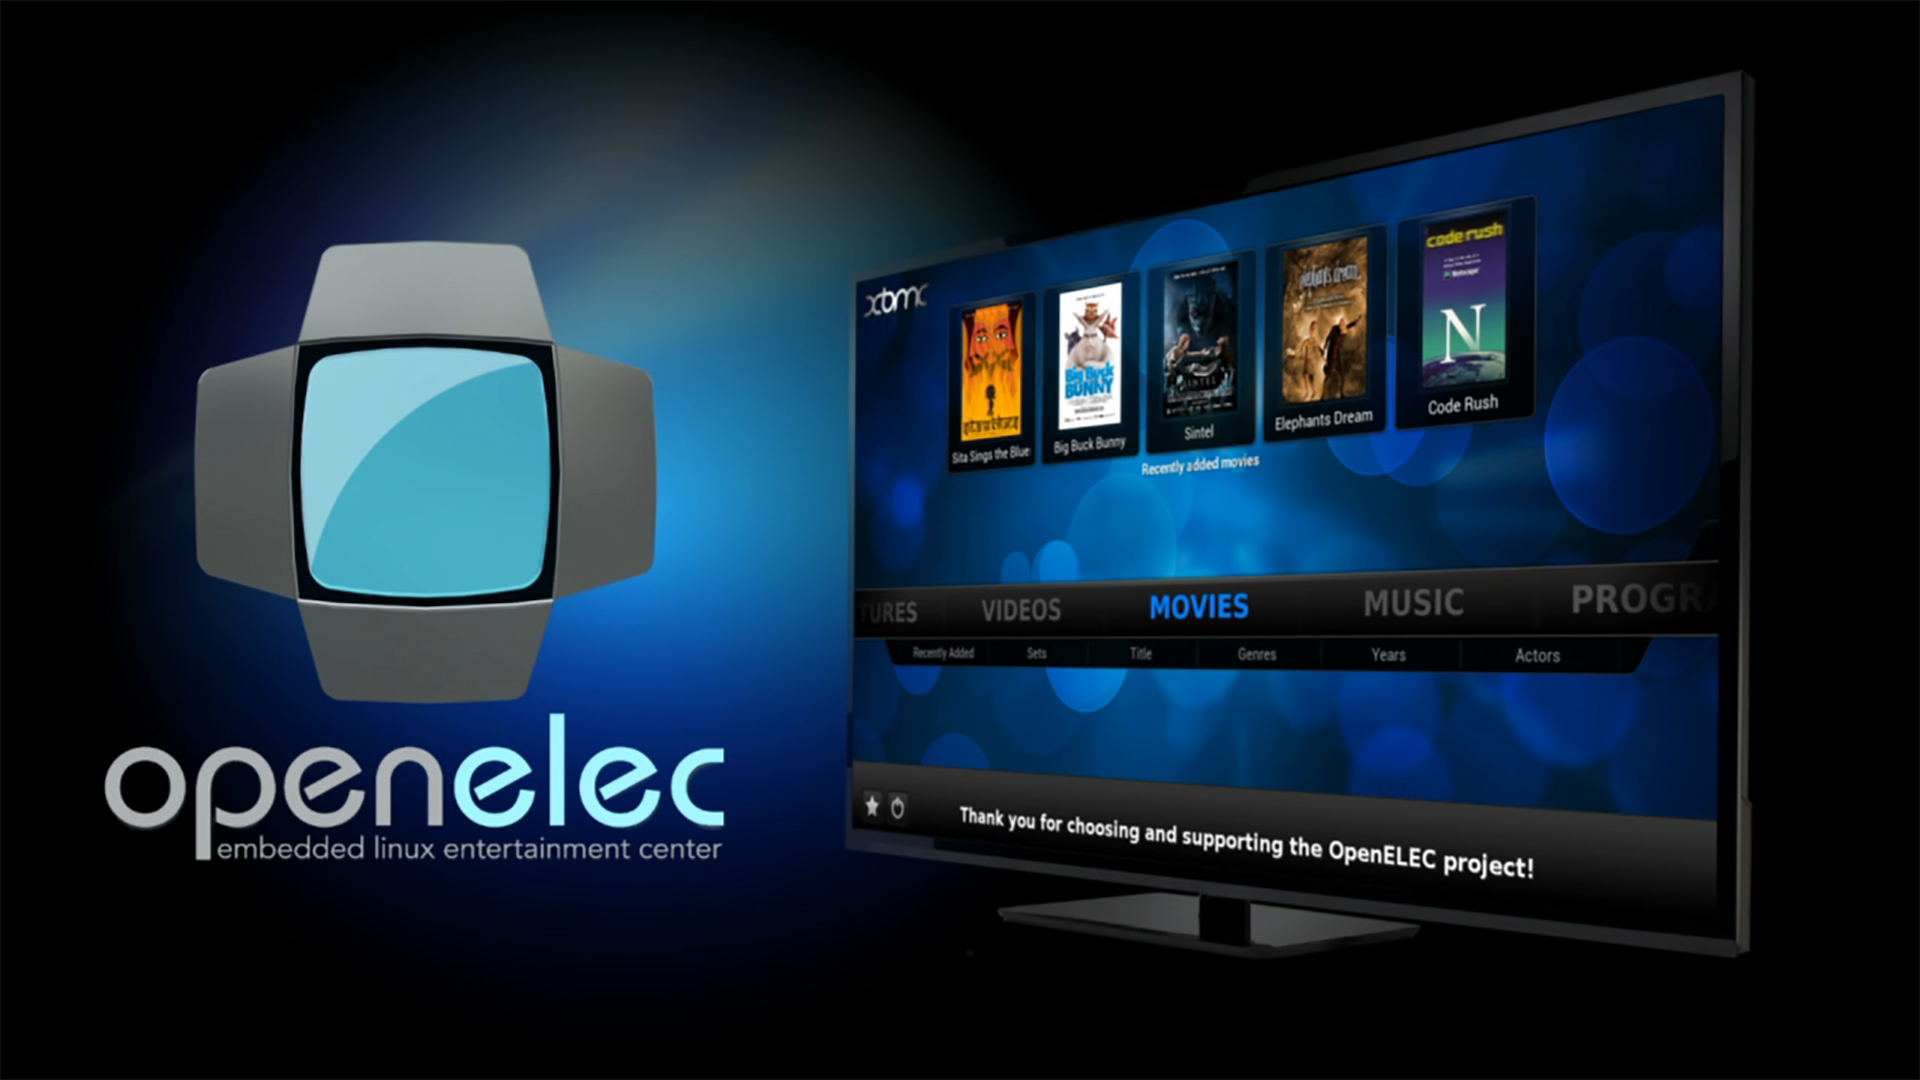
2) Install Openelec
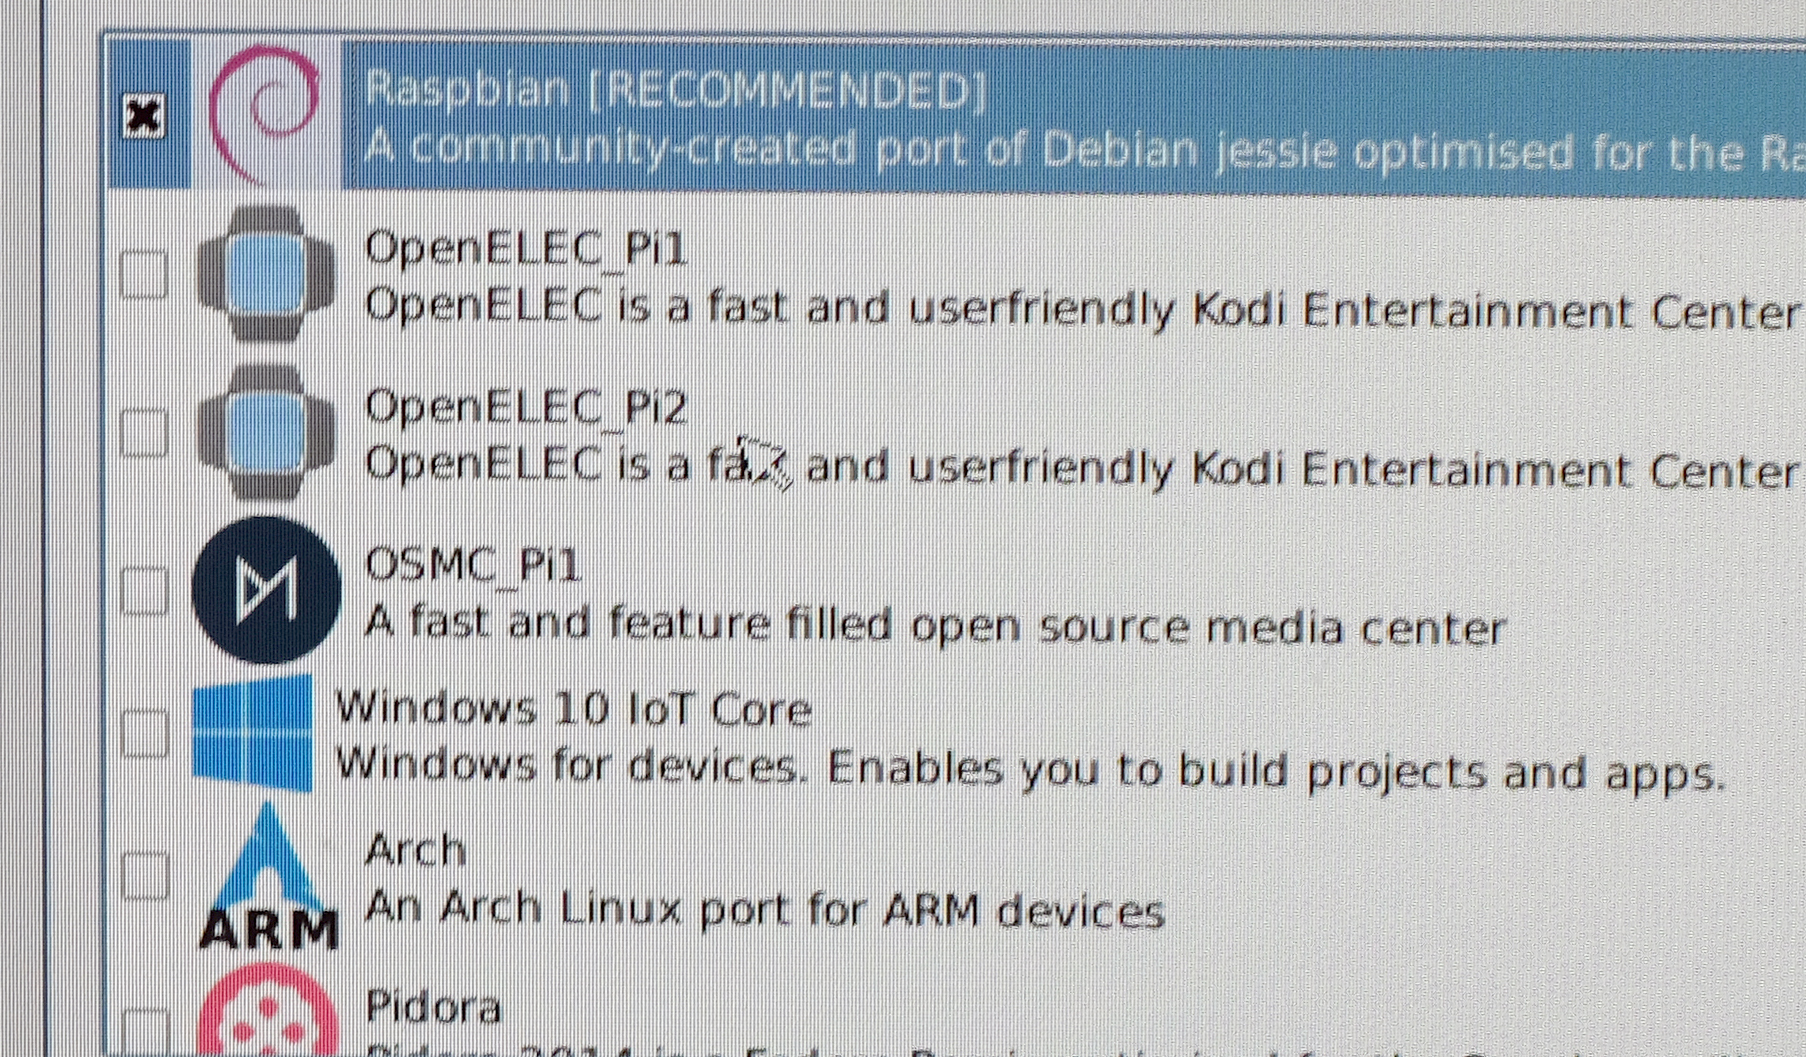
Stick the microSD card in your Pi, power it up and we’ll be back to the Noobs installation screen. There are two media centre options here, Openelec and OSMC. These are both based on the XBMC media centre software everyone raves about. Let’s select Openelec for now. You can try out the other one later.
Once installed, the Pi 3 will boot right into the media centre software, as if the little guy were made for the purpose. Now we’re into OpenElec we need to specify folders for it to find media. You do this in the Settings menu, predictably enough.
3) Start the Samba
There are loads of ways to get media onto our Pi 3, but the best is to enable Samba sharing in OpenElec’s settings. This will let you transfer media right over to your Pi’s memory card over your home Wi-Fi network. Buy a storage-packed microSD card and you’ll be flying.
 Andrew Williams