27 GarageBand tips and tricks to make you a music master
It might be free, but GarageBand is also a super-powerful – here's how to wield it
27 GarageBand tips and tricks to make you a music master
If you’re armed with a reasonably recent Apple Mac or iOS device, you can download GarageBand for free. It’s no stripped-back throwaway tool for shoving loops together, though. Instead, it strives to cater for all levels of musician – whether you’re a total novice determined to bash out some tunes, or a pro who fancies diving deeper into the software’s capabilities. Before you start randomly chucking around blips and bloops like digital confetti, allow us to guide you along the path of GarageBand enlightenment by highlighting its best features and showing you how to get the best from them.

01) EMBRACE LOOPS
On macOS and iOS, GarageBand has a loop browser, enabling you to create songs by dragging and dropping pre-made loops to tracks on the timeline. To open the loop browser, click/tap the loop icon in the toolbar. You can search for specific instruments or genres. Drag a loop to an empty area underneath any existing tracks to get started.
02) USE SMART INSTRUMENTS
Ignore music snobs who balk at the idea of automated accompaniment. Smart Instruments in GarageBand for iOS are an excellent way to learn how to construct chord progressions, and a speedy means of fashioning a custom backing track to jam with. You can choose from smart bass, drums, strings, guitars, piano (keyboards). World instruments can also be played as Smart Instruments.

03) LEARN TO PLAY
In the ‘New Project’ dialog on macOS, click ‘Learn to Play’ for playalong intro videos for guitar and piano. ‘Lesson Store’ has a bunch of free full courses, which take you from the basics of handling an instrument through to playing chords and melodies. Once you’ve mastered all that, you can venture into the selection of tutorials from famous artists, who’ll teach you how to play their greatest hits — albeit for four quid a pop.

04) BE A LOOP DJ
The Live Loops feature gives you a grid of loops to trigger with taps. To start, you select a genre, and then trigger canned loops by prodding them, while simultaneously pretending you’re a combination of Fatboy Slim, Skrillex and Carl Cox. Live Loops are handy for experimenting with song arrangement, and you can record into empty cells, or add new tracks for custom loops.

05) CAN IT
Even if you’ve a swanky new iPad Pro, its speakers won’t be suitable for making and mixing music. So get some cans on your ears — we like the Sennheiser Momentum 2.0s, or the AKG K451s for something more affordable. On the desktop, we also suggest using headphones when working on music. But do sometimes take a break and listen to your composition through a set of decent speakers (ideally not the ones welded to your computer).
06) UNDERSTAND ICLOUD
GarageBand for iOS and macOS are similar but not identical. Songs saved to iCloud are primarily designed to be accessible only on the same platform. This means if you save a track on your iPad, it’s designed to be played and edited on other iOS devices, and Mac compositions are designed to be sent to other Macs. There is an exception, in that you can import iOS songs into macOS, but this is one-way traffic: songs won’t go from Mac to iOS.

07) GET NEW SOUNDS
On Mac, the quickest way to get a slew of new sounds is buying MainStage 3, which bundles hundreds of instruments and loops. On iOS, tap + to start a new song, and then select Sound Library. Tap any item to read more about it, listen to a preview, or download. Note that additional sounds may not work across Mac and iOS devices.
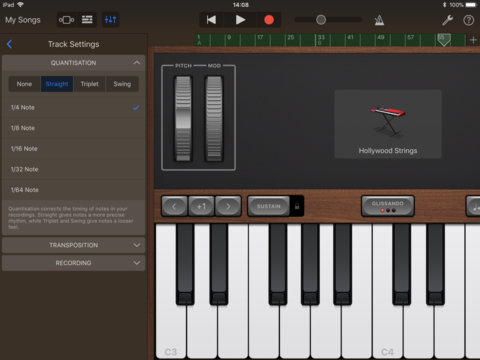
08) ADJUST NOTE TIMING
Improve the timing of live-played virtual instruments by using quantising to align notes to a grid. In macOS, this option is found in Piano Roll > Notes within the Editor (E); on iOS, Quantisation is in the Mixer menu (sliders icon). Also, try temporarily slowing the song’s tempo while recording tricky bits.

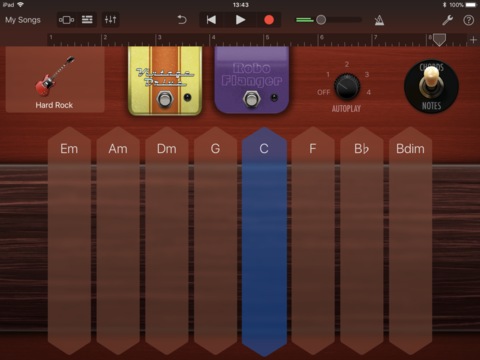
09) PLAY PATTERNS
Arpeggiators are excellent tools for musicians, playing chord patterns by sounding each note in sequence. Access GarageBand’s arpeggiator through the ‘five dots arrow’ button, and then experiment with note and octave settings. The arpeggiator is especially good for quickly creating bass and rhythm tracks for electronic music.
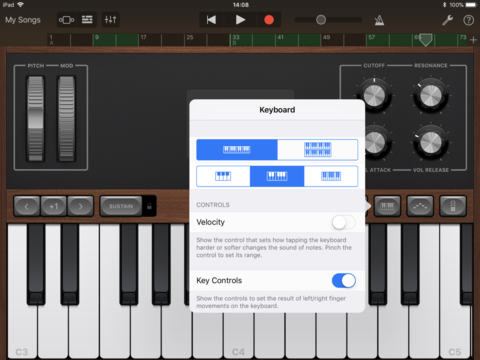
10) USE VIRTUAL KEYBOARDS
If you lack a USB piano keyboard, there are virtual equivalents. On the Mac, Window > Show Musical Typing enables you to use your Mac’s keyboard for playing notes. On iOS, a keyboard is a major part of the interface when you select a relevant instrument. Use the Keyboard button to toggle velocity sensitivity or choose a new key thickness. Tap the Scale menu to restrict available keys to those within a specific scale.
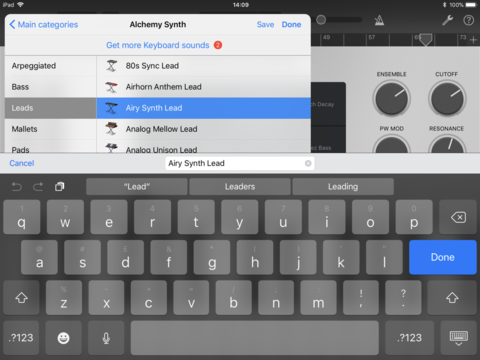
11) SAVE YOUR SYNTHS
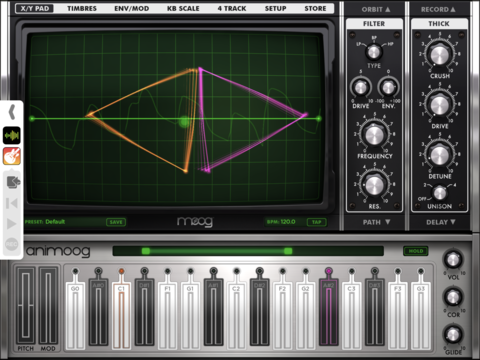
Built-in presets soon become overly familiar, but GarageBand enables you to adjust synth settings to create something unique. Once you’ve finished tweaking your new synth, save your set-up to use again in future – in macOS use ‘Save…’ in the Library pane; in iOS, use ‘Save’ in the instrument selector. On iOS, Alchemy Synth’s a good bet for creating new sounds, due to its selection of dials and pads.
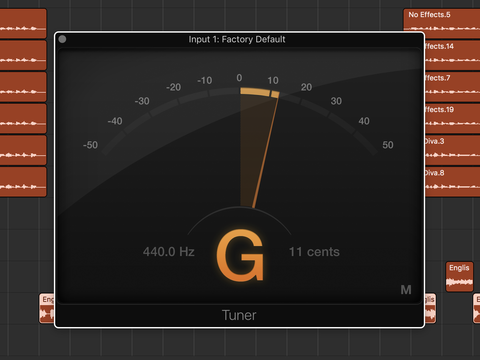
12) TUNE UP
Unless you hate your ears (and everyone else’s), get your guitar in tune before recording. On macOS, the tuner button is found in the main toolbar; on iOS, it appears when viewing an Amp track. Use the levels indicator to get your strings sounding perfect.

13) BE A KNOB TWIDDLER
Amp presets in GarageBand aren’t fixed effects. Instead, they are digital recreations of real-world amps. This means you can fiddle with dials to get the perfect sound for your current recording, adjusting gain, EQ, reverb, distortion, presence, and other settings.
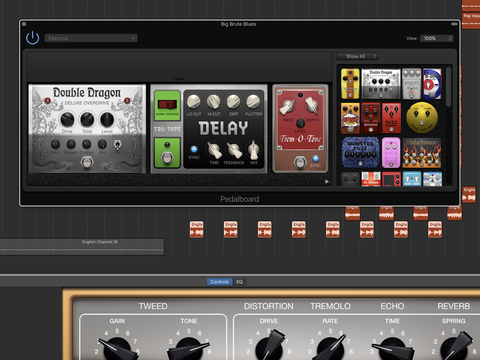
14) PEDAL TO THE METAL
Tap the pedal button to see the effects set-up for your guitar track. Individual pedals can be fine-tuned and reordered. You can also add new pedals. On macOS, just drag them; on iOS, tap an empty slot then add a pedal. You can add up to four on iOS, and more on macOS.

15) TEST YOUR LEVELS
When you have a real guitar plugged into your Mac or iOS device, carefully test levels before any serious recording. Play parts of the full range of your song, watch the indicators and, where relevant, adjust the input level accordingly. Avoid whisper-quiet input and unwanted distortion.
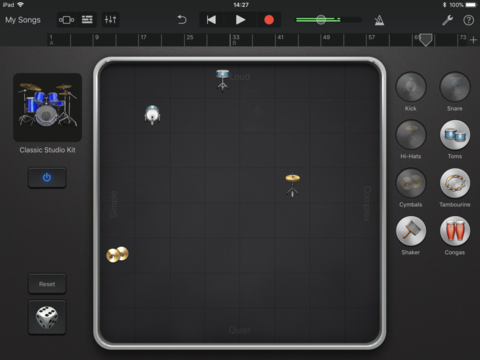
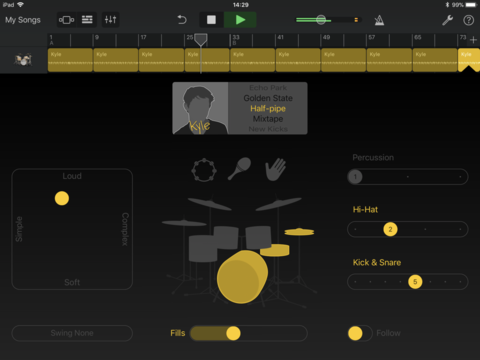
16) USE SMART DRUMS
The iOS Smart Drums interface is a grid on to which you drag instruments from a selected kit (or tap the dice to randomise everything). Drums positioned at the top are louder; those to the right have more complex patterns. To keep your pattern, it must be recorded, whereupon it’s converted to editable MIDI data. Note that drums can be moved during recording, for example to make a snare more complex at the end of a bar.
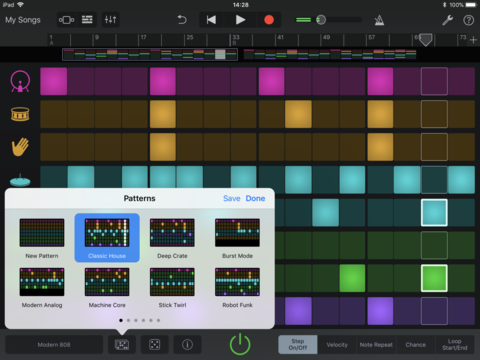
17) MASTER THE BEAT SEQUENCER
For direct control over beat creation, use Beat Sequencer. This old-school step-based interface enables you to define precisely when drums are triggered, and provides nuance with velocity, note repeat, and ‘chance’ options. If you need inspiration, tap the Patterns button and select from dozens of built-in presets. Again, there’s a random option if you fancy starting with something more chaotic.
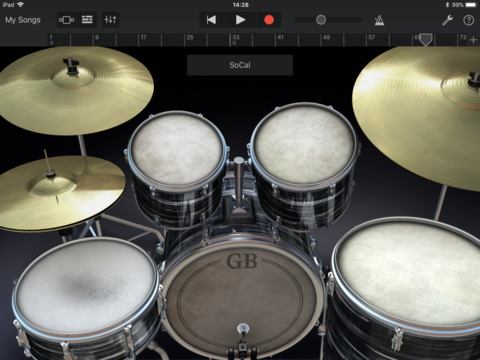
18) TRY LIVE DRUMMING
GarageBand lets you play virtual drums manually. On macOS, select a drum kit and use musical typing or a connected USB piano keyboard to trigger sounds. On iOS, create a Drum track using the Acoustic Drums option. On iOS, the drums are velocity sensitive, and acoustic kits offer different sounds depending on where the drum is struck. For example, tap the edge of a snare for a rim shot.
19) WORK WITH APPLE’S DRUMMER
Drummer gets its own section in the iOS Tracks picker, and also exists as a track option on macOS. It’s a smart audio loop creation tool, based on recordings of real drummers. To start, select a drummer and a style. Then turn on and off individual drums, and fiddle with the pads and sliders to refine what’s played. When happy with your loop, record it. (Drummer loops are rendered audio, note, not MIDI data.)
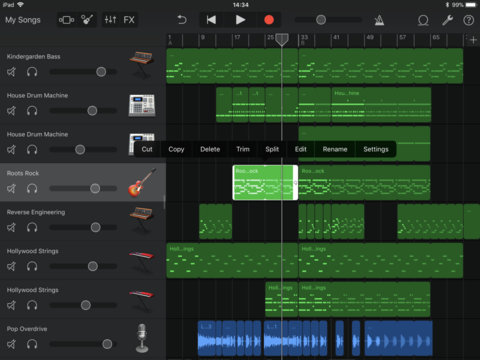
20) USE COPY AND PASTE
Whether recording guitars or tapping out keyboard lines, use GarageBand’s ‘Tracks’ view on iOS/the tracks area on macOS to copy and paste from your best performances or cover up errors. Don’t imagine pros avoid this – plenty of songs that sound ‘live’ in fact use individual notes taken from dozens of performances.
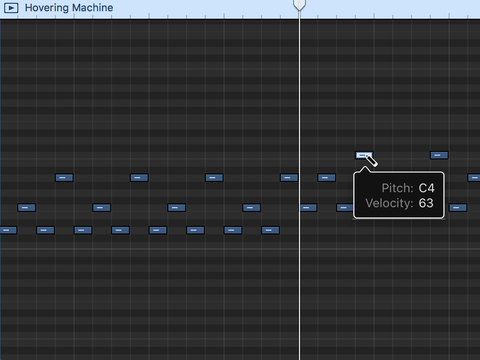
21) ADJUST NOTES
If you record a MIDI instrument (such as a synth, drum machine, or Smart Instrument), individual notes can be adjusted by moving or resizing them on the piano roll. On iOS, enter Tracks view, tap an audio region and select Edit from the menu.
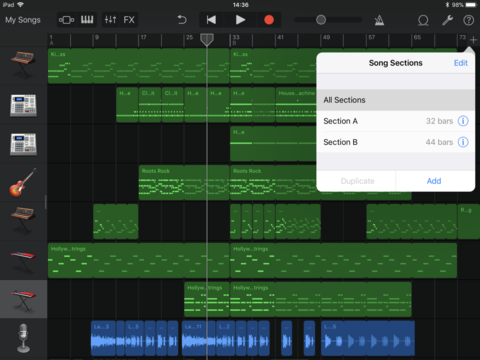
22) ARRANGE YOUR SONG
Use GarageBand’s ‘arrange tools’ to create song sections (verse, chorus, and so on) that can be copy/pasted/reordered in their entirety. On macOS, Track > Show Arrangement Track makes the feature visible. On iOS, ‘Song Sections’ are more limited (no section naming), and accessed via the + menu in Tracks view.
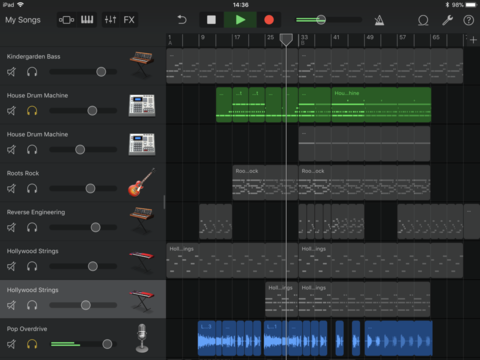
23) GO SOLO
If you have lots of tracks, you might find your song becomes muddied. Use GarageBand’s track header tools to adjust the volume and panning of individual tracks, to boost clarity. You can also mute and solo tracks, respectively, to temporarily disable some and focus on a few specific parts.
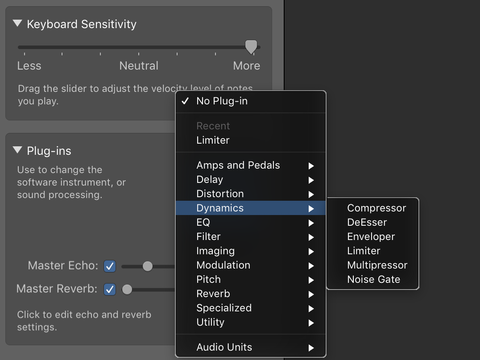
24) ADD EFFECTS
On iOS, use the ‘Mixer’ menu to tweak echo, reverb, treble, bass and compressor effects for a selected track. On macOS, you get more options — open Smart Controls (B), and expand the Plug-ins menu. You can load and adjust up to four plug-ins for the instrument.
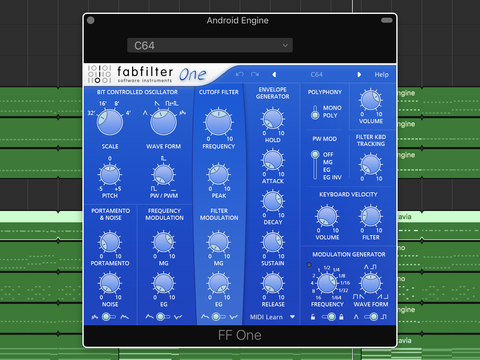
25) LOAD AUDIO UNITS
You can expand GarageBand with AU (Audio Unit) plug-ins. If a compatible one is installed on your Mac, click the Instrument slot in Plug-ins, and select it from the menu. Its settings can be adjusted in its pop-up window. On iOS, create an External track and select Audio Unit Extensions. Choose an AU to load it. As of iOS 11, AUs can take over the entire play area, so you can access the likes of Model 15’s custom keyboards.

26) TRY INTER-APP AUDIO
For those iOS audio apps you love that don’t yet have Audio Unit capabilities, there’s another option. When creating an External track, choose Inter-App Audio. This enables you to record third-party synths/audio apps directly into a GarageBand track, albeit with an end result that’s a rendered audio waveform, not editable MIDI data.
27) INSTALL AUDIOBUS
And for those apps that don’t support Inter-App Audio either, there’s the more widely supported (along with flexible and usable) Audiobus. Use the app to define input, effects and output chains (GarageBand as output if recording to it), fire up your other music app, and use Audiobus’s overlay menu to trigger recordings. Again, these are rendered as audio waveforms.