Can Razer’s Kishi Ultra controller turn my phone into a Steam Deck rival?
The Kishi Ultra is a mobile controller that works with just about any USB-C mobile device, adding haptics to the games you play

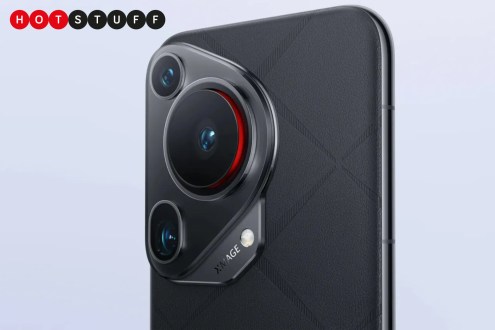
This Android phone has a retractable camera for capturing moving objects
With a retractable 1-inch camera sensor (yes, it really moves), the Huawei Pura 70 Ultra can capture moving objects with excellent detail.
Record Store Day 2024: exclusive cuts every vinyl collector needs
From Blur to Bowie via a founding member of the Beastie Boys, here are all the Record Store Day exclusives you need this year

The 25 best police movies of all time
Cop a load of this: these have to be the finest depictions of law enforcement on screen, both good and bad

Latest posts

Apple iPhone 15 models compared: 15 vs Plus vs Pro vs Pro Max
Everything you need to know about the entire iPhone 15 family – we compare all four phones

Apple iPhone 14 vs 14 Pro vs Plus vs Pro Max: what’s the difference?
Everything you need to know about the iPhone 14 family

Best gaming chairs 2024: improved comfort for work and play
For serious gaming sessions, comfortable glutes are just as important as flexible thumbs

54 best browser games 2024 you can play for free
It’s OK, you didn’t have much to do today anyway. Did you?

Features
The best Netflix documentaries 2024
Why not stream some knowledge into your eyeballs this evening?

What is Apple ProRes on the iPhone 13 Pro, 14 Pro and 15 Pro and Pro Max?
Shoot from the hip with Apple’s ‘visually lossless’ video recording format. Here’s how it works on your Pro or Pro Max iPhone

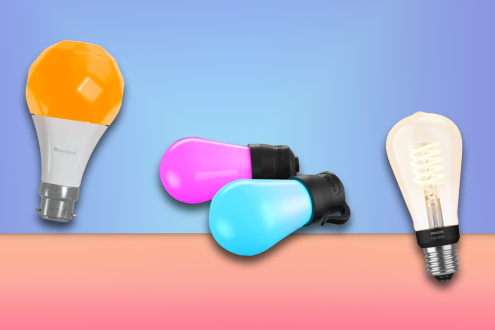
Best smart lights 2024: ultimate smart light bulbs, light strips and more
Let’s shed some light on all the best smart lights worth considering – which one is the top pick for you?
Best turntables 2024: Bluetooth record players for Record Store Day
Want the warmth of analogue audio with modern cordless convenience? The best turntables offer exactly that

Reviews
FiiO R9 review: the ultimate desktop Hi-Fi experience
An auditory Swiss Army Knife that delivers on all fronts, with a premium price tag to match

Nothing Ear (a) review: hello yellow
Colourful, cut-price take on Nothing’s usual formula goes one better in a few key areas

Nothing Ear review: definitive article
Third time lucky for Nothing’s ace affordable in-ears

Maserati Grecale Folgore review: tempting transition EV
Luxurious, powerful, and yes, very expensive
Motorola Buds+ review: with a little help from my friends
Moto brings in Bose for affordable ANC expertise

Motorola Edge 50 Ultra hands-on review: ultimate evolution?
Style-led flagship doesn’t go quite has heavy on hardware as some rivals

Motorola Edge 50 Fusion hands-on review: colour me interested
New entry-level Edge promises Pantone approved colours

Motorola Edge 50 Pro review: living on the edge
Mid-range specs meet Pantone-approved cameras

Samsung QN95D review: looks and sounds stunning
Flagship NeoQLED 4K TV adds class-leading processing to get the most out of its bright images and immersive audio

The best of everything
Best outdoor TV 2024: weatherproof screens for your backyard or patio
The ultimate screens for outdoor summer entertainment – these are the best outdoor TVs

Best cassette players 2024: tape players for a retro audio fix
The best tape players will have you rockin’ and a rollin’ in no time (pencils not included)
Best running headphones 2024: wireless buds for sport and workouts reviewed
Add a soundtrack to your sprints with the best headphones for running

Best gaming console 2024: which console should you choose?
The best gaming consoles to buy, from Xbox and PlayStation, to the Nintendo Switch and more – we’ve played them all. Press start to continue…

The best free iPhone and iPad games 2024 to play today
Got an iPad or iPhone? Load it with the best iOS games – none of which cost a penny!

Best wireless speakers 2024: music and radio via Wi-Fi
Streaming speakers for all budgets – our guide to the best wireless speakers you can find anywhere
Best smartphone 2024: Apple and Android phones reviewed
The best phones you can buy right now – all reviewed and rated

Best wireless earbuds 2024: reviewed and rated
From accessible in-ears to premium earphones, these are the best wireless earbuds from Apple, Beats, Bose and more

20 best Nintendo Switch accessories
Coming home with a Switch? Don’t skip these essential add-ons

Best VPN service 2024: stay secure online for less
We’ve gathered together the cream of the Virtual Private Network crop – what’s the best VPN service for you?

Stuff Picks
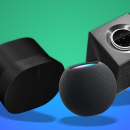
Amazon Echo vs Google Home: which one is right for you?
It has new multi-room music powers, but is the Echo still king of the smart speakers?

The Premier League on Amazon Prime: how to watch for free in the 2024/2025 season
The Premier League will be back on Amazon Prime in 2024/2025

DJI’s new backup battery can juice up just about any device
It’s a backup battery that can charge your drone, phone, and other small appliances. DJI can juice up just about any gadget you’ve got!

How to get multiple Amazon Echo smart speakers working together
You don’t need a degree to have a smart home – here’s how to get multiple Echo devices working together